Team & affiliates
Two bits of setup that pay off daily: team members with the right roles (so office staff can work the CRM and crews get jobs in the app), and affiliates (so every lead records where it came from).
The team directory
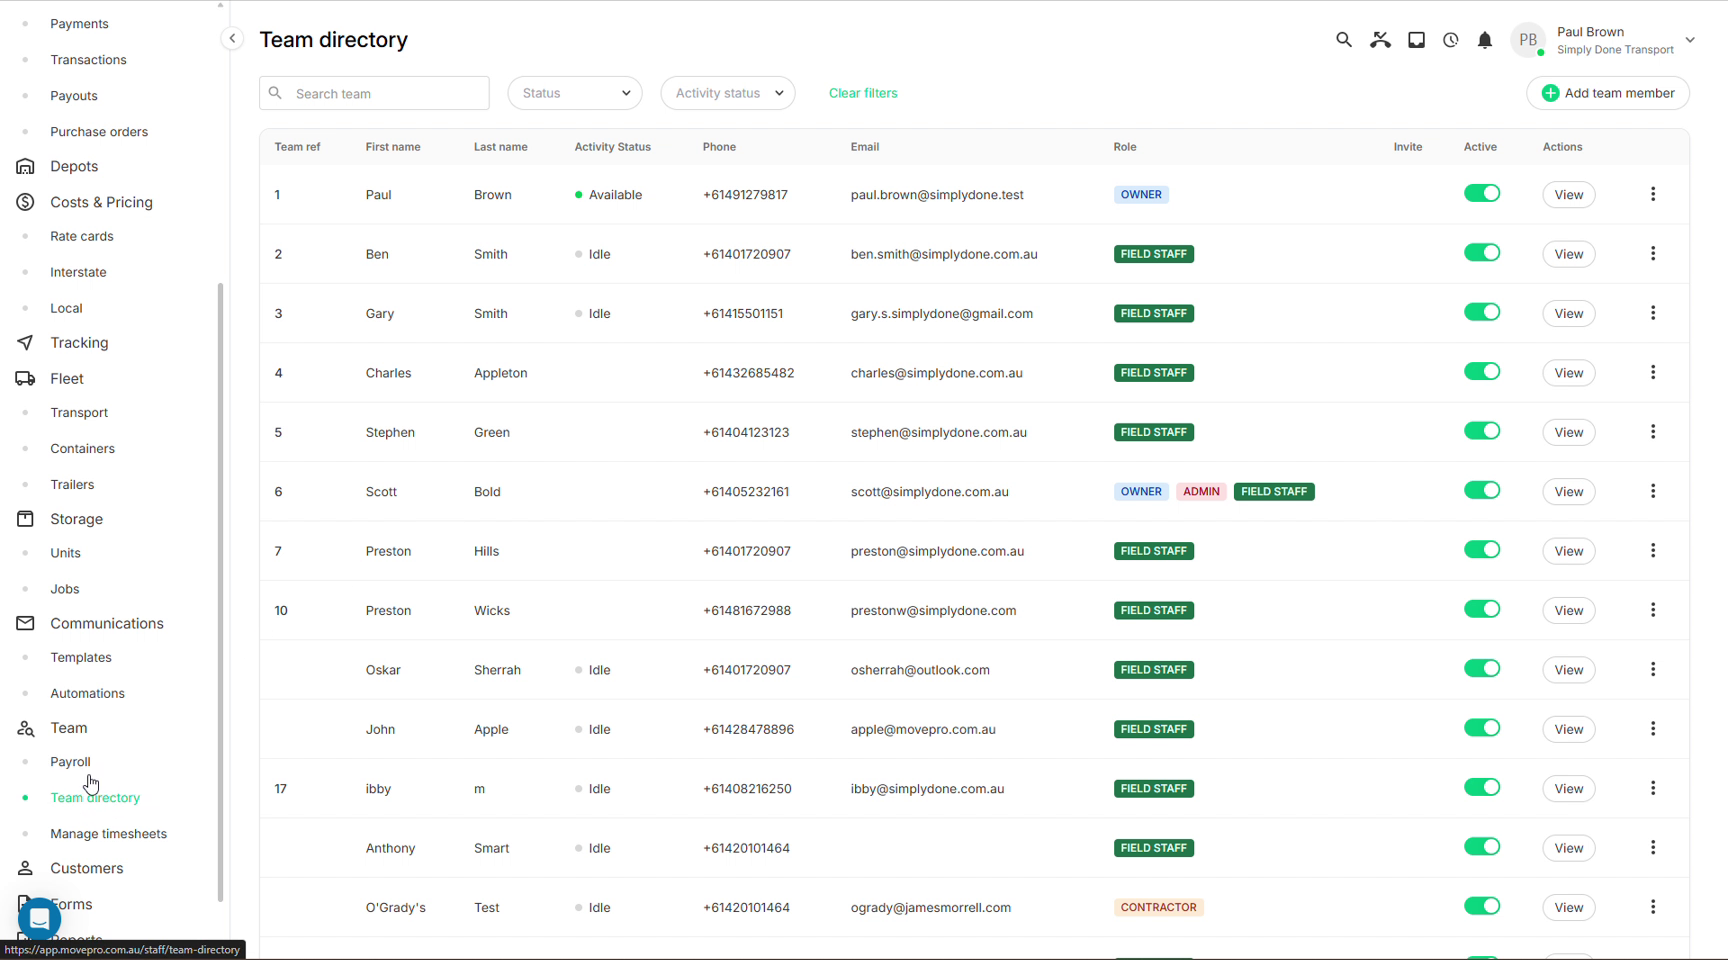
Team → Team directory lists everyone with an account: name, activity status (Available / Idle), contact details, role badges, and an Active toggle to enable or disable the account without deleting it. Timesheets are managed from the neighbouring Manage timesheets item.
Add a team member
- In the Team directory, click Add team member.
- Enter their name, email and phone. The Title (e.g. "Admin", "Operations Manager") is worth filling in; it appears in the default email signature customers see.
- Tick an Administration role and/or the Function roles that match the job (see the table below).
- Optionally set pay rates and a team.
- Click Send invite. They receive an invitation by email (or SMS if only a phone was provided) and set their own password on first login.
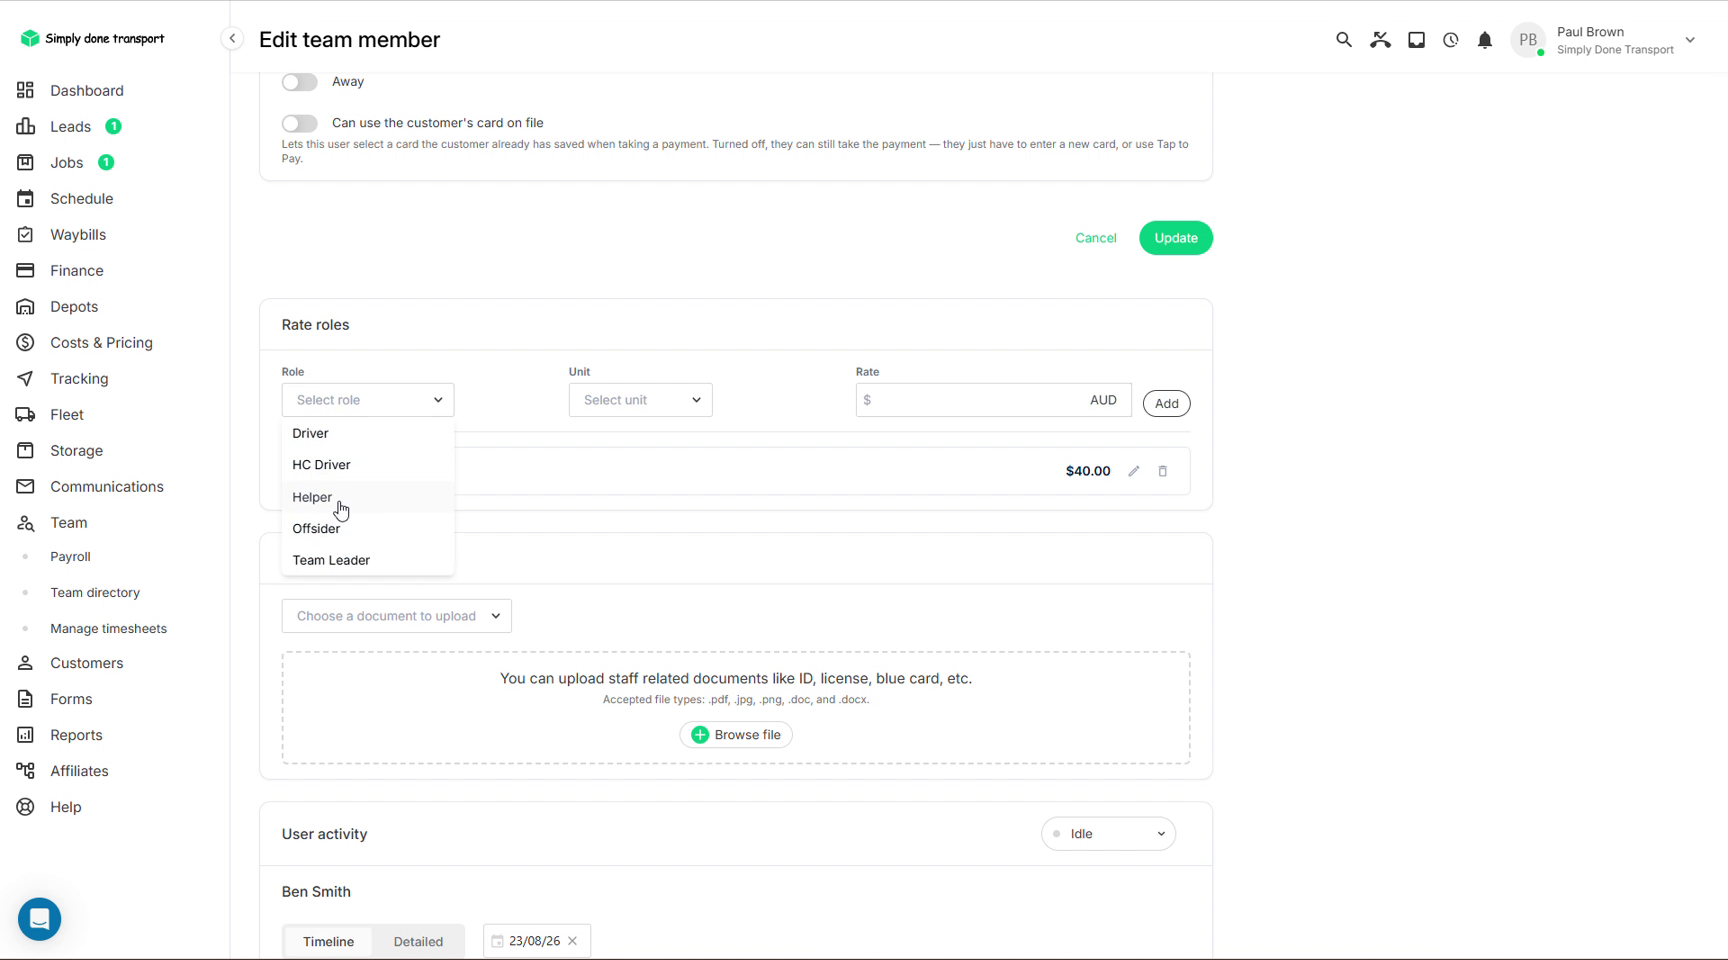
Open a member's profile afterwards for the deeper setup: Rate roles sets an hourly rate per role they can play on a job (Driver, Offsider, Team Leader…), which drives job costing; you can upload staff documents (ID, licence, blue card); and the Can use the customer's card on file toggle controls whether they may charge saved cards when taking payment in the field.
Choosing roles
| Role | What it grants |
|---|---|
| Owner | Access to all areas, including billing and Stripe setup. |
| Admin | Everything below Owner, the usual choice for a second-in-command who books jobs, edits pricing and manages the system. |
| Manager | Everything granted to Admin except company settings. |
| Ops | Manage leads, jobs, scheduling, vehicles, depots and interstate configuration. |
| Sales | Manage leads and jobs, view local prices and scheduling. |
| Finance | View and take payments, manage payouts, adjust payment settings. |
| Field staff | Users that can be scheduled onto tasks; they get the mobile app experience. |
| Contractor | External crew: schedulable, but they can't manage timesheets. |
That's the summary; the next section maps it page by page, so you can check exactly which parts of the CRM a role sees before granting it.
What each role can access
The matrix below shows which roles can open each page of the CRM. A green dot means the role can open the page; an amber dot means it can open it, but one or more actions there are restricted (the notes column says which); a dash means the page is hidden for that role. Movepro's own support roles (Super, Movepro Admin and Developer) can access every page, so they aren't listed.
This is a page-level guide. Individual buttons can carry their own checks, like the card-on-file permission above, and the notes column calls out the ones that matter.
| Page | What this page is for | Availability | Owner | Admin | Manager | Operations | Sales | Finance | Field staff | Important restrictions or notes |
|---|---|---|---|---|---|---|---|---|---|---|
| Sales & Leads | ||||||||||
Leads/orders | View and manage the lead and order queue, create leads, and open an order to work on it. | Live | ● | ● | ● | ● | ● | ● | – | – |
Order workspace/orders/:id/view | Manage a move from quote and booking through inventory, payments, refunds, invoices, notes and communications. | Live | ● | ● | ● | ● | ● | ● | ● | – |
Customers/customers | Search the customer directory, view customer profiles and orders, and manage customer records. | Role-gated | ● | ● | ● | – | – | – | – | – |
Affiliates/affiliates | Manage referral partners that send leads to the business, including their portal access token. | Role-gated | ● | ● | – | – | – | – | – | – |
| Operations | ||||||||||
Jobs/jobs | View booked jobs, open job details, and create new jobs. | Live | ● | ● | ● | ● | ● | ● | ● | – |
Diary/scheduler/diary | Schedule work and assign staff, vehicles, containers and trailers, including moving or releasing resources. | Live | ● | ● | ● | ● | ● | – | – | – |
Fix list/scheduler/fix-list | Review scheduling conflicts that need to be resolved. | Live | ● | ● | ● | ● | ● | – | – | – |
Swimlane/scheduler/swimlane | Use a visual scheduling view across staff, transport and storage resources. | Live | ● | ● | ● | ● | ● | – | – | – |
Runs/scheduler/runs | Use the legacy line-haul run and job-grouping view. | Live | ● | ● | ● | ● | ● | – | – | Waybills provide the newer shared-transit and manifest workflow. |
Waybills/waybills | Group moves onto shared transit, manage capacity and assigned resources, and export a manifest. | Tenant flag | ● | ● | ● | ● | – | – | – | Only available when the Waybills feature is enabled for the tenant. |
Tracking/tracking | View a live map of GPS location updates from field staff. | Role-gated | ● | ● | ● | ● | – | – | – | – |
Depots/depots | Manage depot locations used for scheduling, storage and waybills. | Role-gated | ● | ● | ● | ● | – | – | – | – |
| Resources | ||||||||||
Transport/transport | Manage road vehicles, including capacity, availability, block-outs and ownership. | Role-gated | ● | ● | ● | ● | – | – | – | – |
Containers/containers | Manage intermodal containers, their capacity, availability and block-outs. | Role-gated | ● | ● | ● | ● | – | – | – | – |
Trailers/trailers | Manage trailers and their availability. | Role-gated | ● | ● | ● | ● | – | – | – | – |
Storage units/storage | Manage physical storage units, capacity and default pricing. | Role-gated | ● | ● | ● | ● | ● | – | – | – |
Storage jobs/storage/jobs | View active storage products and their billing status. | Role-gated | ● | ● | ● | ● | ● | – | – | Storage lifecycle actions are completed from the order workspace. |
| Finance & Pricing | ||||||||||
Payments/finance | Process and reconcile payments individually or in batches, record offline payments, and send receipts. | Live | ● | ● | – | – | – | ● | – | – |
Transactions (disputes)/transactions | View and respond to Stripe disputes and chargebacks. | Role-gated | ● | ● | – | – | – | ● | – | Requires Stripe Connect to be configured. |
Payouts/payouts | View Stripe Connect payouts made to the removalist's bank account. | Role-gated | ● | – | – | – | – | ● | – | Requires Stripe Connect to be configured. |
Purchase orders/purchase-orders | Browse and filter affiliate purchase orders. | Role-gated | ● | ● | ● | ● | – | ● | – | This is primarily a read-only index. |
Rate cards/rate-cards | Manage the company's pricing catalogue and cost items, clone rate cards, and export them to PDF. | Role-gated | ● | ● | ● | ● | – | – | – | – |
Interstate pricing/interstate | Configure interstate trips, lanes, pricing tiers and the local-to-interstate distance threshold. | Role-gated | ● | ● | ● | – | – | – | – | – |
Local pricing/local | Configure local moving prices, rules and minimum charges. | Role-gated | ● | ● | ● | ● | – | – | – | – |
| Communications, Forms & Team | ||||||||||
Templates/communication | Manage reusable email and SMS templates that use merge tags. | Role-gated | ● | ● | ● | – | – | – | – | Managers can open the page, but the API does not allow them to create or edit templates. |
Automations/automations | Build multi-step customer communication and automation sequences. | Role-gated | ● | ● | ● | – | – | – | – | – |
Forms/forms | Build custom forms, fill them in, and review form submissions. | Live | ● | ● | ● | – | – | – | ● | Field staff can access the page, but cannot create or update forms in the form builder. |
Reports/reports | Browse, favourite and view saved analytics reports. | Role-gated | ● | ● | ● | – | – | – | – | Only a Super user can create or edit report definitions. |
Team/staff | Manage the staff directory, payroll, timesheets and personal clock-in or clock-out activity. | Role-gated | ● | ● | ● | ● | ● | ● | – | Payroll is limited to Owner, Admin and Manager. Operations, Sales and Finance can access the page but not payroll. |
Field-staff view/field-staff | Crew-facing view for assigned schedules, notifications and runsheets. | Live | – | – | – | – | – | – | ● | – |
Availability labels: Live means the page is active for the roles shown; Role-gated means only selected roles see it; Tenant flag means the feature must also be enabled for your account.
Affiliates: tracking where leads come from
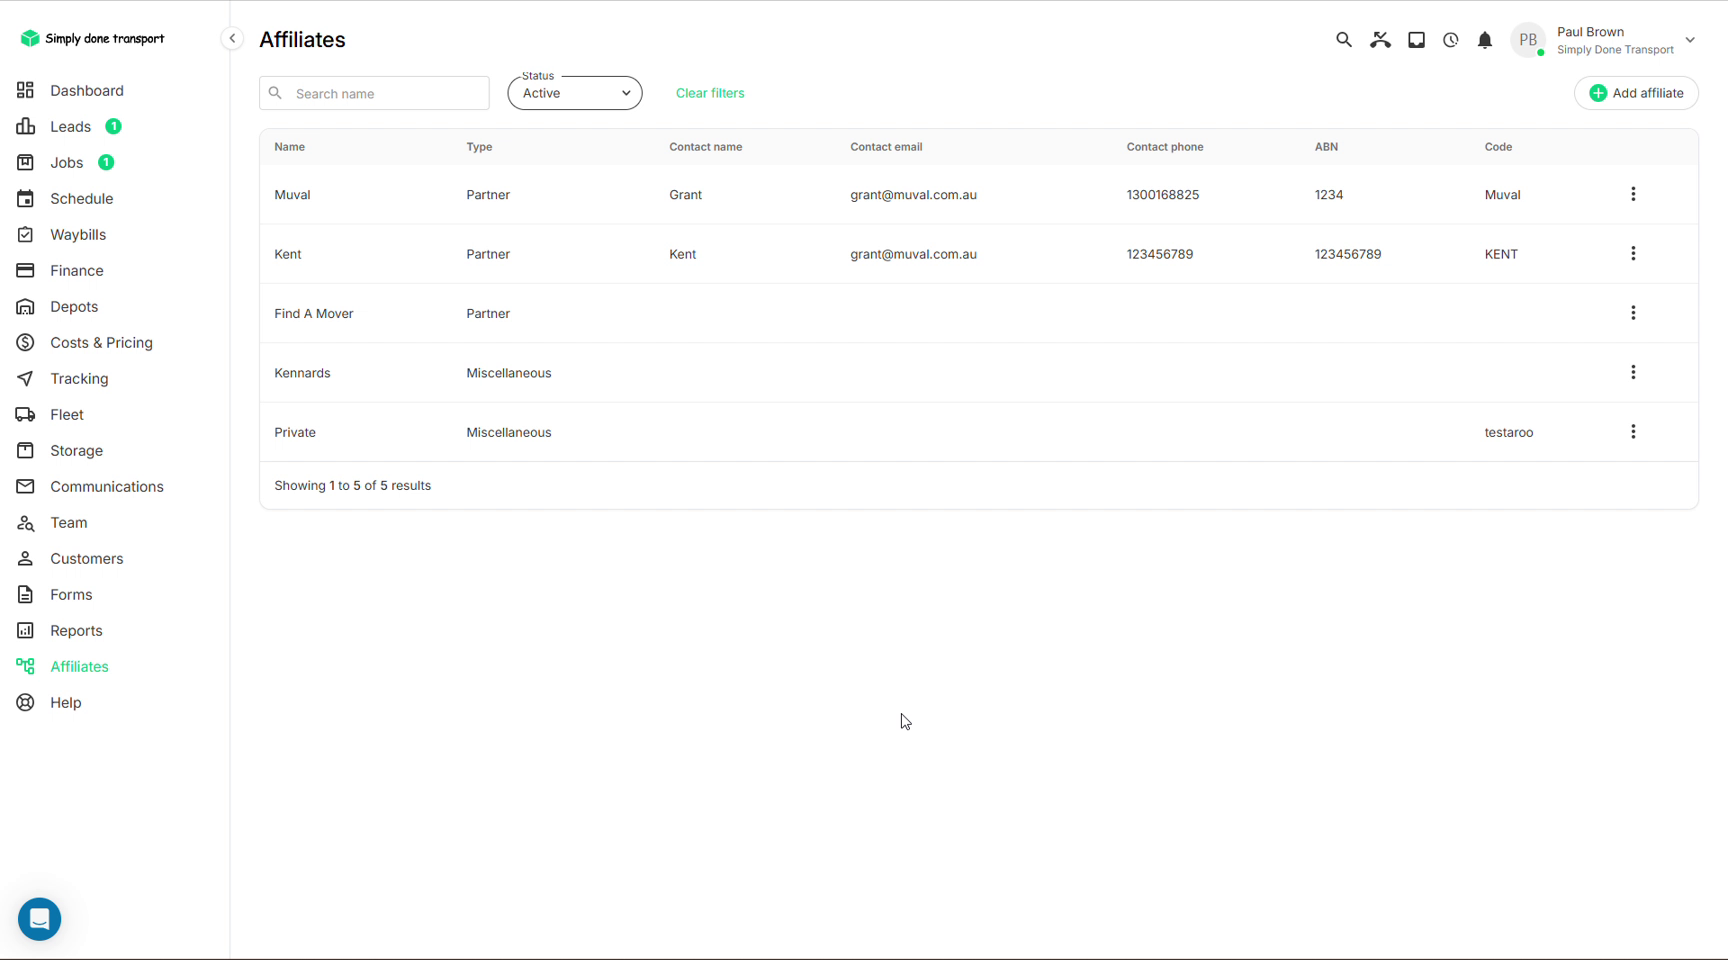
Affiliates are your referrer list: the website, phone enquiries, partner stores, agents. They appear in the Referrer dropdown when adding a lead, and they're how you'll later report which channels bring the work.
- Go to Affiliates in the left menu and click Add affiliate.
- Enter the company/source name (e.g. "Website", "Harvey Norman").
- Pick a type: Partner, Lead source, Agent, Hire company or Miscellaneous. The type is just for your own segmentation; it doesn't change behaviour.
- Contact details are optional. Click Create affiliate; it's immediately available as a referrer on new leads.