Leads & CRM
Every job starts as a lead. This guide shows how to get enquiries into Movepro, typed in manually or auto-filled by AI from an email, and how to work them: the leads board, follow-up actions, notes, and the order log.
- Leads vs jobs: two entry points
- The leads board
- Add a lead manually
- Add a lead with AI auto-fill
- Finding your way around an order
- Follow-ups with scheduled actions
- Queue mode: work your follow-ups one call at a time
- The Activity panel: your day at a glance
- Notes and @mentions
- List view and customising columns
- Archive (delete) a lead, and bring one back
- The order log
Leads vs jobs: two entry points
There are two places to enter work, depending on how confirmed it is:
- Leads: a fresh enquiry you still need to follow up, quote and win. Enter it under Leads → Add new lead. This is the flow covered on this page.
- Jobs: work that is already confirmed (for example a delivery contract that sends you booked jobs each day). Skip the sales stages and add it under Jobs → Add new job. The form and the auto-fill described below work the same way.
The leads board
Click Leads in the left menu. The board shows every open lead as a card, grouped into pipeline stages: New lead, Initial contact, In progress, Quoted, Follow up. Drag cards between columns as the conversation progresses so you always know where each customer sits. The toggle at the top-right switches between this board and a list view.
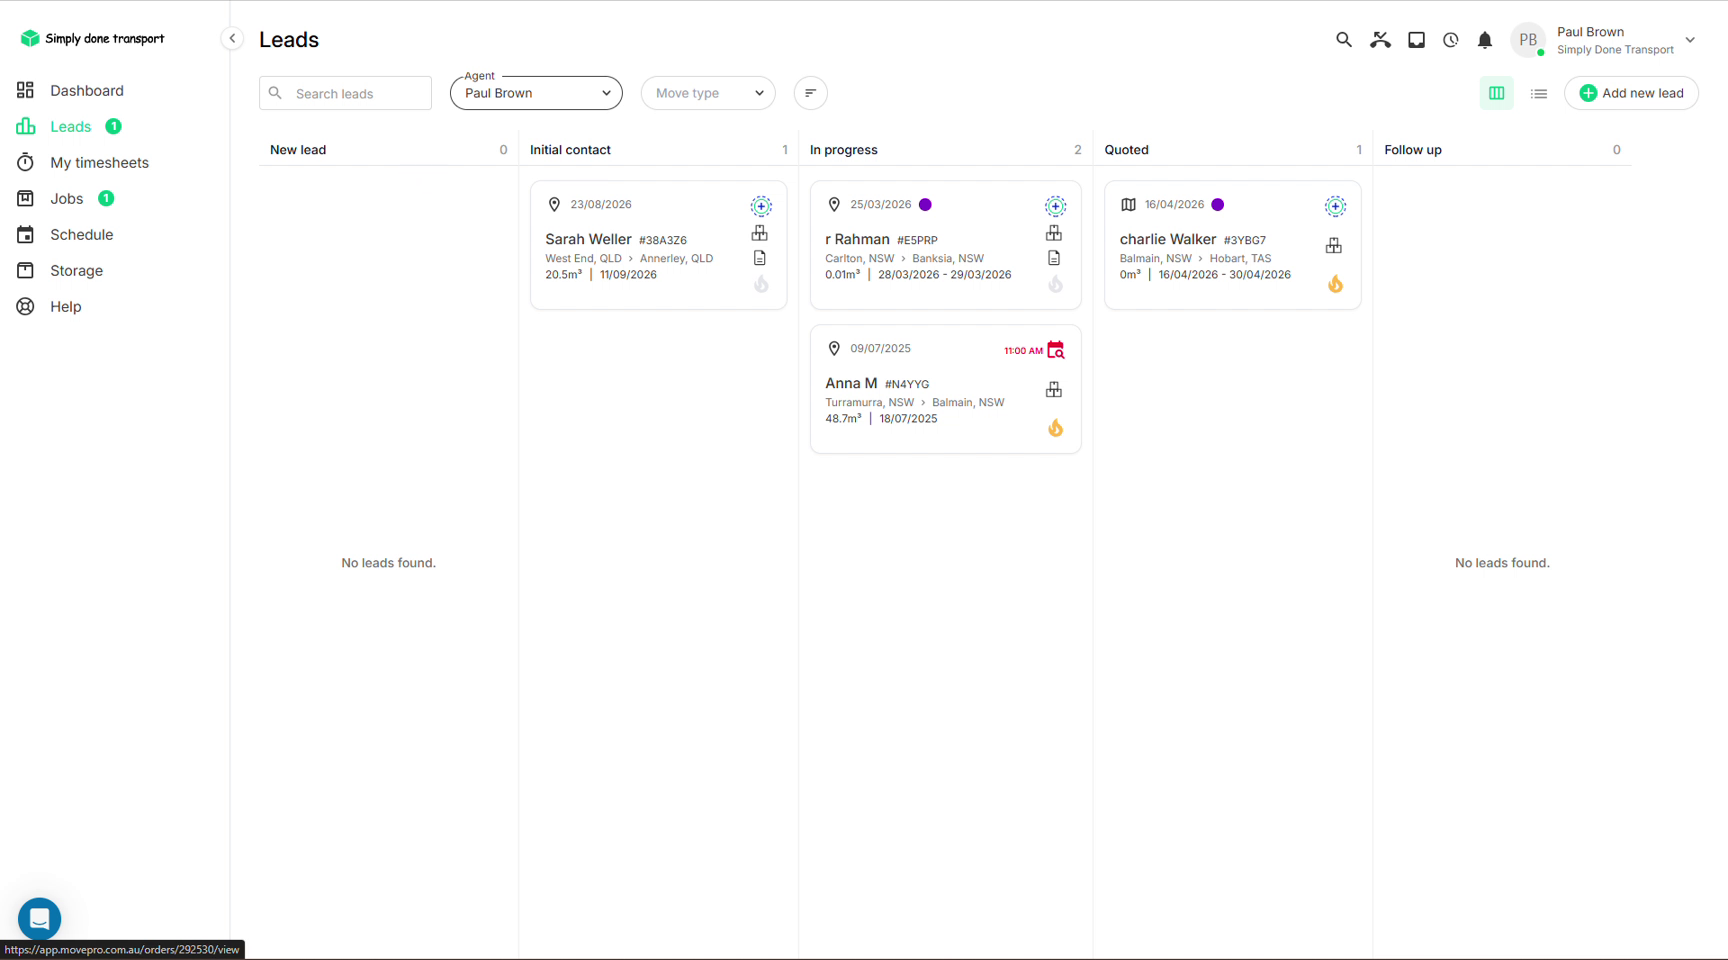
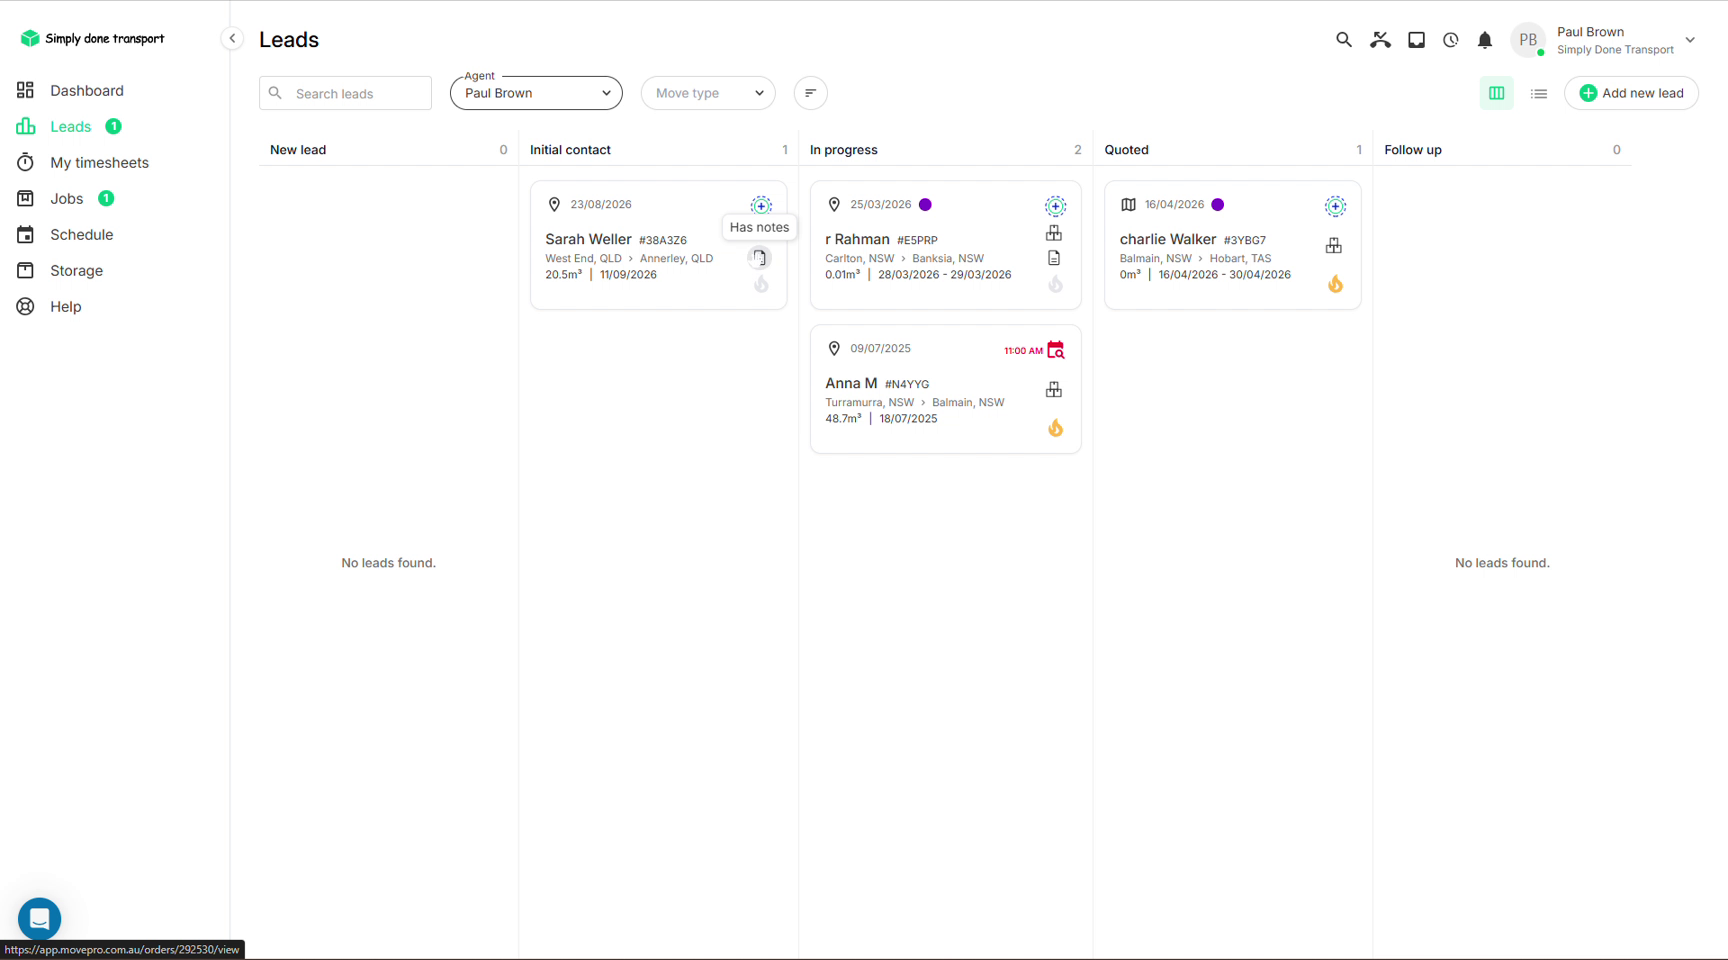
The small icons on a card tell you what the lead already has attached; hover any of them for a label. A flame icon marks a hot lead, and the icon column on the right of each card flags notes, inventory and forms.
Add a lead manually
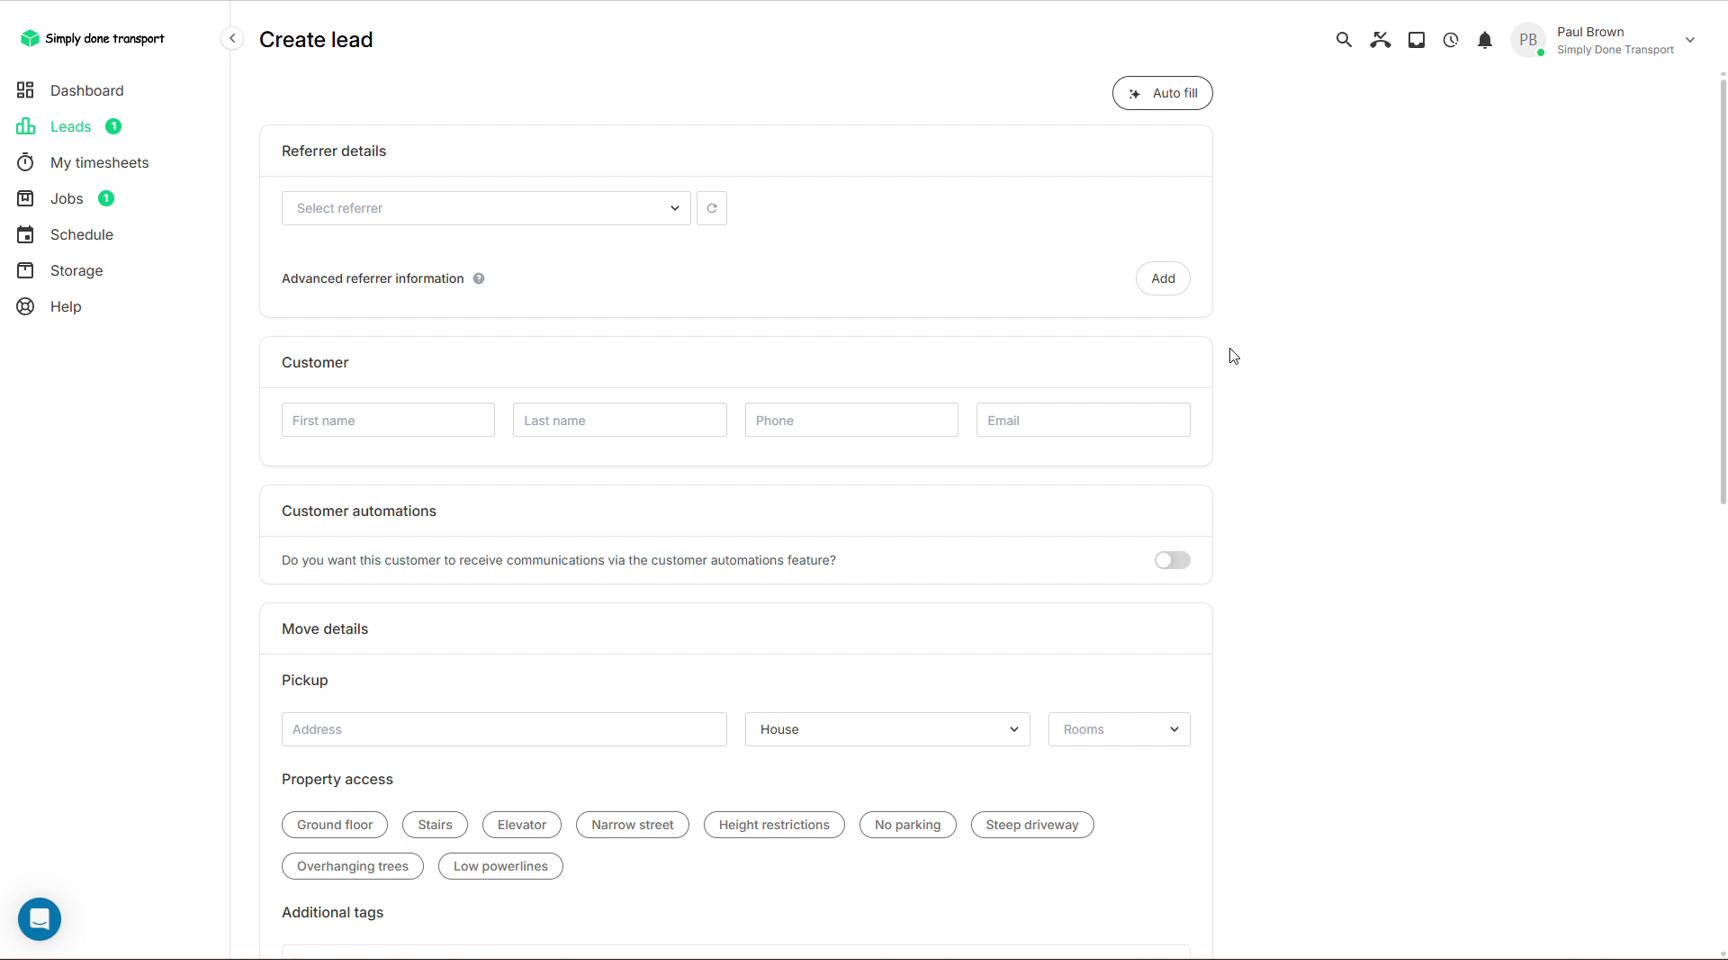
- Go to Leads and click Add new lead (top right).
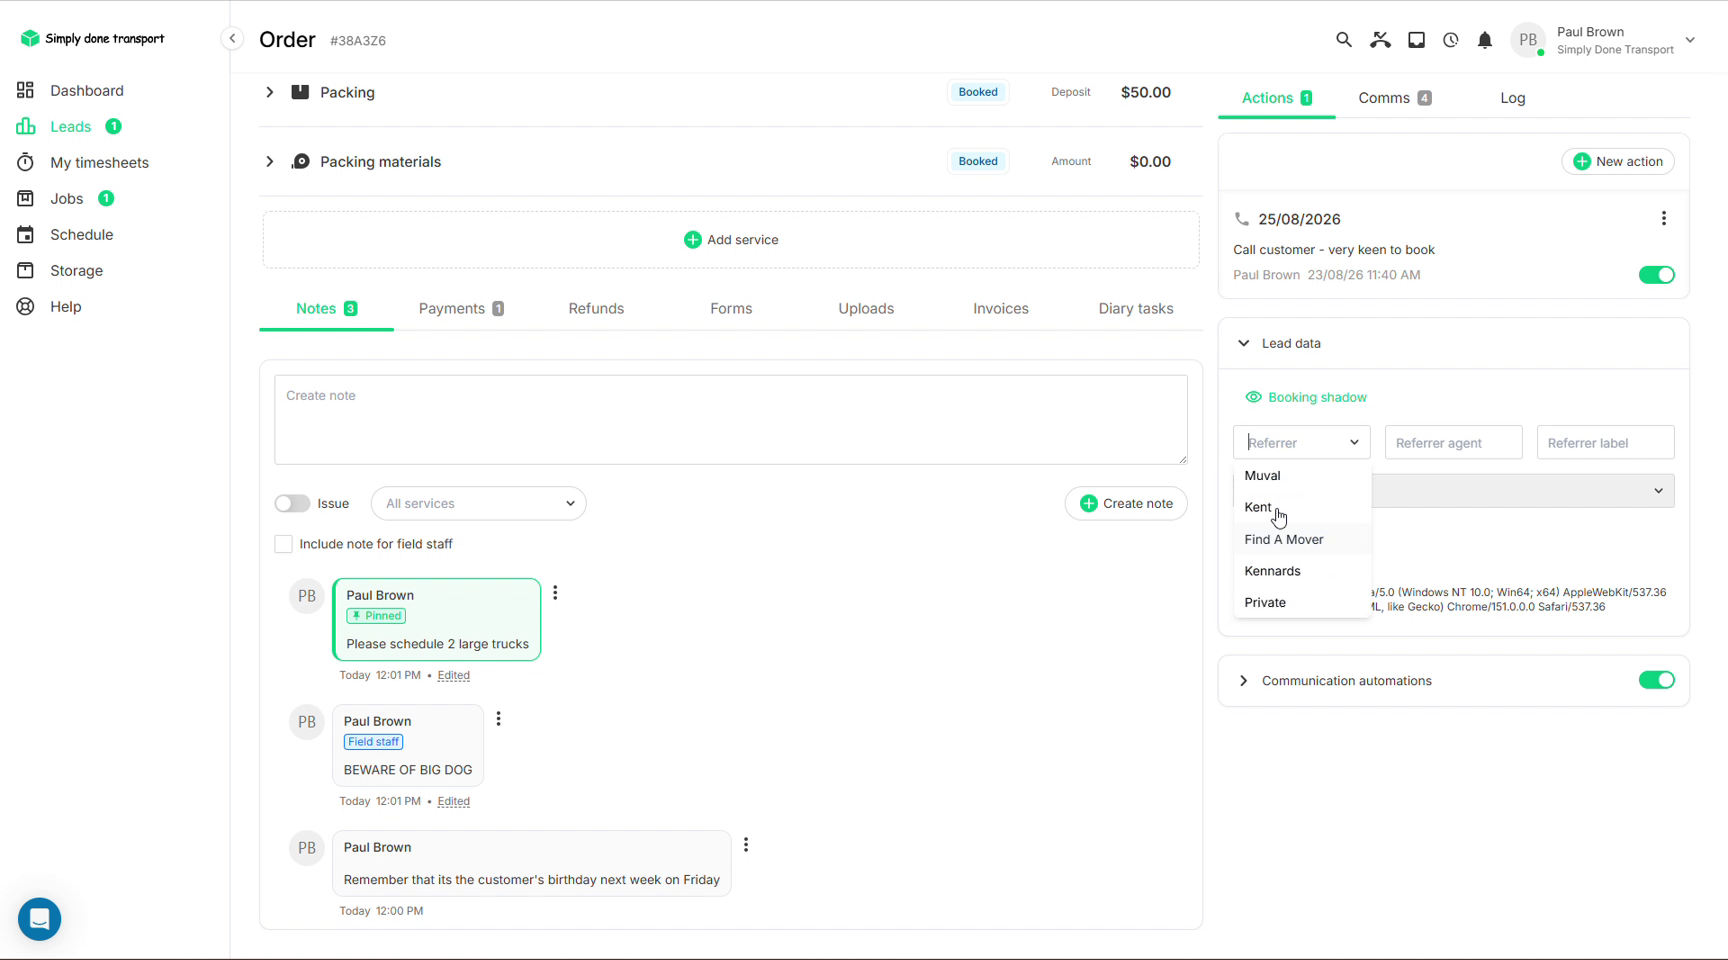
- Referrer details (optional): record where the lead came from (website, phone, a partner company). The dropdown lists your affiliates; see Team & affiliates to add more. It's purely for your own reporting, so you can skip it.
- Fill in the Customer fields: first name, last name, phone, email.
- Fill in Move details: pickup and delivery address, property type and number of bedrooms, and any Property access tags that affect the job: stairs, elevator, narrow street, height restrictions, no parking, steep driveway and so on. These tags aren't just notes; they can carry access charges onto the quote.
- Scroll to the bottom and Save. The lead opens as an order, ready to quote.
Add a lead with AI auto-fill
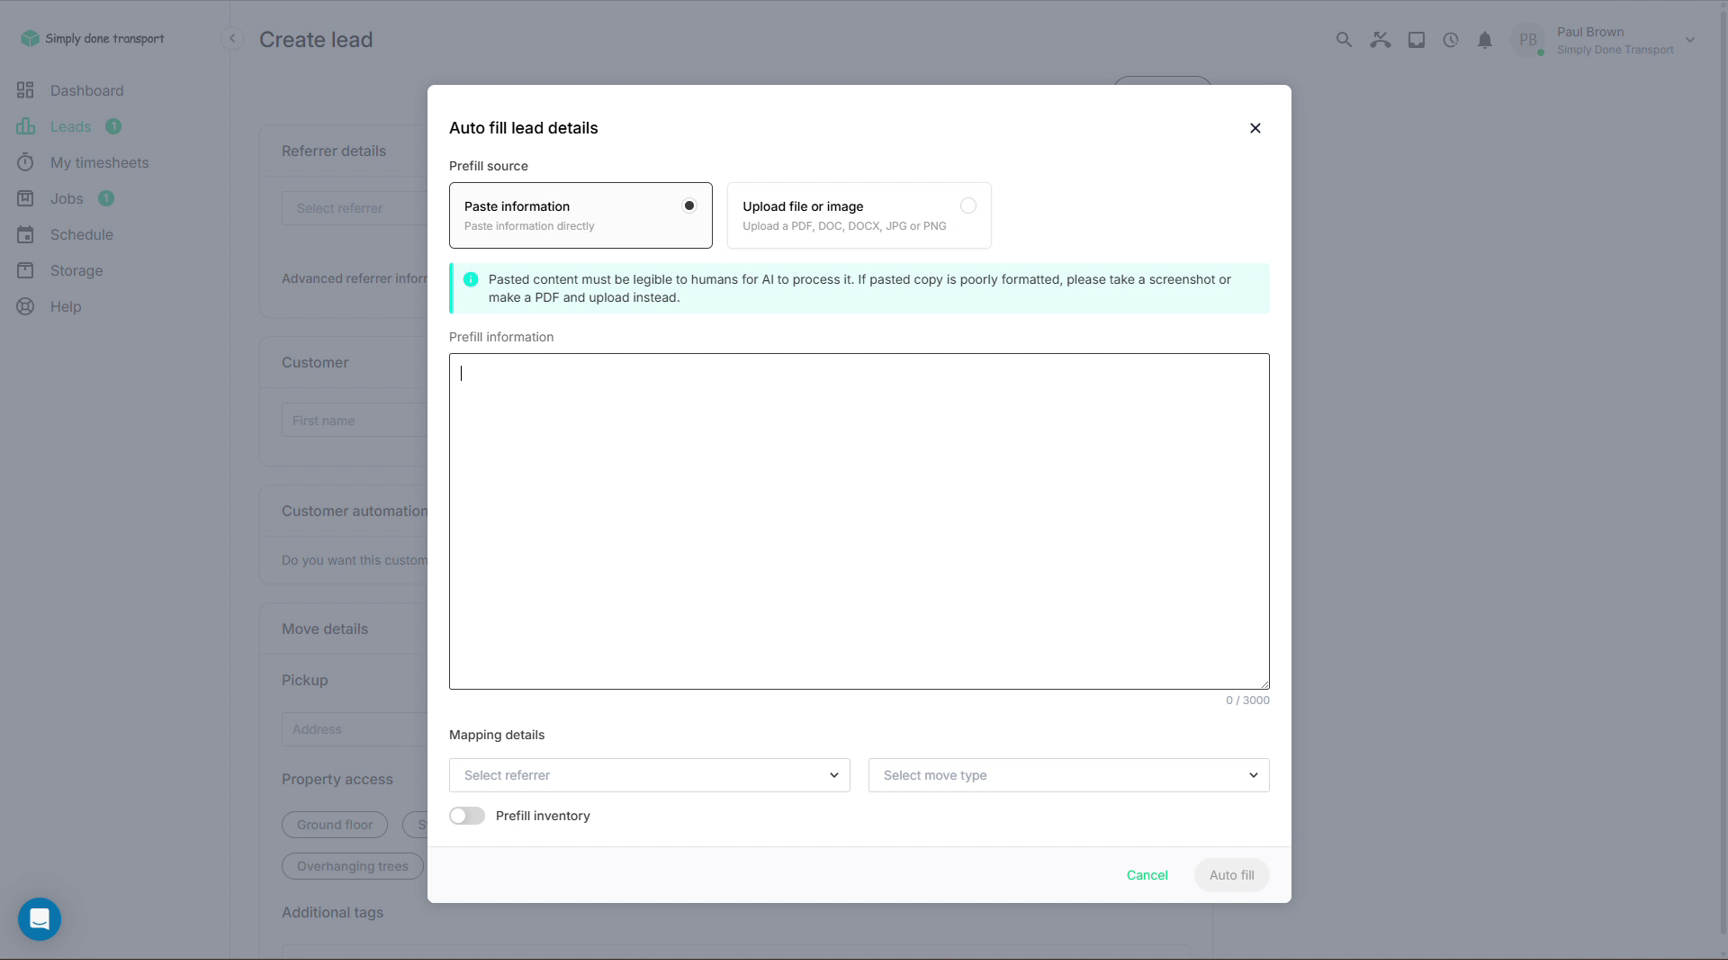
If the enquiry arrived as an email, web form or PDF, don't retype it. The Auto fill button at the top of the Create lead form reads pasted text or an uploaded file and populates the whole form, including itemised inventory.
- On the Create lead (or Create job) form, click Auto fill.
- Choose Paste information and paste the customer's email; you can paste several emails and an inventory list together. Or choose Upload file or image for a PDF, DOC, JPG or PNG (e.g. a work order or a screenshot).
- Under Mapping details, pick the referrer and the move type (Local / Interstate).
- Toggle Prefill inventory if the text includes an item list, and tell it how volume is provided, usually per item.
- Click Auto fill and wait a moment while it works through the content.
- Review what it filled in: confirm the suggested address validations, check phone numbers and dates, then Save.
Finding your way around an order
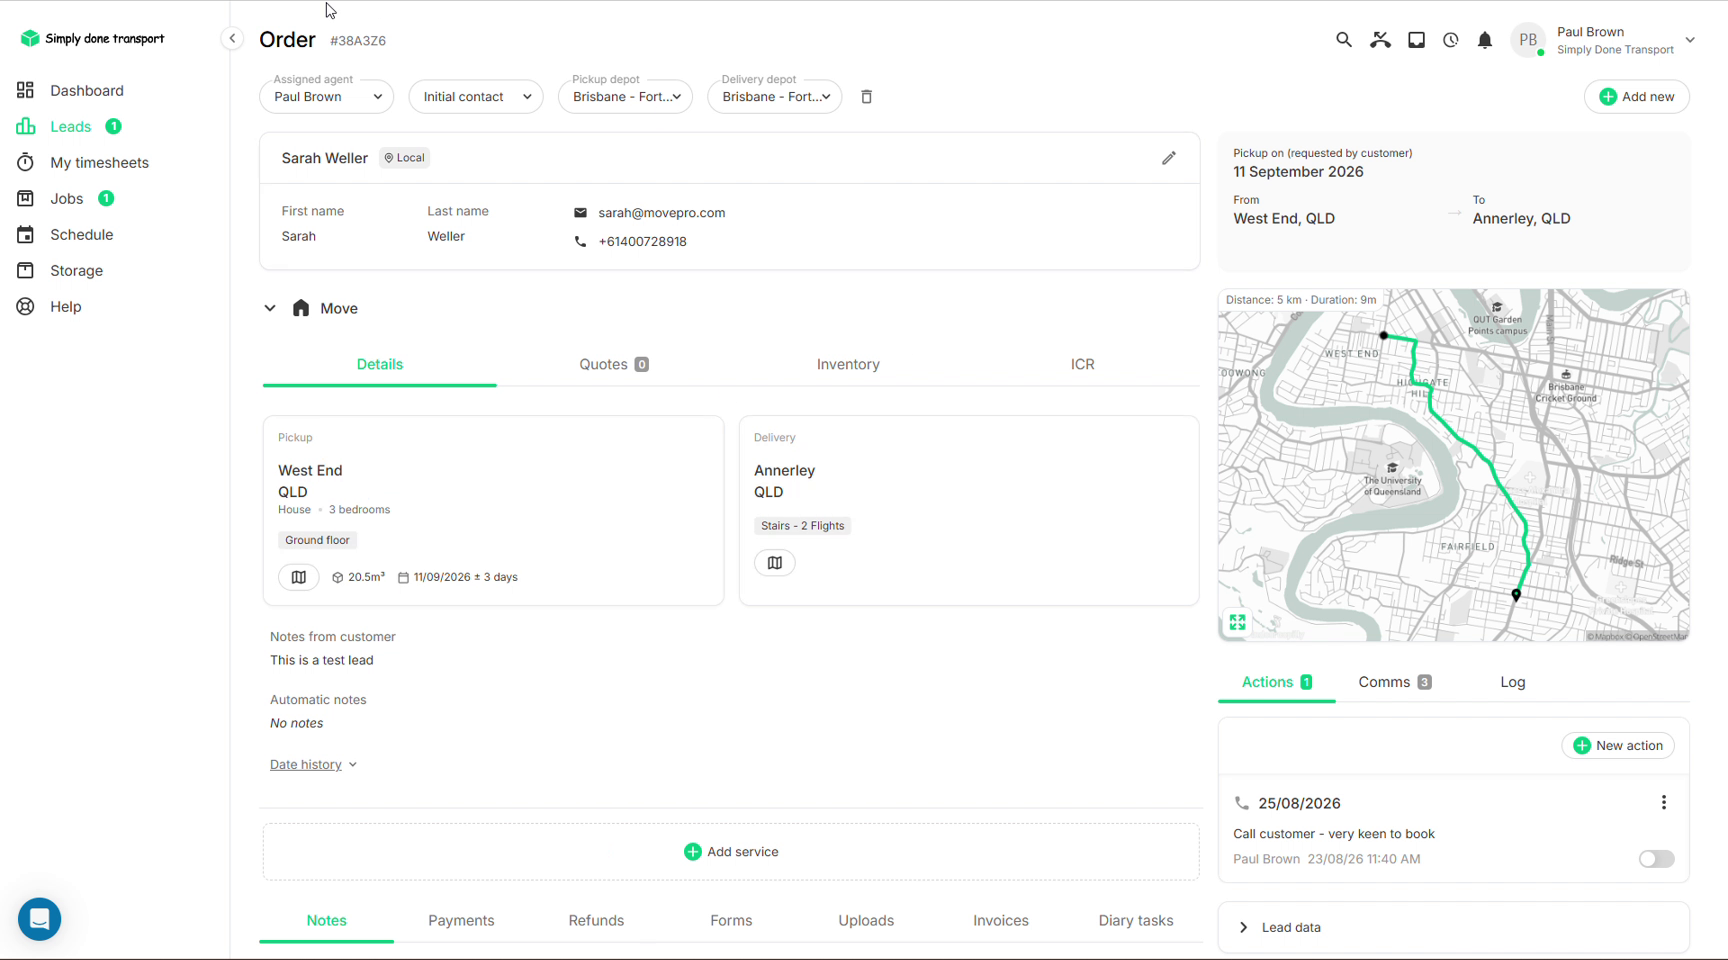
Opening a lead (or job) lands you on the order view, the hub where everything about that customer lives:
- Customer header: name and contact details, with a pencil icon to edit. The chip beside the name is the move category (Local, Interstate, Office and so on); click it to change it.
- Service section: each service (e.g. Move) with its status chip (Pending Quoted Booked Completed) and estimated cost, plus tabs for Details, Quotes, Inventory and ICR (inventory condition report). Add service lets you add packing, storage or another move to the same order.
- Bottom tabs: Notes, Payments, Refunds, Forms, Uploads, Invoices, Diary tasks.
- Right rail: the route map, plus Actions (scheduled follow-ups), Comms (every email/SMS/call with the customer) and Log (audit trail).
Follow-ups with scheduled actions
When you tell a customer "I'll call you Thursday", record it so it can't slip. Actions are reminders for you; they don't message the customer. They're also separate from the diary's tasks: actions drive the sales side's follow-ups and site inspections, while diary tasks are the operational work scheduled per service once it's booked.
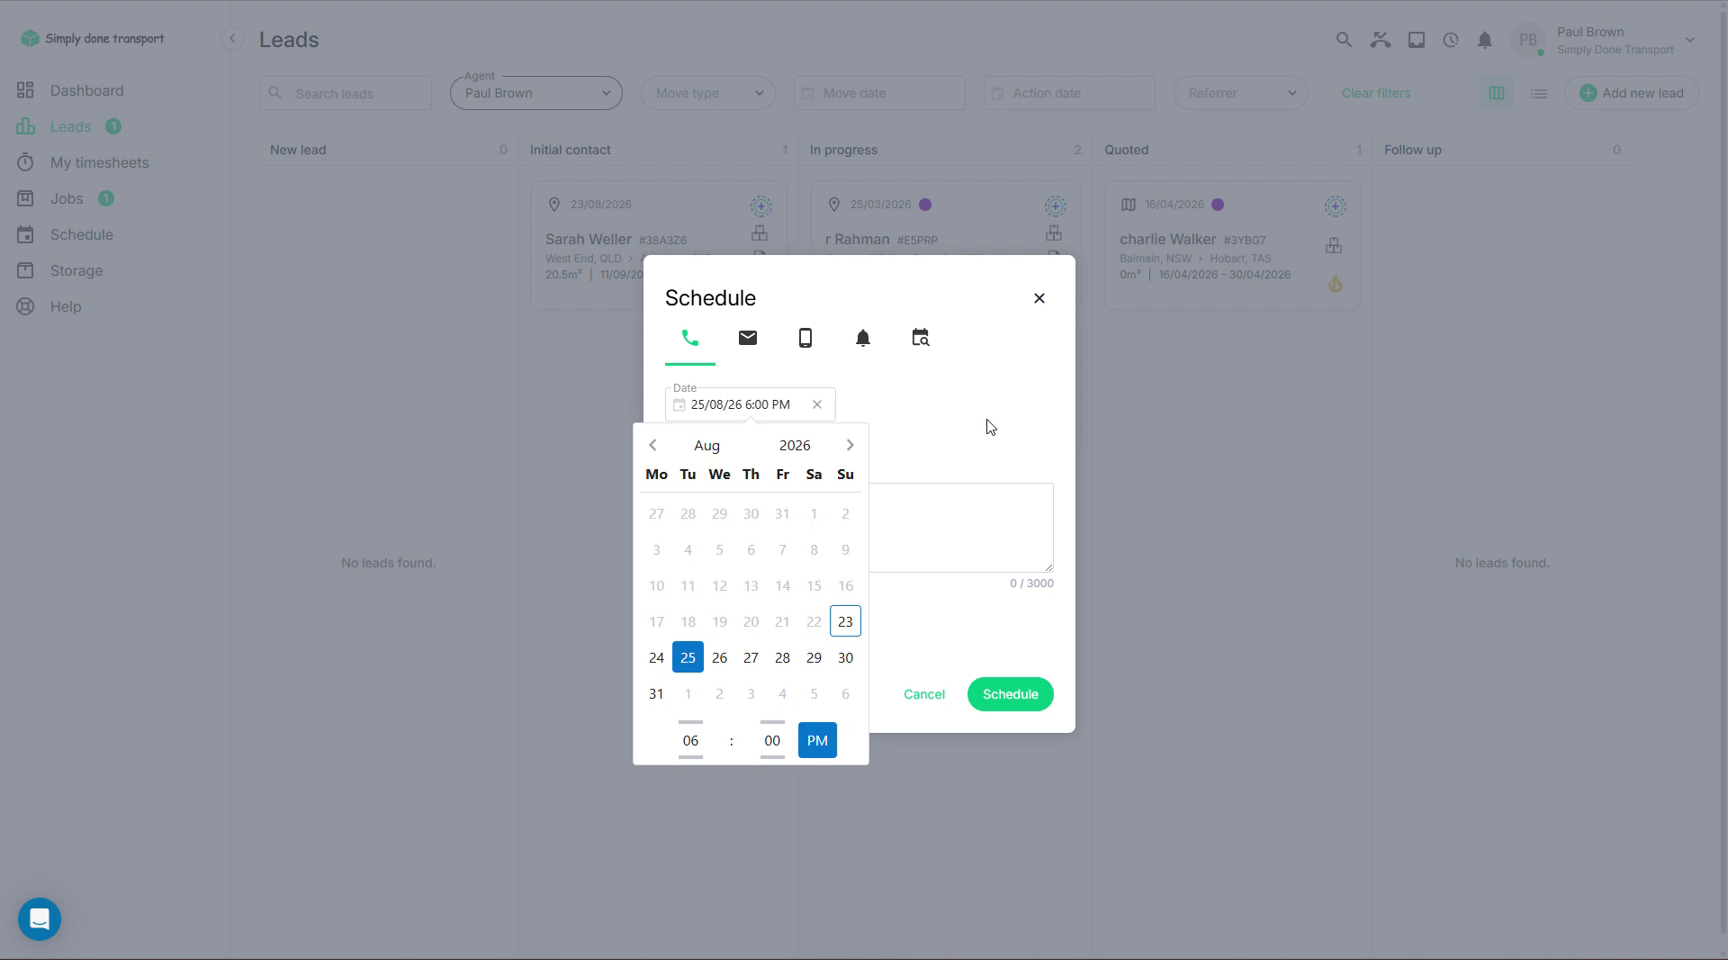
- On a lead card, click the + in the top-right corner (or use New action in the Actions tab of the order).
- Pick the action type: a call, email, SMS or miscellaneous reminder, or a site inspection (virtual or remote).
- Set the date, toggle Specify time if you want a time, and add a note about what to say.
- Schedule. When it falls due you'll get a notification via the bell in the top-right of Movepro.
Queue mode: work your follow-ups one call at a time
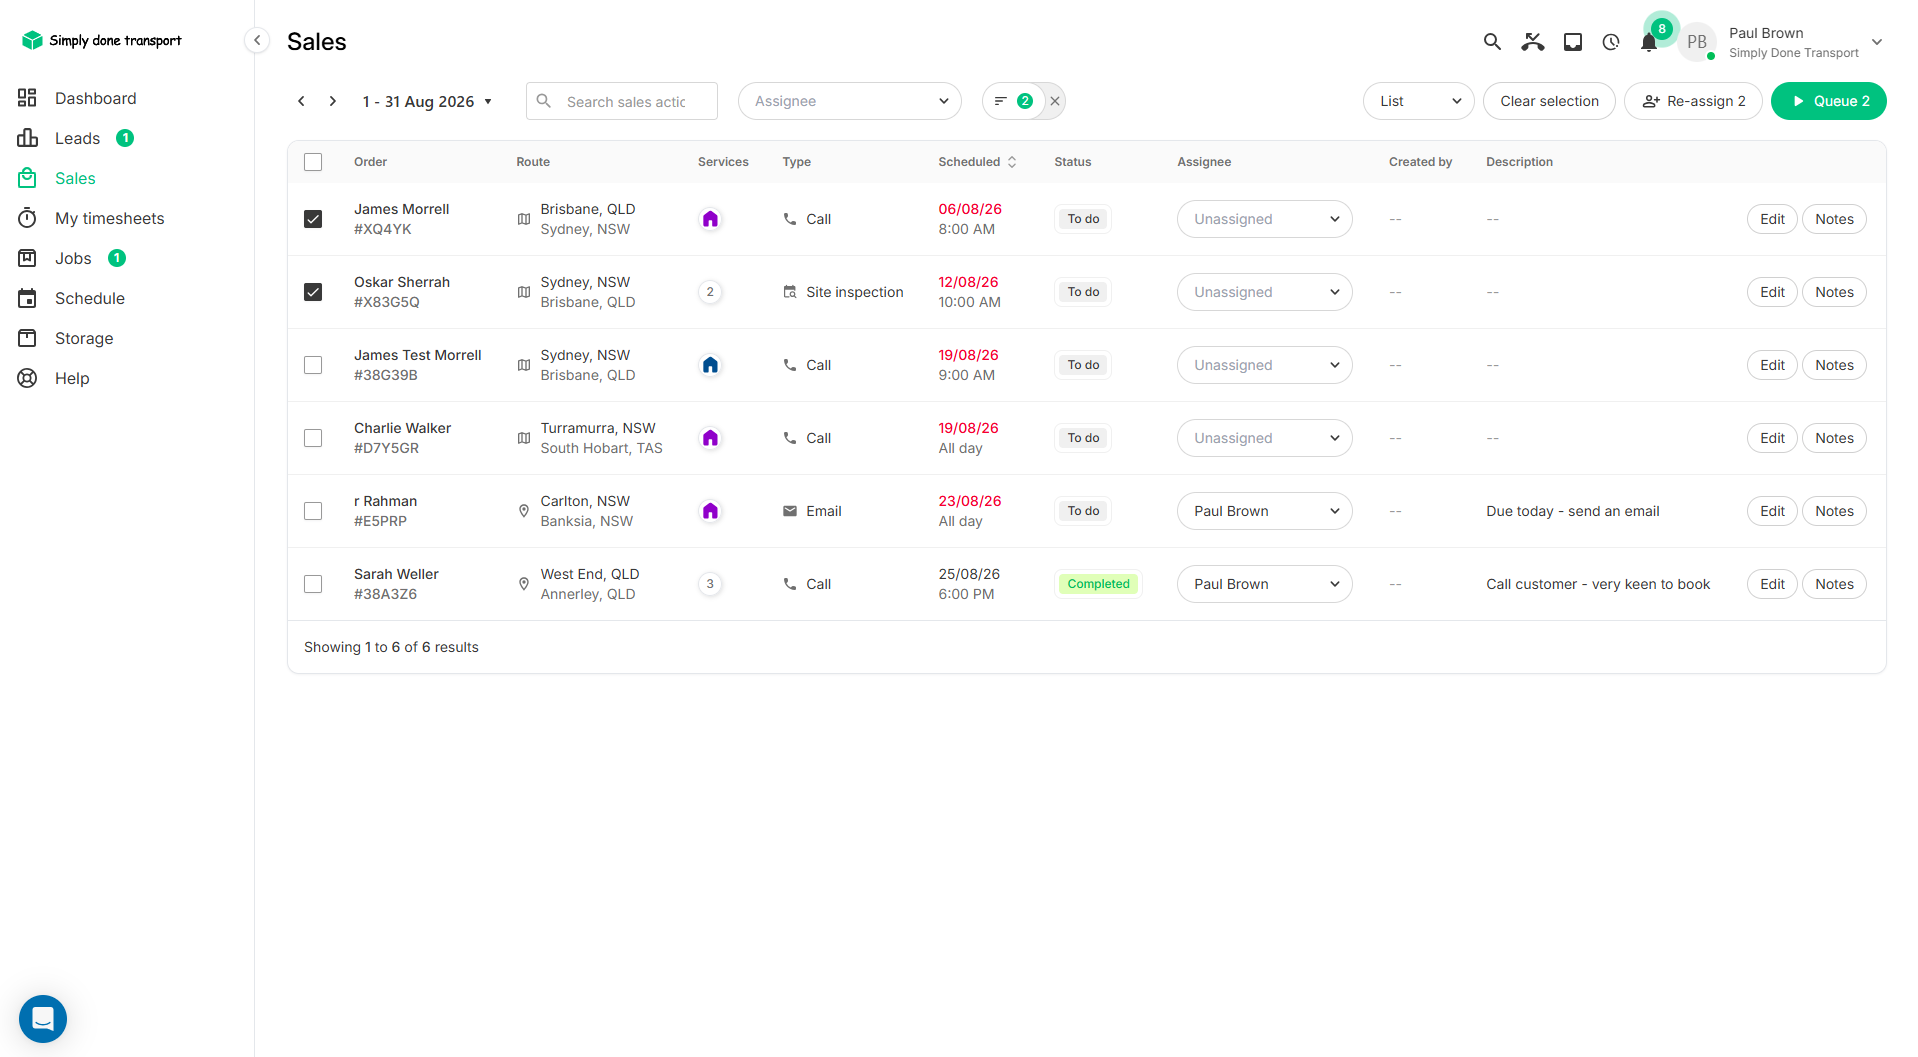
When a stack of follow-ups falls due, don't open them one at a time from the board. The Sales screen (left menu) lists every scheduled action; filter the assignee to yourself to see your own list for the day, tick the actions you want to power through, and click Queue.
Movepro opens the first order with a queue bar pinned to the bottom of the screen: the action you're on, its due time, and four buttons: Reschedule, Skip, Cancel and Complete. Do the call or send the message with the full order in front of you, hit Complete, and the queue advances to the next order automatically.
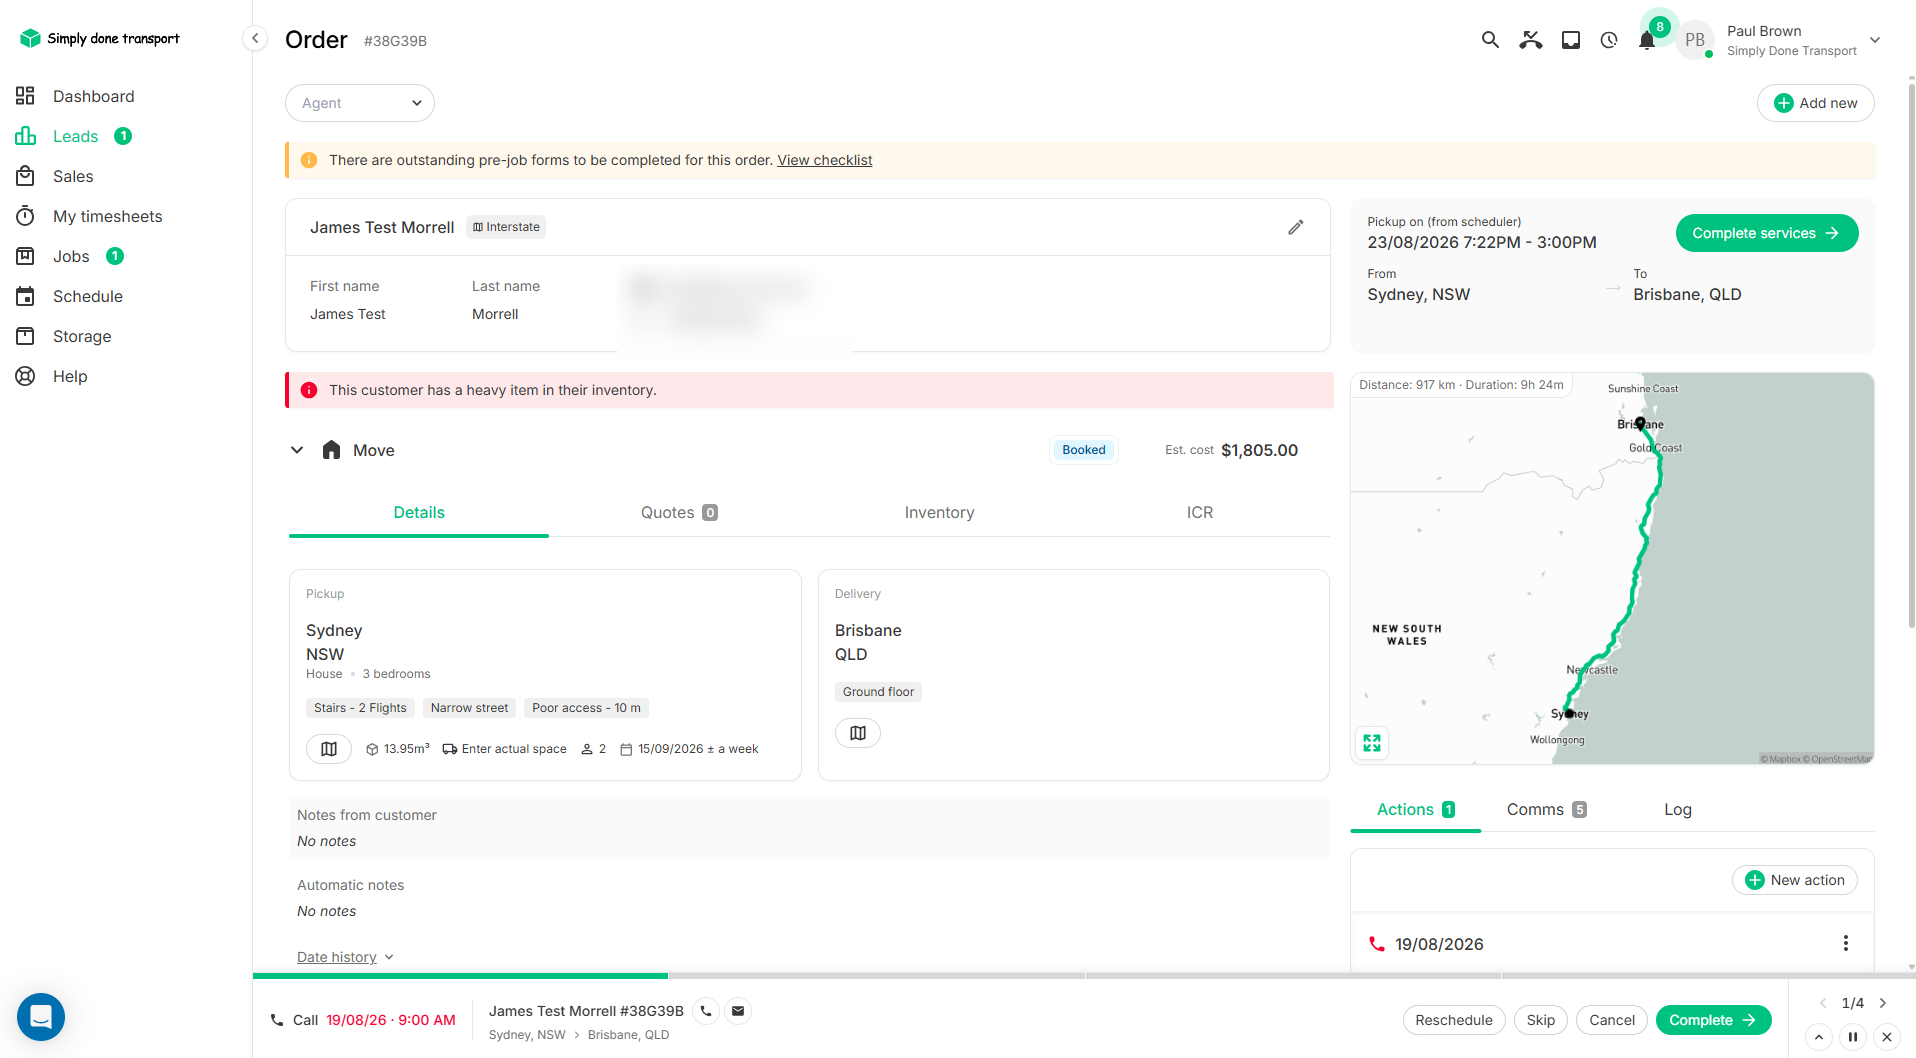
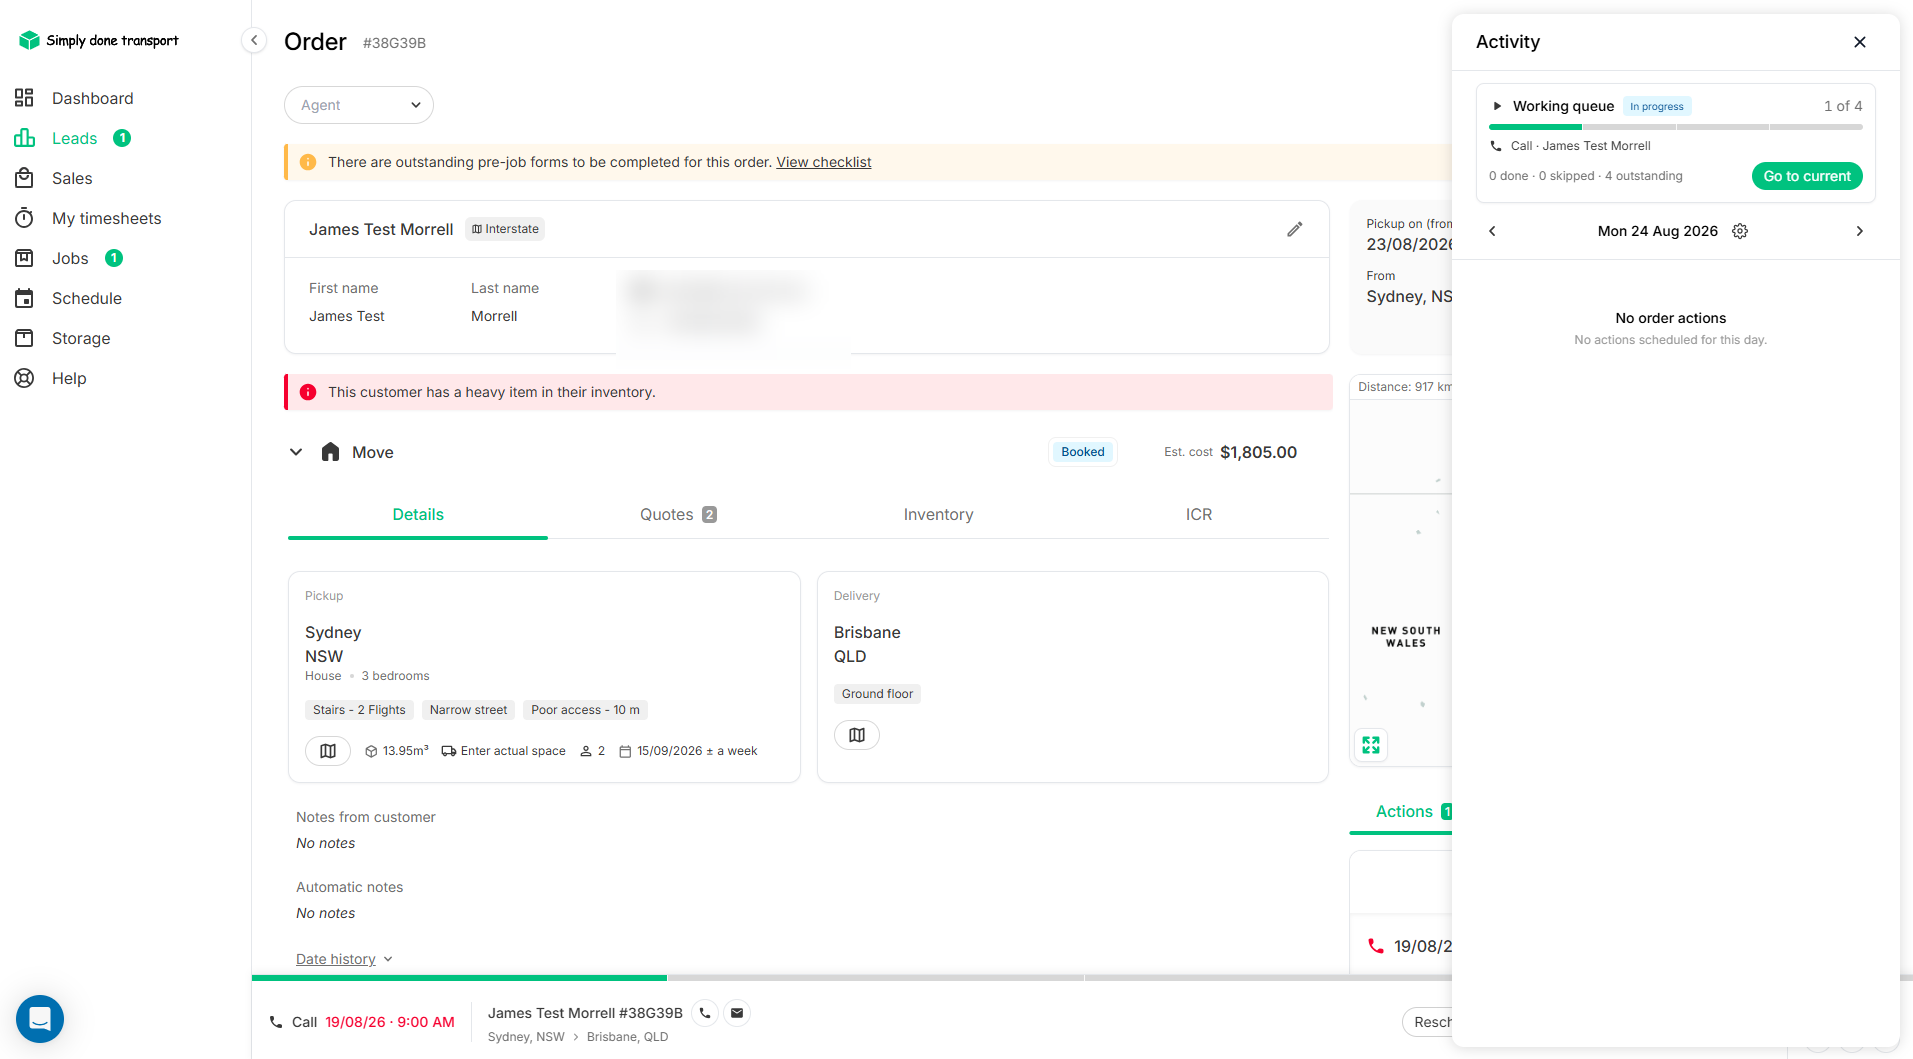
Step away mid-queue and nothing is lost: the Activity panel (clock icon, top bar) shows the queue in progress with its tally of done, skipped and outstanding, and Go to current drops you back on the action you were up to.
The Activity panel: your day at a glance
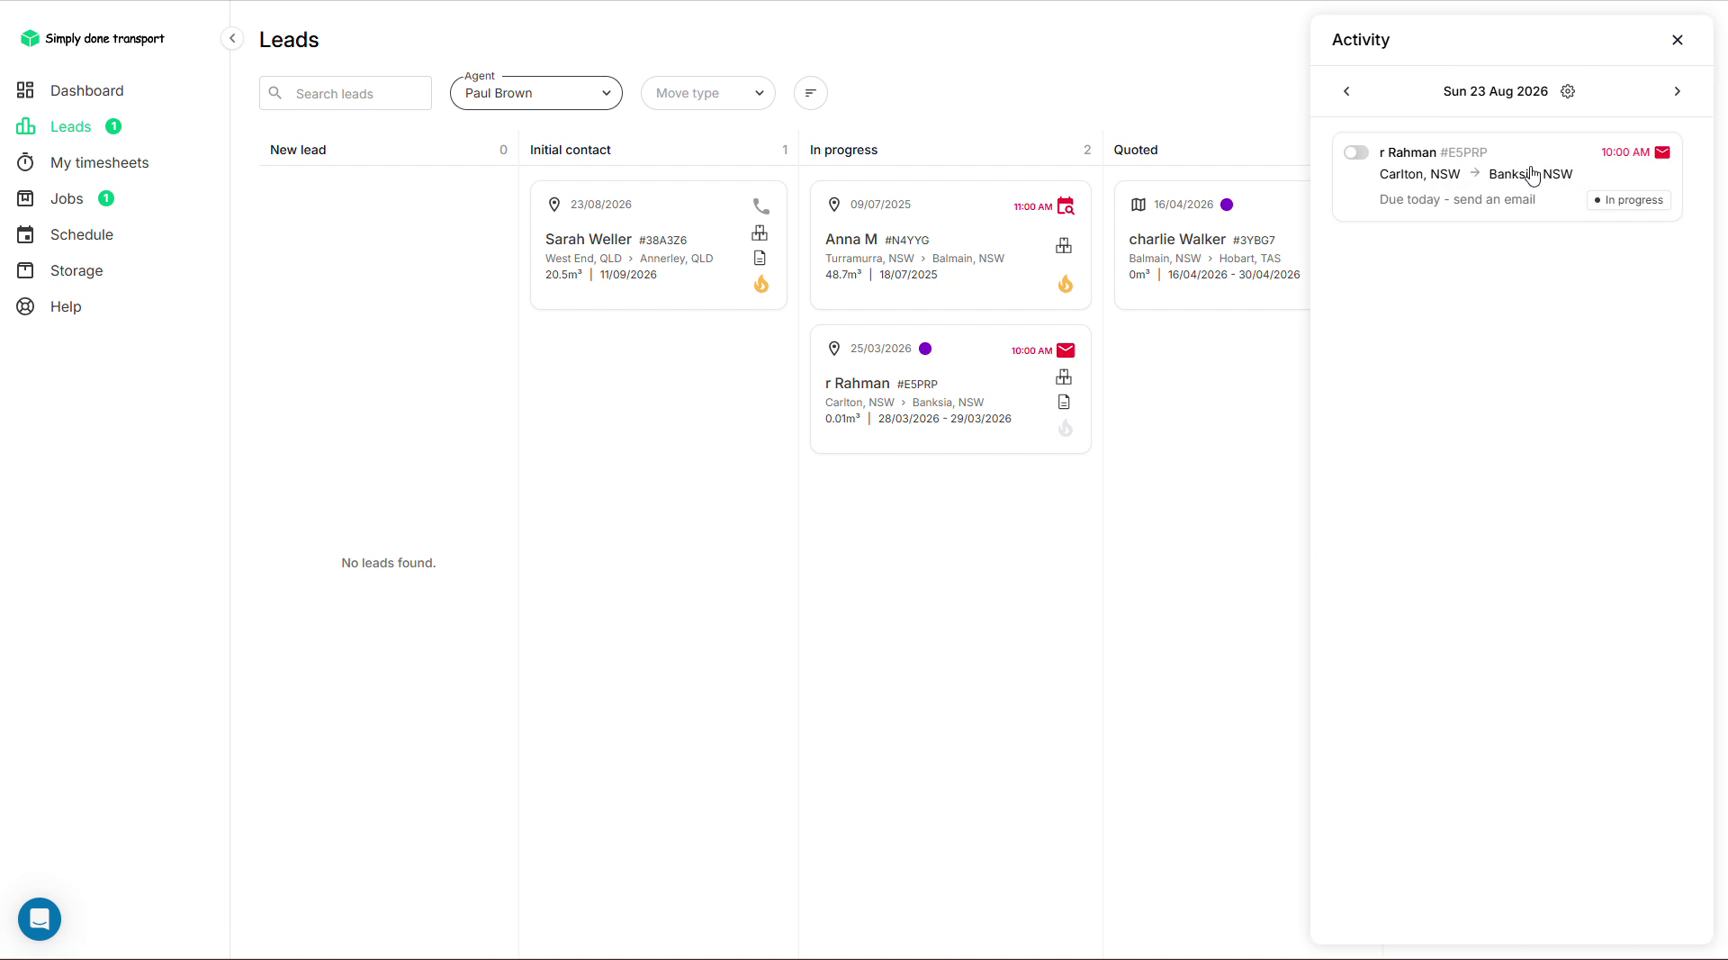
Outside a queue, the same Activity panel is your daily to-do list: open it from any screen to see the actions due today (who, what, when) and flip through days with the arrows. Each entry links straight to its order, and the toggle marks it done.
Notes and @mentions
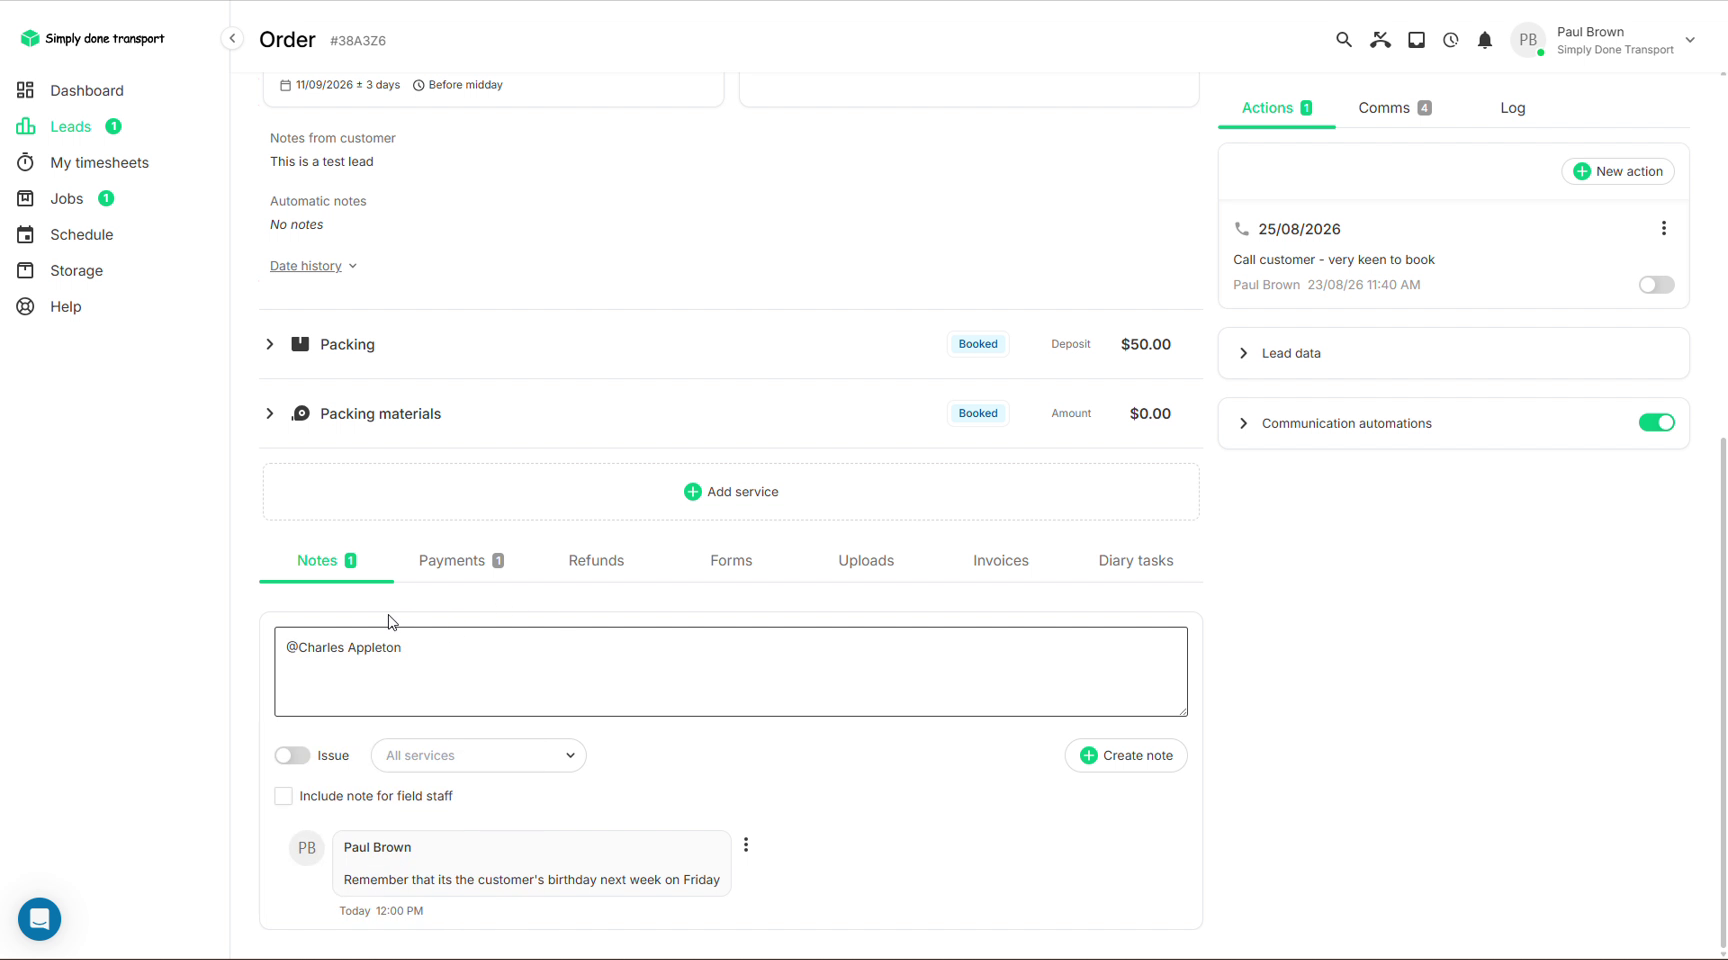
The Notes tab is the running history on the order. Type @ to mention a teammate; they get notified and the note lands in their feed. Notes can be pinned, and a note can be flagged as an Issue against a specific service (issues feed the fix list).
List view and customising columns
The toggle at the top-right of the Leads page switches from the board to a list view, better for scanning many leads at once, and the place to filter by agent, move type, move date, action date or referrer.
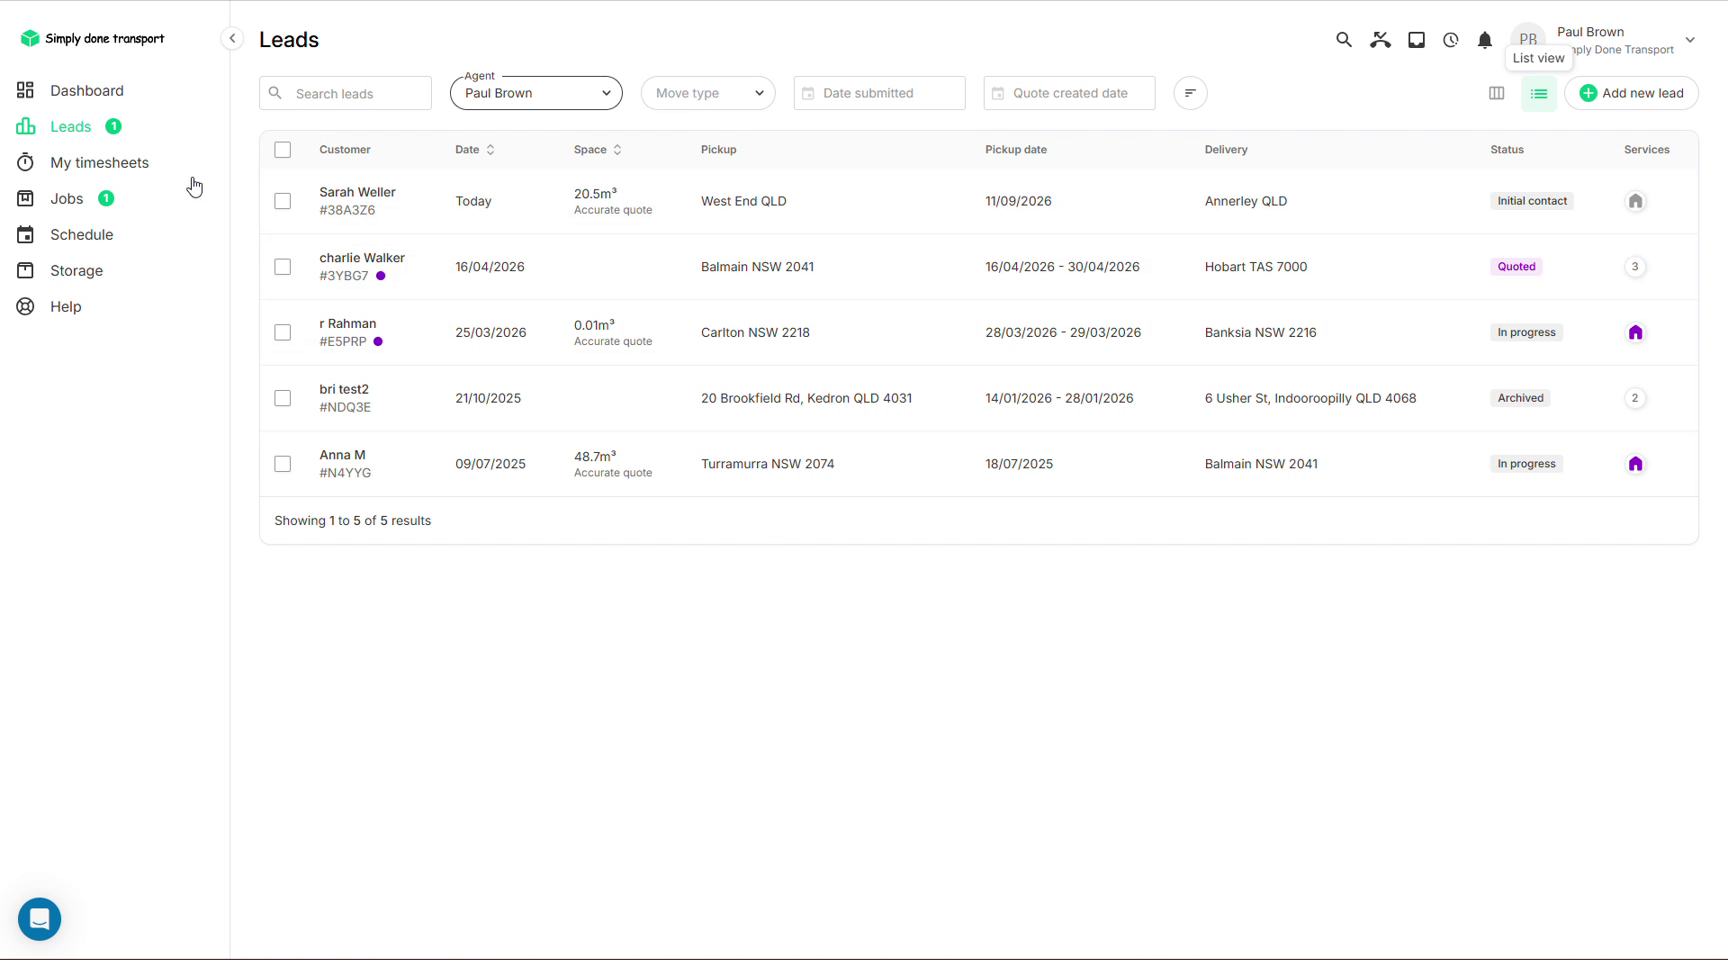
In the list views (Leads, Jobs, the diary list), the cog icon at the top-right of the table opens the column settings. Turn columns on or off and drag to reorder them so the list shows what matters to you: status, move date, suburb, volume, value.
Archive (delete) a lead, and bring one back
Leads that expire or go cold shouldn't clutter the board, but Movepro never deletes anything permanently: "deleting" a lead means archiving it. The card leaves your workspace; the record, its history and its comms stay searchable forever. There are three ways to archive:
- Drag the card off the board. Drag it to the bottom of the board, drop it on Archived, and give a reason (Unable to help them, Customer declined…). The reason is recorded on the order.
- Bulk archive from the list view. Tick as many leads as you like and archive them in one go with a single reason; the manager's walkthrough is in Sales manager tools → Bulk archiving.
- From the order itself. The Remove order button at the top of the order view archives it too, reason included.
To bring one back, switch Leads to the list view and set the Lead state filter to the Bin. Every archived lead is there with Archived in its status column: tick any number of them and click Restore, or open a lead and set its status back to a pipeline stage and it pops straight back onto the board.
The order log
The Log tab in the right rail is the audit trail: every edit, note update and status transition, with who did it and when. Entries look like "The move service was transitioned to Booked", each stamped with the user and date. Use it to answer "who changed this and when?"