Payments & invoicing
Deposits, pre-authorisations, final payments and tax invoices all hang off the order. This guide covers taking a payment step by step, holding funds with a pre-auth, chasing the balance, the company-wide finance views, and generating invoices. The accounting side (Xero sync, payouts and the order P&L) lives in Finance & Xero.
The Payments tab on an order
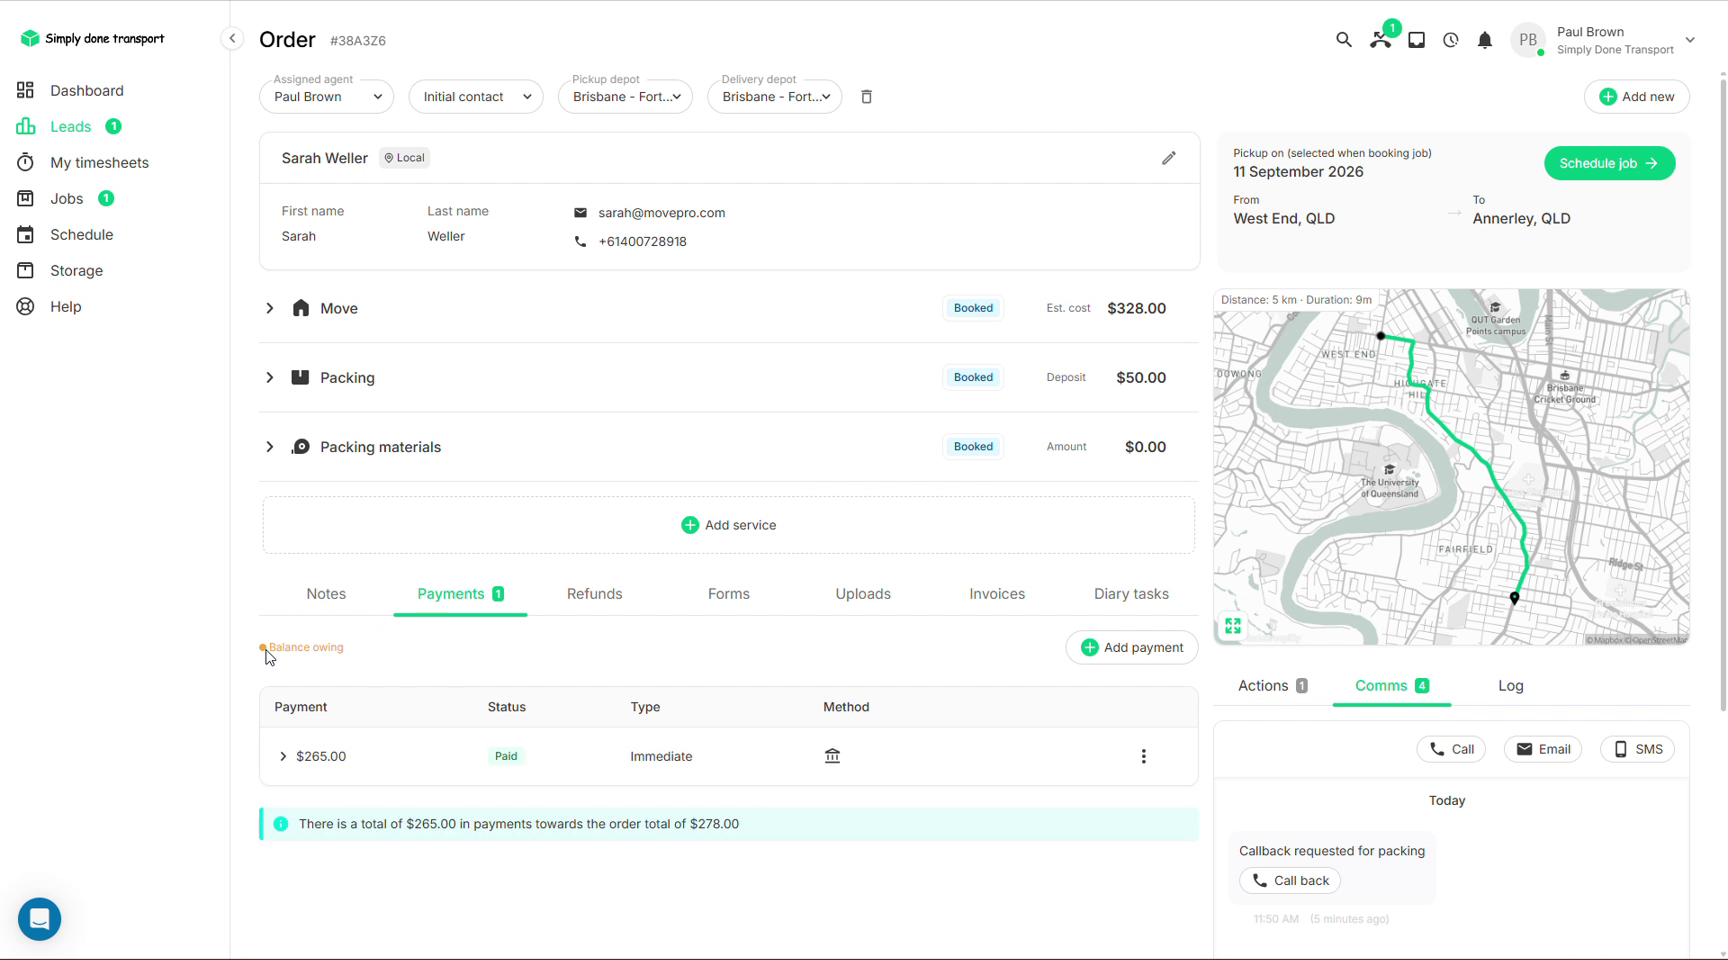
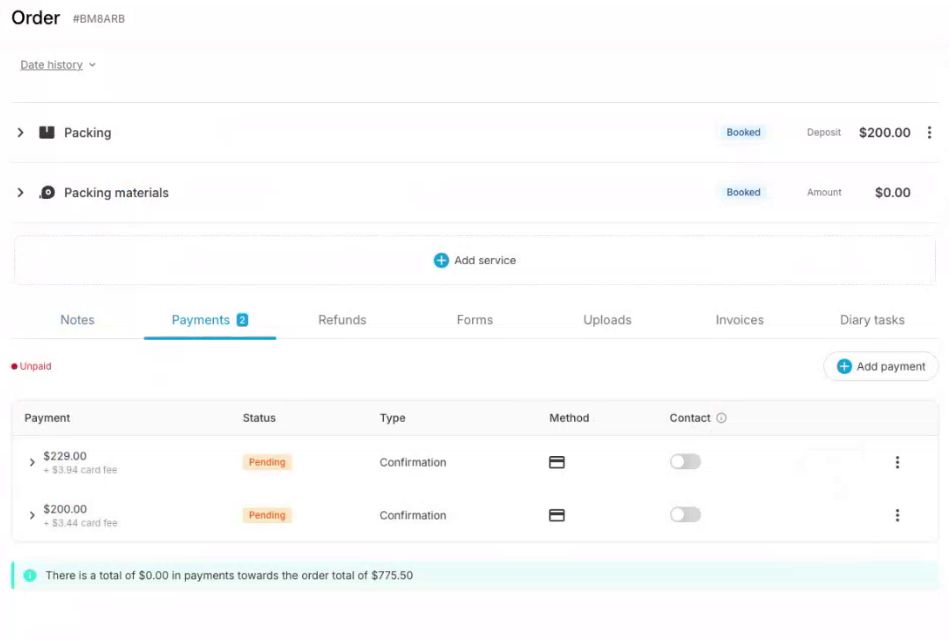
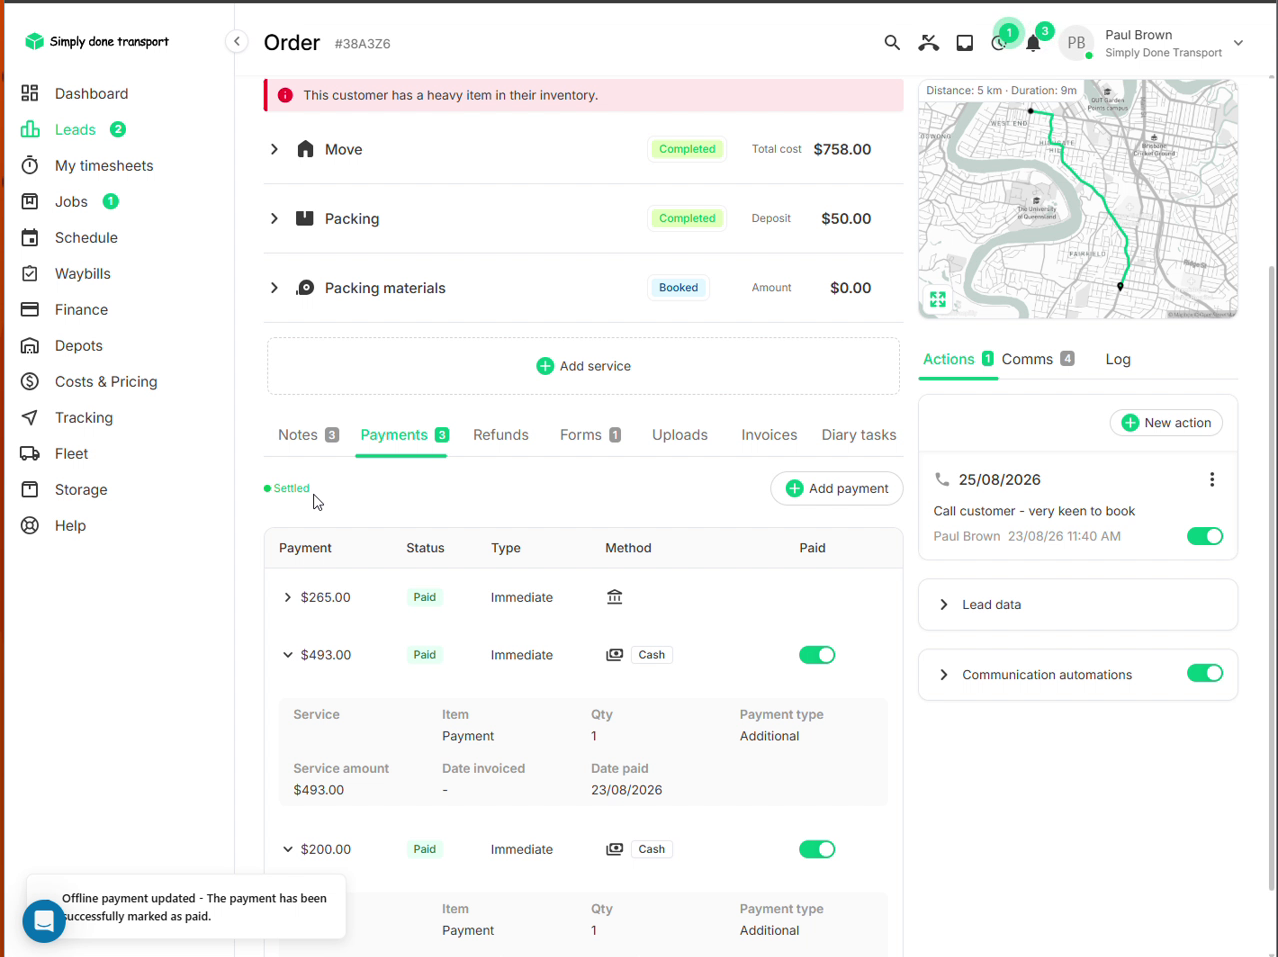
Every payment for a job lives in the order's Payments tab. Each row shows the amount, its status (Paid, Pending, Draft, Cancelled or Refunded), its type (Immediate or Confirmation) and method. Expand a row for the detail: which service and item it applies to, the payment type, and the dates invoiced and paid. The banner below keeps the running score, e.g. "there is a total of $265.00 in payments towards the order total of $278.00", and the chip above it flips from Balance owing to Settled when the order is fully paid.
Take a payment
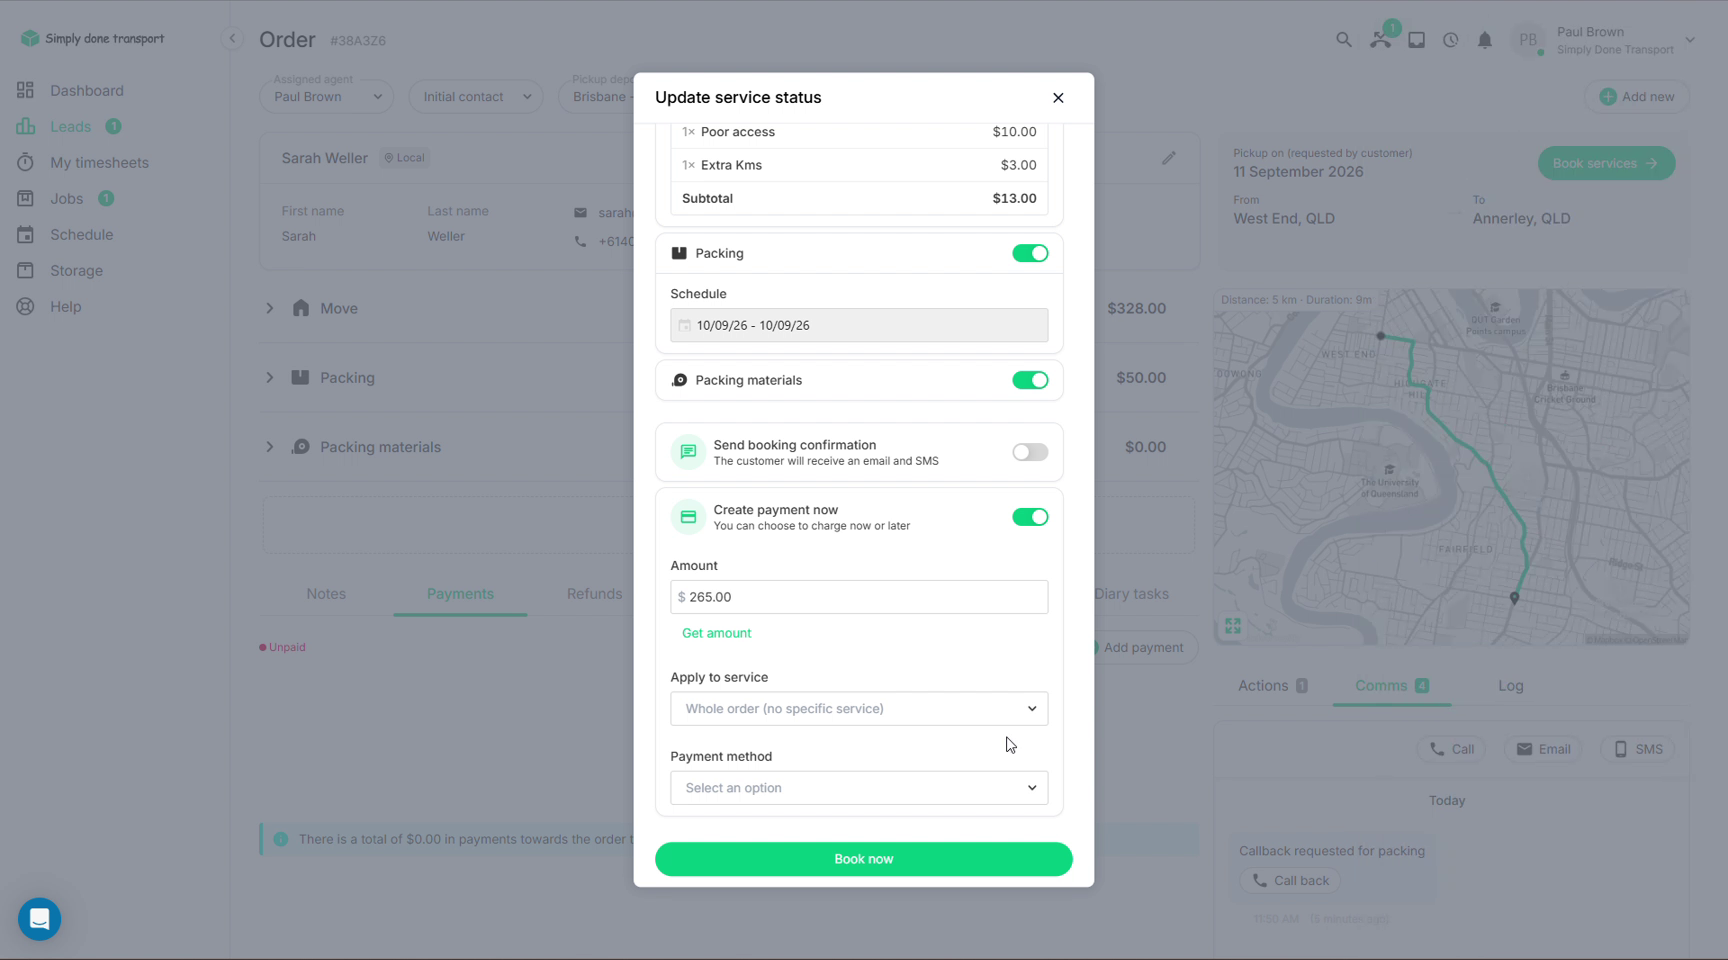
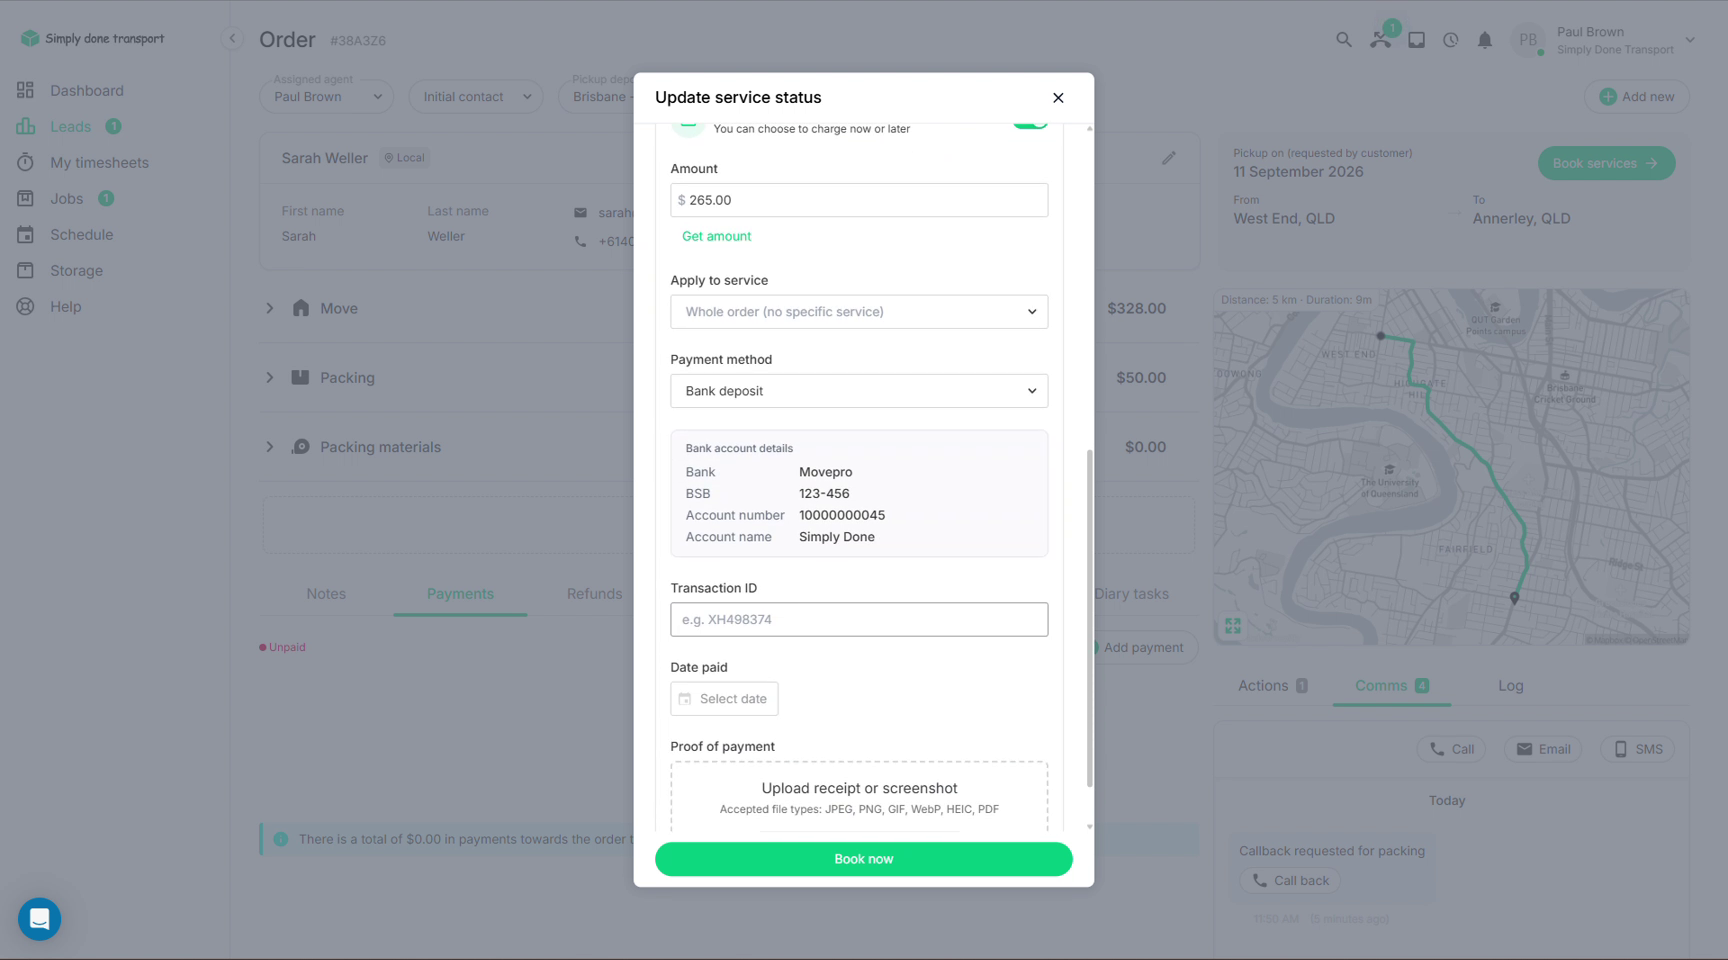
The same payment fields appear in three places: behind Add payment on the Payments tab, inside the Book services dialog when you toggle Create payment now, and inside the Complete services dialog when you tick Collect a payment now (there, the amount arrives pre-filled with the balance due). Wherever you meet them:
- Enter the Amount, or click Get amount to pull the outstanding balance (or the deposit, early in the job).
- Choose what it applies to: the whole order, or a specific service.
- Pick the Payment method: a saved customer card, new card details taken over the phone, or an offline method (bank deposit, cash, EFTPOS) you'll mark as paid when it lands.
- Choose the processing option (Process now to charge immediately) and create the payment.
Deposits
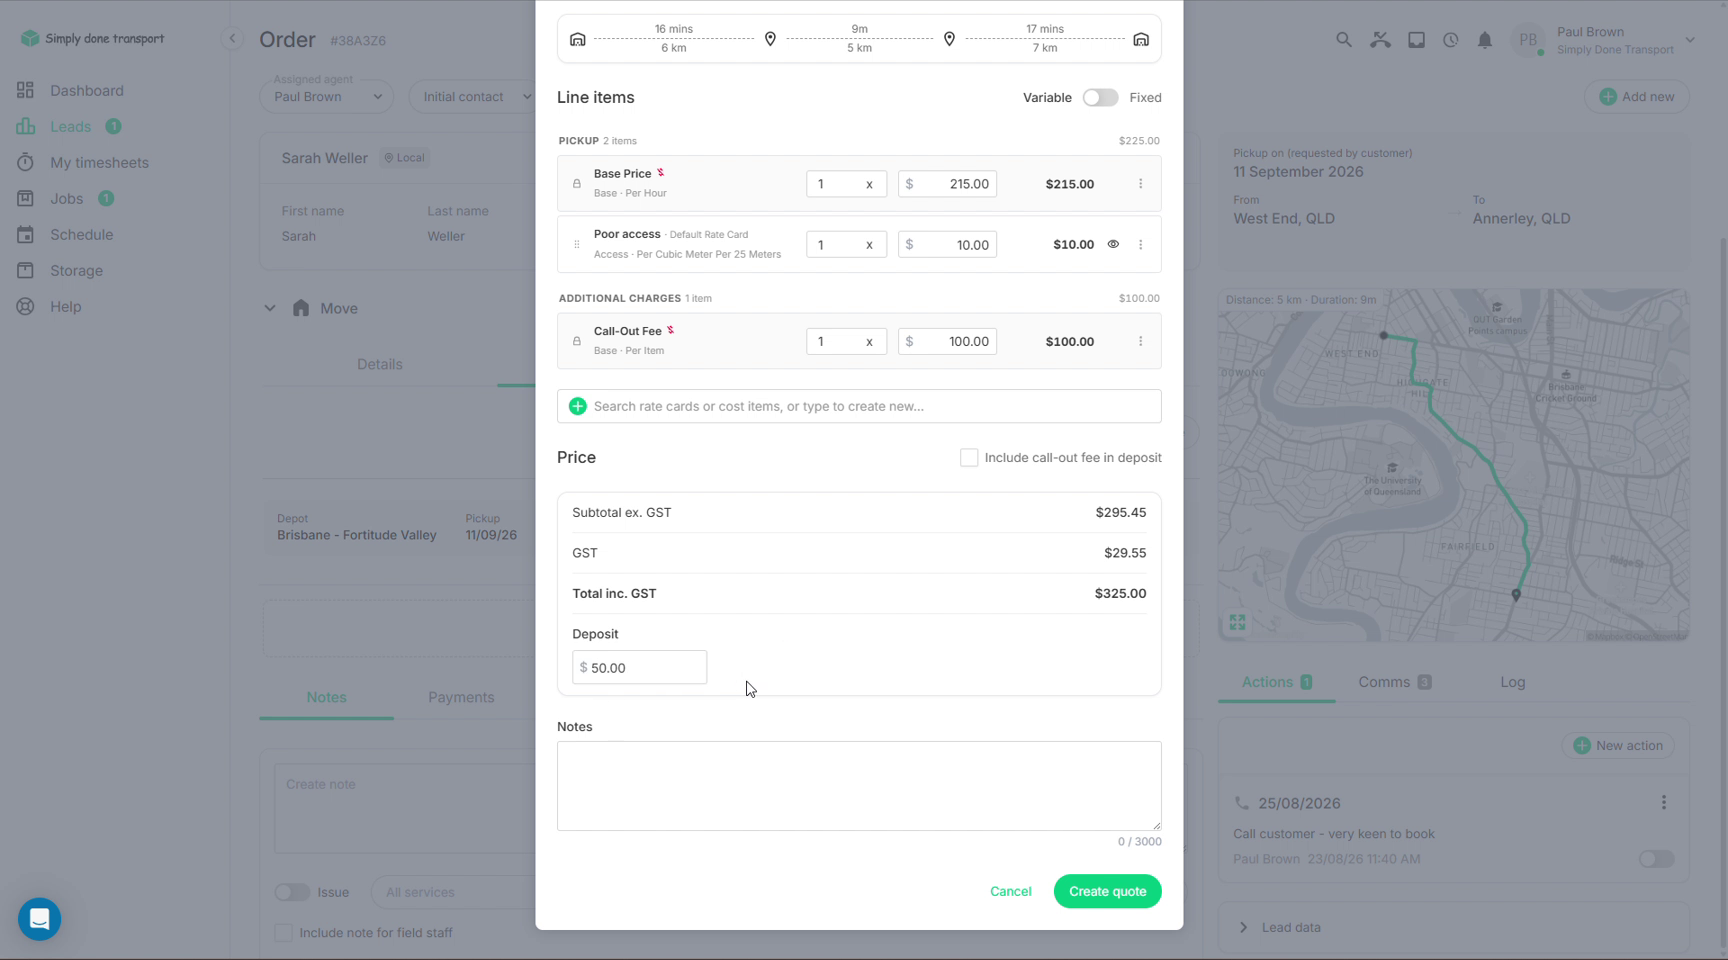
The deposit starts life on the quote. The Deposit field in the quote's Price panel sets what the customer pays up front, and Include call-out fee in deposit rolls the call-out into it. When the job books, by phone or through the portal, that's the amount the first payment asks for, and Get amount pulls it automatically.
Pre-authorisations
A pre-auth puts a hold on the customer's card without charging it; the money "sits there" until you capture it. It's the standard protection for move day: pre-authorise the estimated amount the day before, then capture the true amount once the hours are known. Depending on your settings, ticking the charge option at booking creates the pre-authorisation automatically from the card the customer entered.
Draft payments
A payment can also be created as a Draft, recorded with its amount and method but not yet processed. Use drafts to stage the final payment before the job, or to prepare a charge someone else will confirm. Draft rows sit in the payments list below the processed ones; process (or delete) them from the row's ⋮ menu when ready.
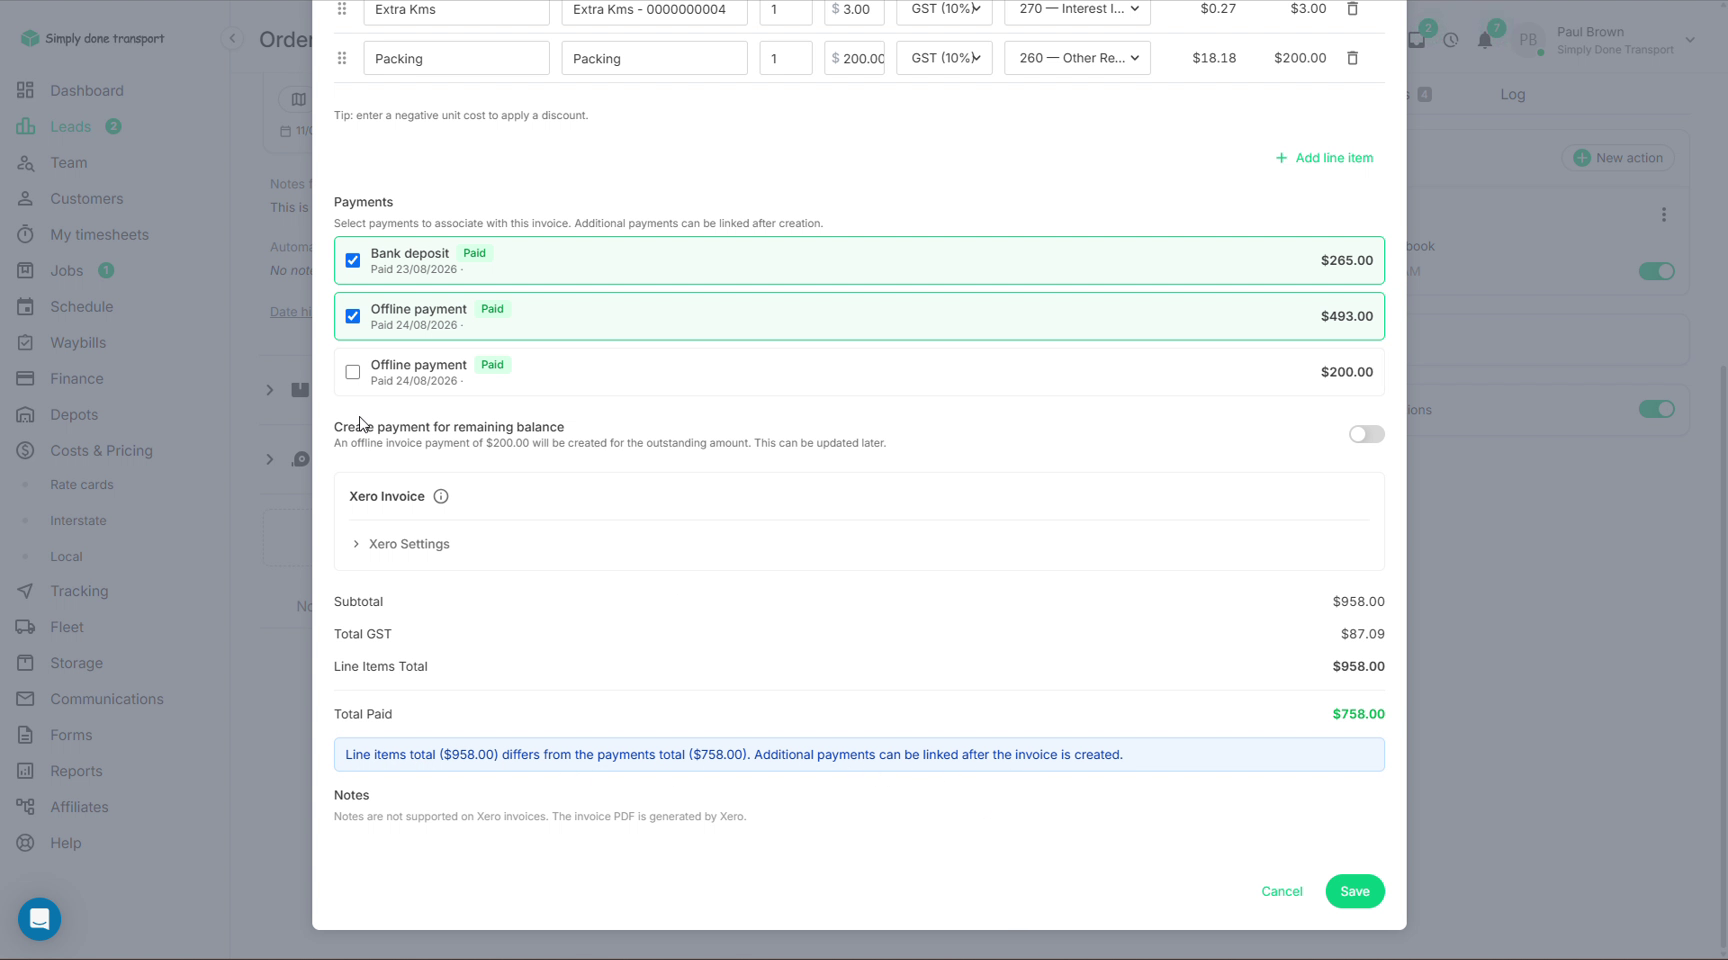
The invoice editor can stage one for you: if the payments linked to an invoice don't cover its total, the Create payment for remaining balance toggle records an offline payment for the difference, ready to confirm when the money actually lands.
Cash on the day: mark as paid
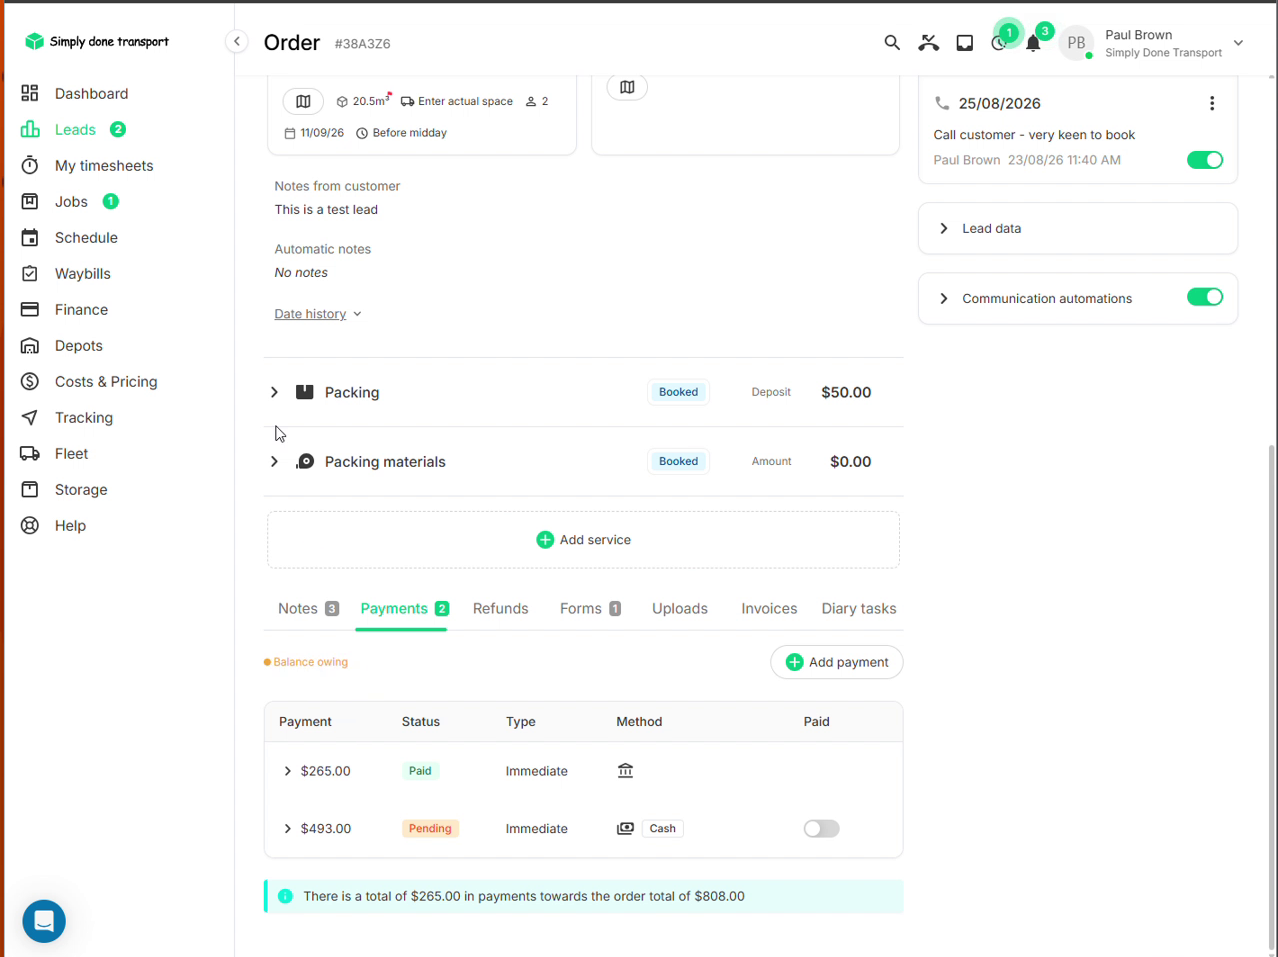
When the crew takes cash (or any offline payment) in the field, the payment lands on the order as Pending with method Cash; the money exists, but the office hasn't confirmed it. Once it's counted:
- Open the order's Payments tab. The pending cash row has a Paid toggle at the end.
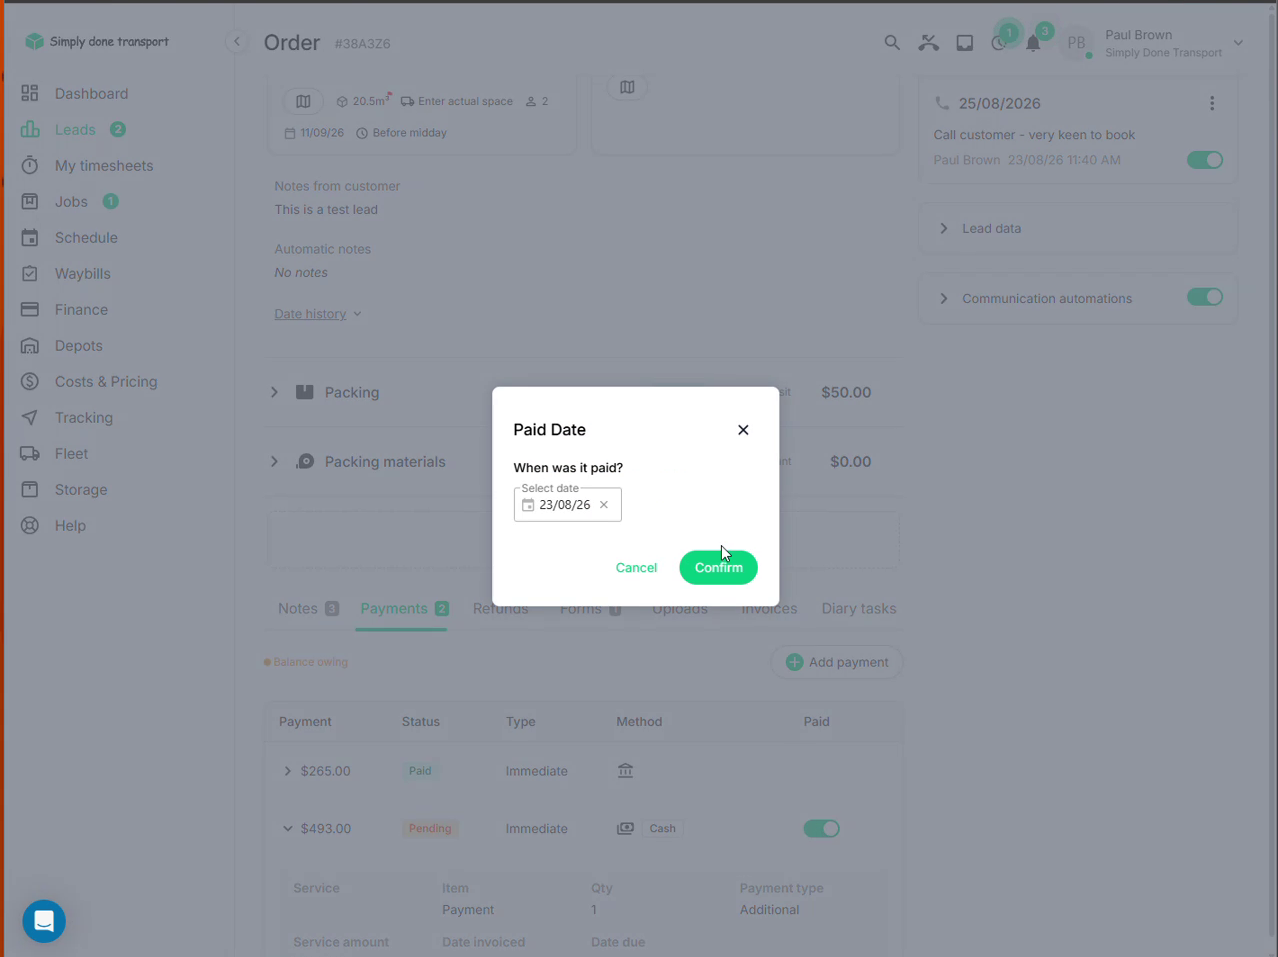
- Flip the toggle, confirm the date in the Paid Date dialog, and the row turns Paid.
- When every payment is in, the chip above the list flips to Settled: job done, money done.
Chasing payment by SMS
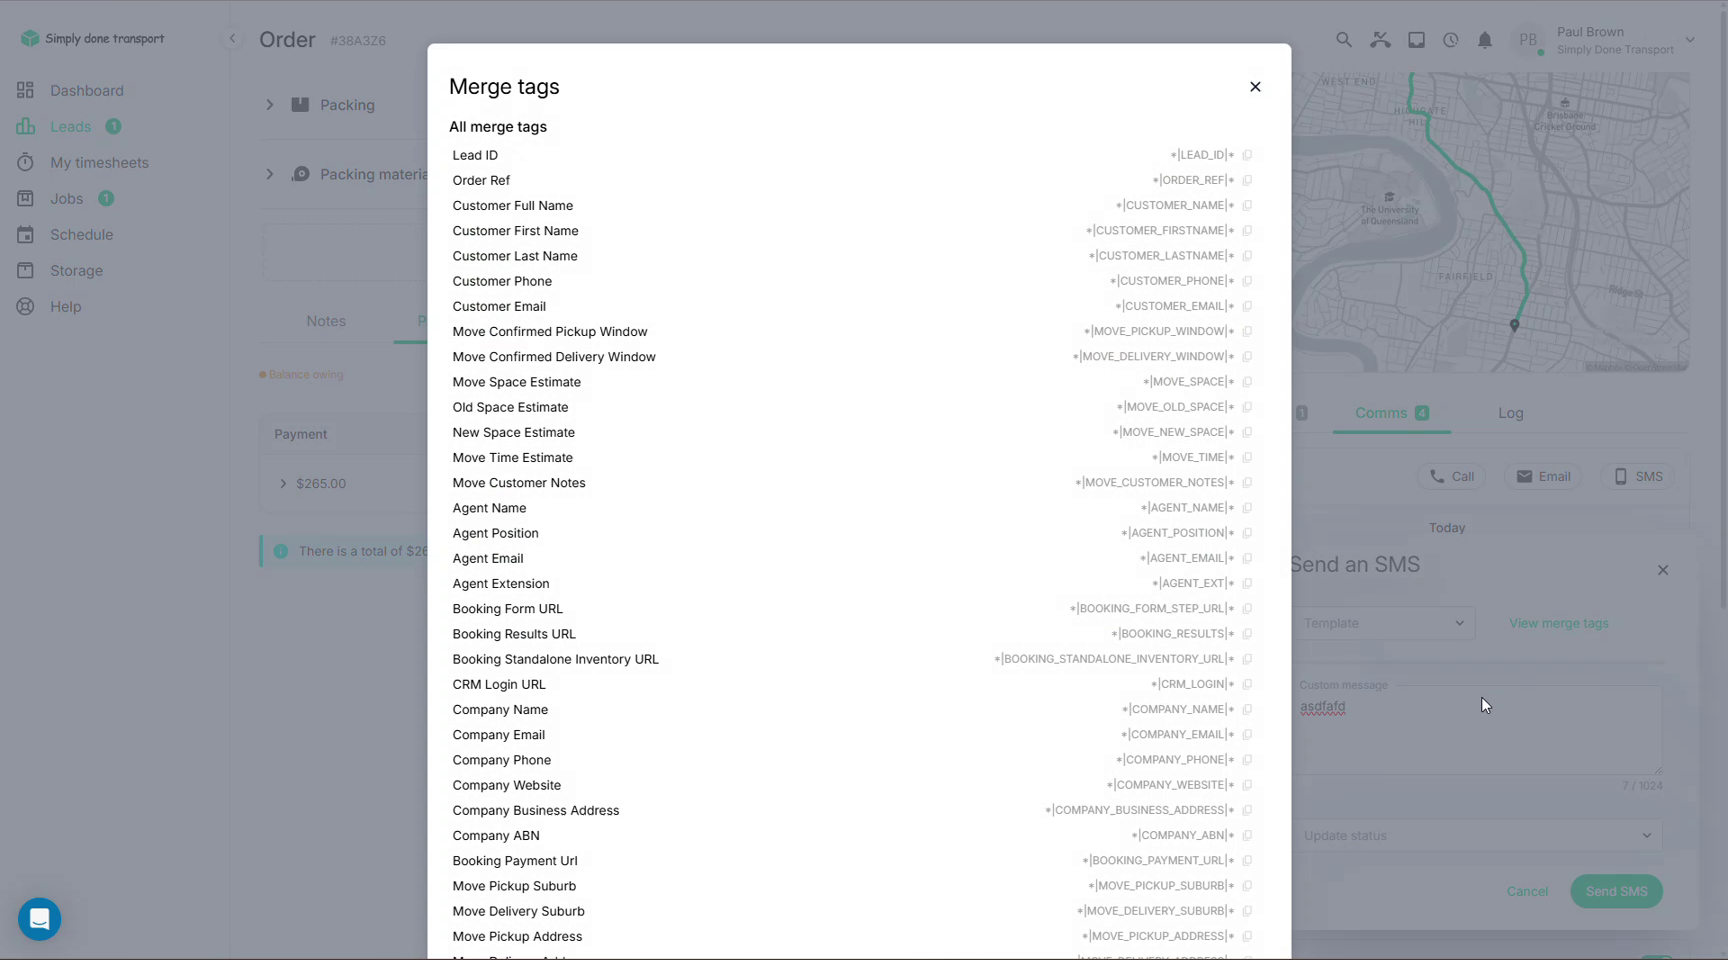
To nudge a customer, open Comms → SMS on the order and use one of your SMS templates (e.g. a payment request with the amount and link) or write a custom message. View merge tags lists every placeholder you can drop in: customer name, amounts, the booking payment URL and dozens more. The Update status dropdown can move the lead/job status in the same action. Replies come straight back into the Comms thread; see Communications.
Finance → Payments: process everything in one place
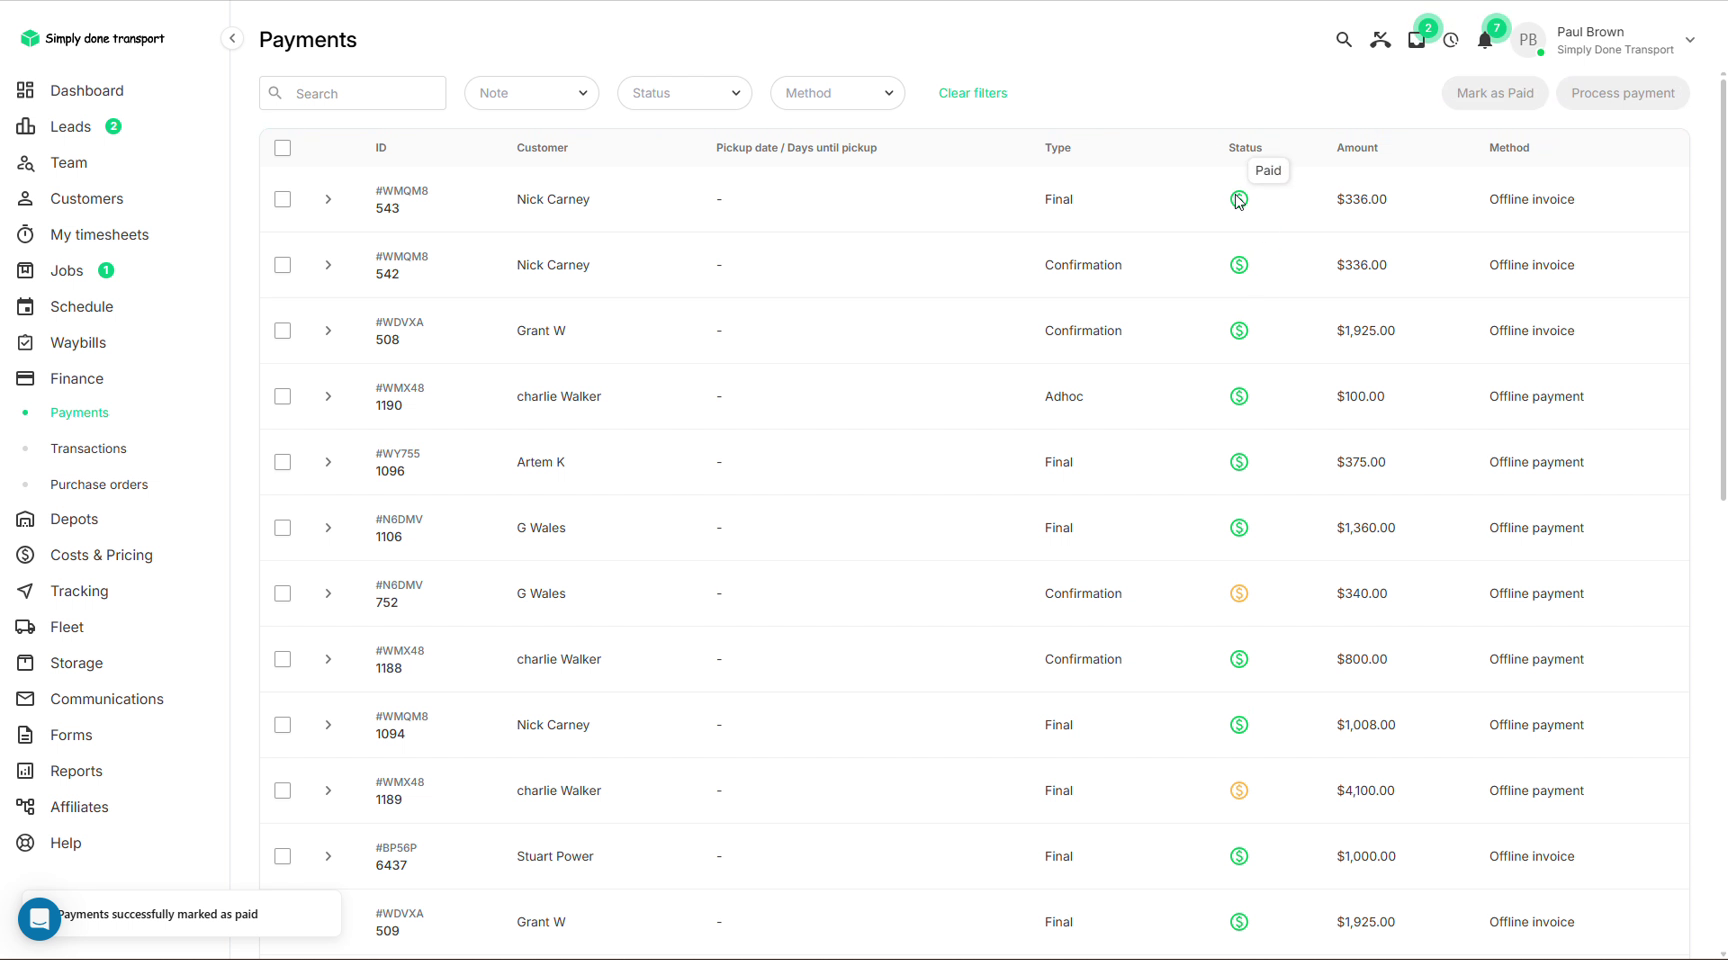
Finance → Payments lists every payment across all orders, searchable and filterable by note, status and method. The Finance menu is only visible to the Owner, Admin and Finance roles. This is where the office works through the money for the day:
- Mark as Paid: confirm offline payments (bank transfers, cash) once they hit your account.
- Process payment: charge pending card payments or capture pre-auths.
The other Finance views (Purchase orders, and Payouts once Stripe is set up) are covered in Finance & Xero.
Finance → Transactions
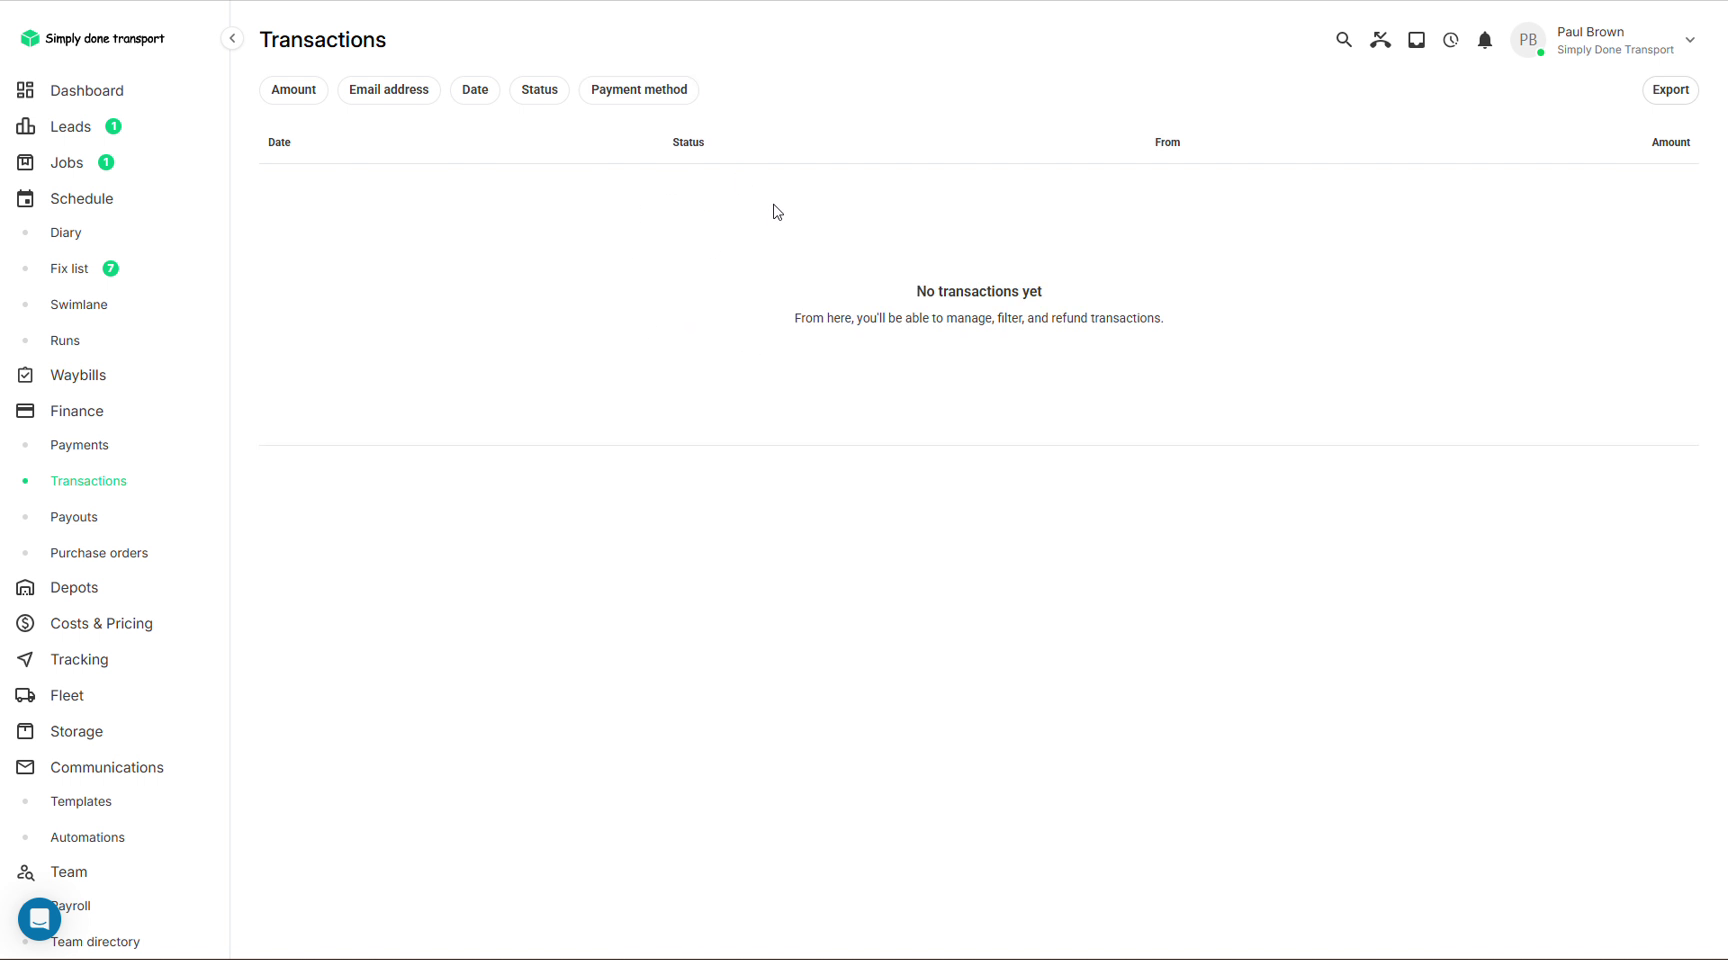
Finance → Transactions is the gateway ledger: every card transaction with its status (Succeeded, Refunded, Cancelled), payer, amount and timestamp. Filter by amount, email, date, status or method, and Export for your accountant or reconciliation.
Invoices
- Open the order's Invoices tab (bottom tabs) and click New invoice.
- Select the services to invoice; their quoted line items arrive with description, quantity (hours) and unit price, ready to edit.
- Tick the payments already received so they're applied to the invoice, then save. The invoice appears in the tab with its number, amount and an Unpaid/Paid status.
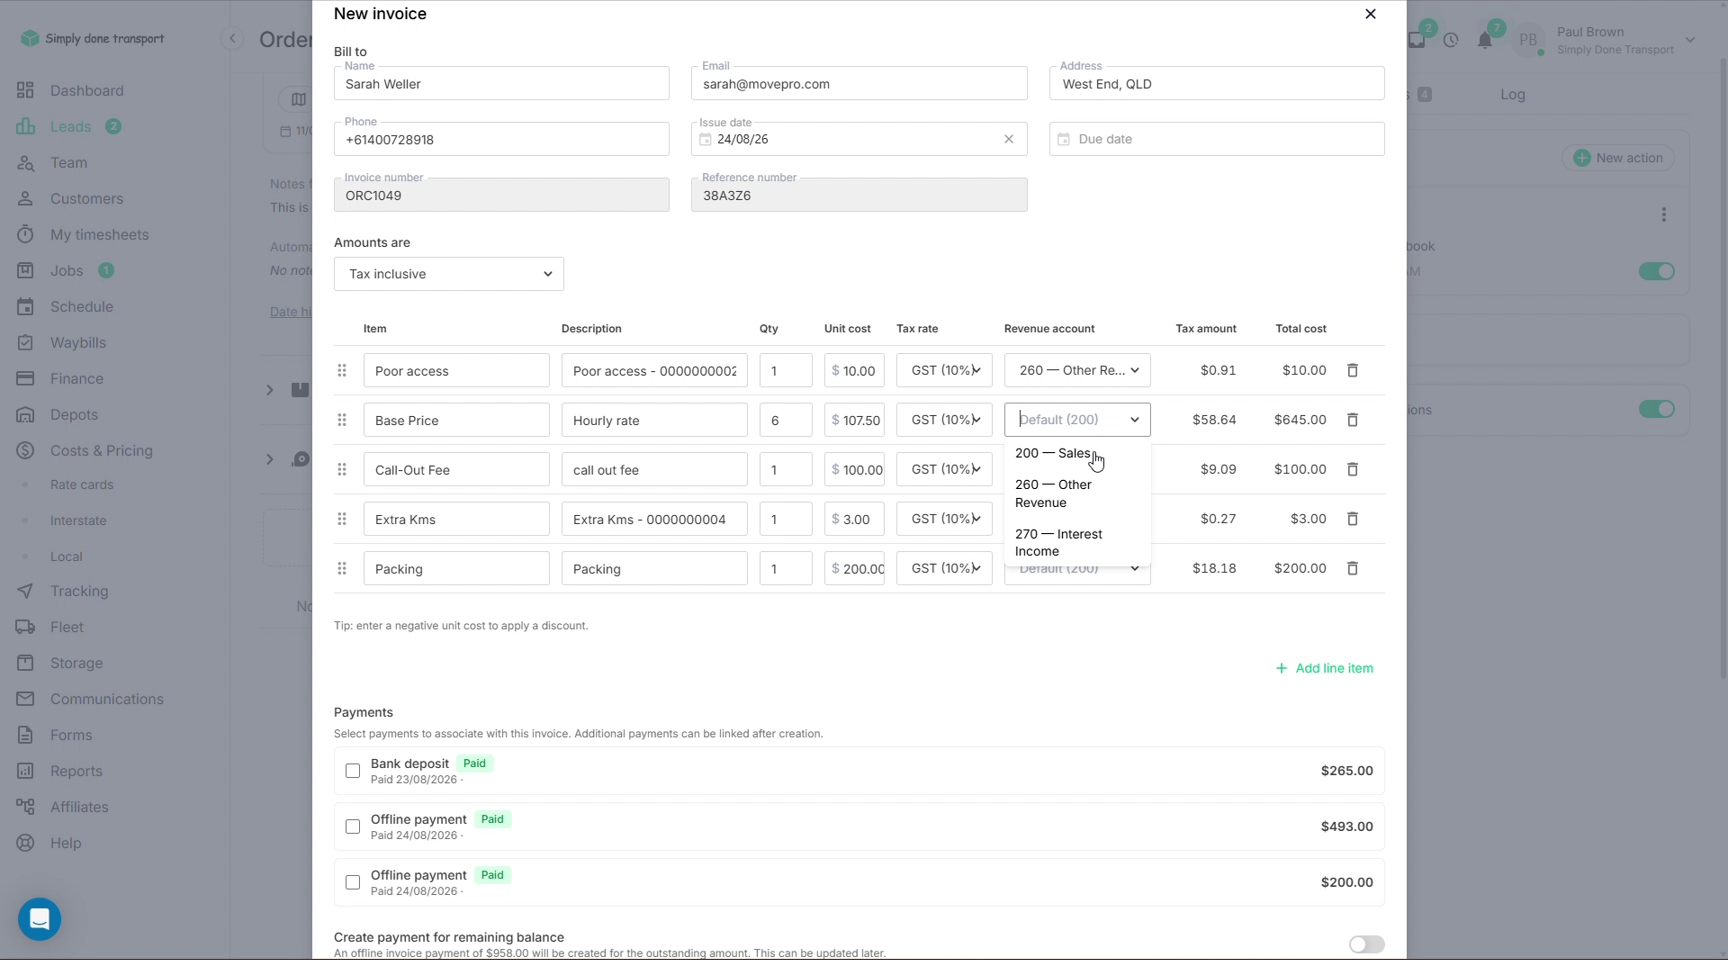
The editor builds each line with a description, quantity, unit cost and tax rate; existing payments on the order can be linked to the invoice, and a toggle creates an offline payment for whatever balance remains. With Xero connected, every line also carries a revenue account, numbering comes from Xero, and the saved invoice syncs automatically, showing a Xero tag on its row. Sync, voiding and account mapping are covered in Finance & Xero.
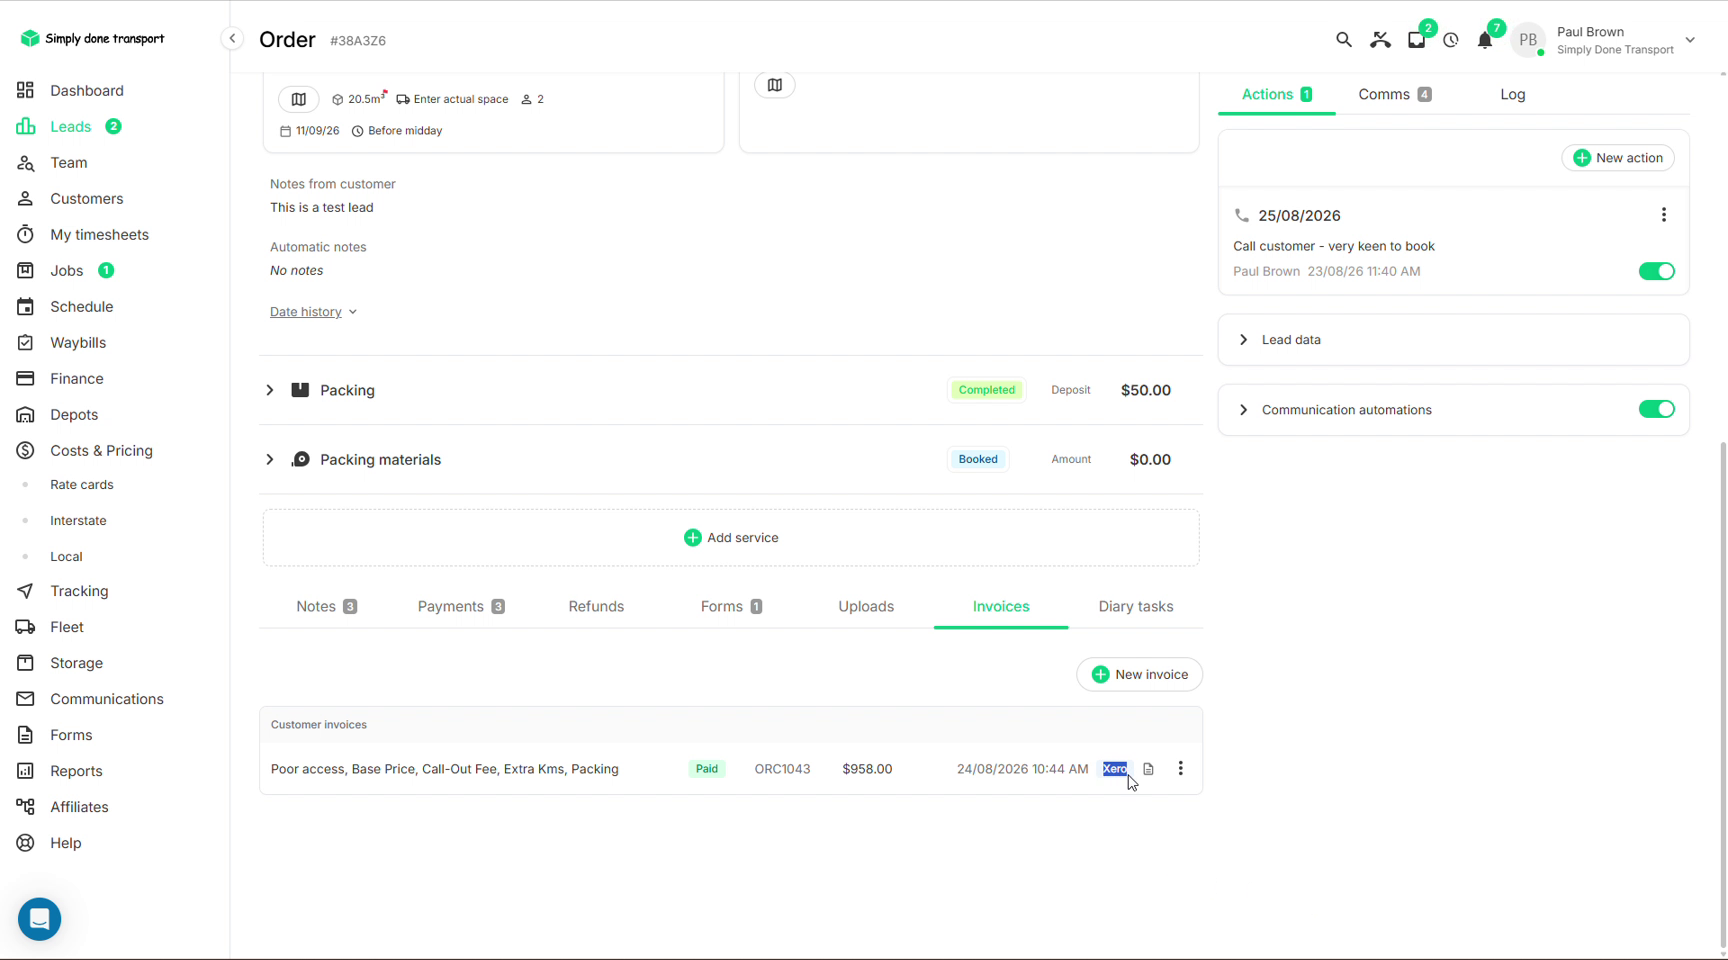
The row's document icon opens the tax invoice itself. With Xero connected it's generated by Xero using the branding theme you picked; without Xero, the numbering follows the prefix and sequence from Payment settings.