Scheduling
Booked jobs become scheduled tasks in the diary, where you assign crews and trucks, watch your capacity in cubic metres, and group tasks into runs for the day. The diary is dispatch HQ: whatever is assigned here is what the crew sees in their mobile app.
The diary
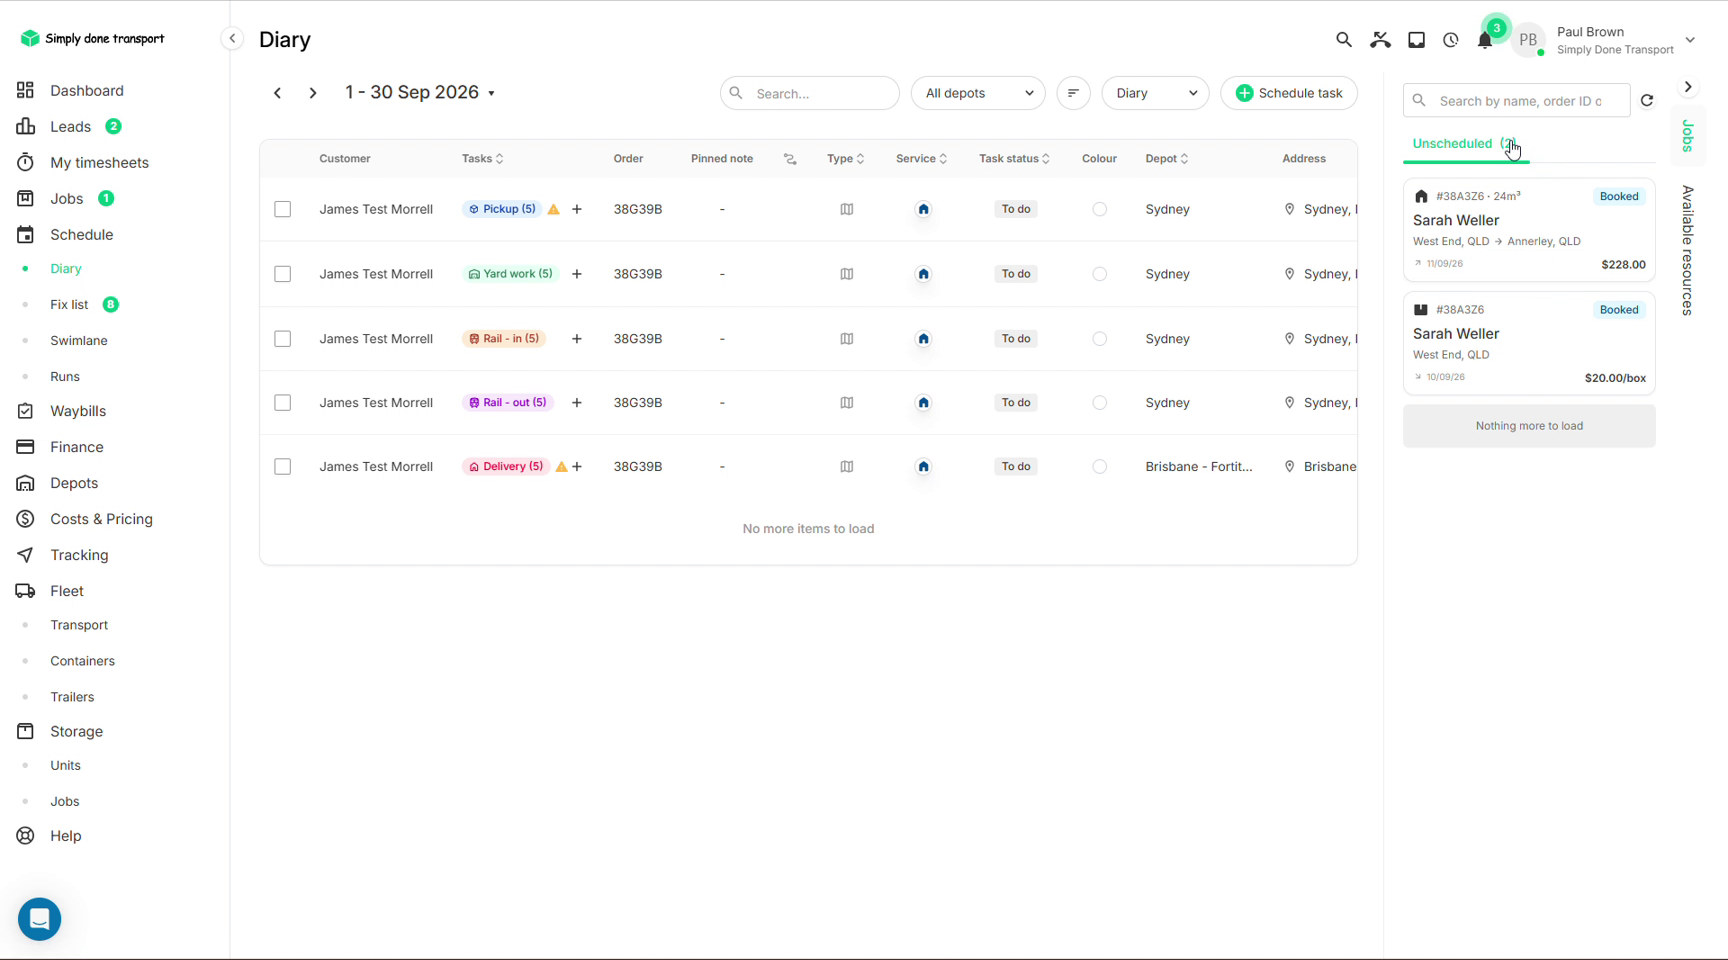
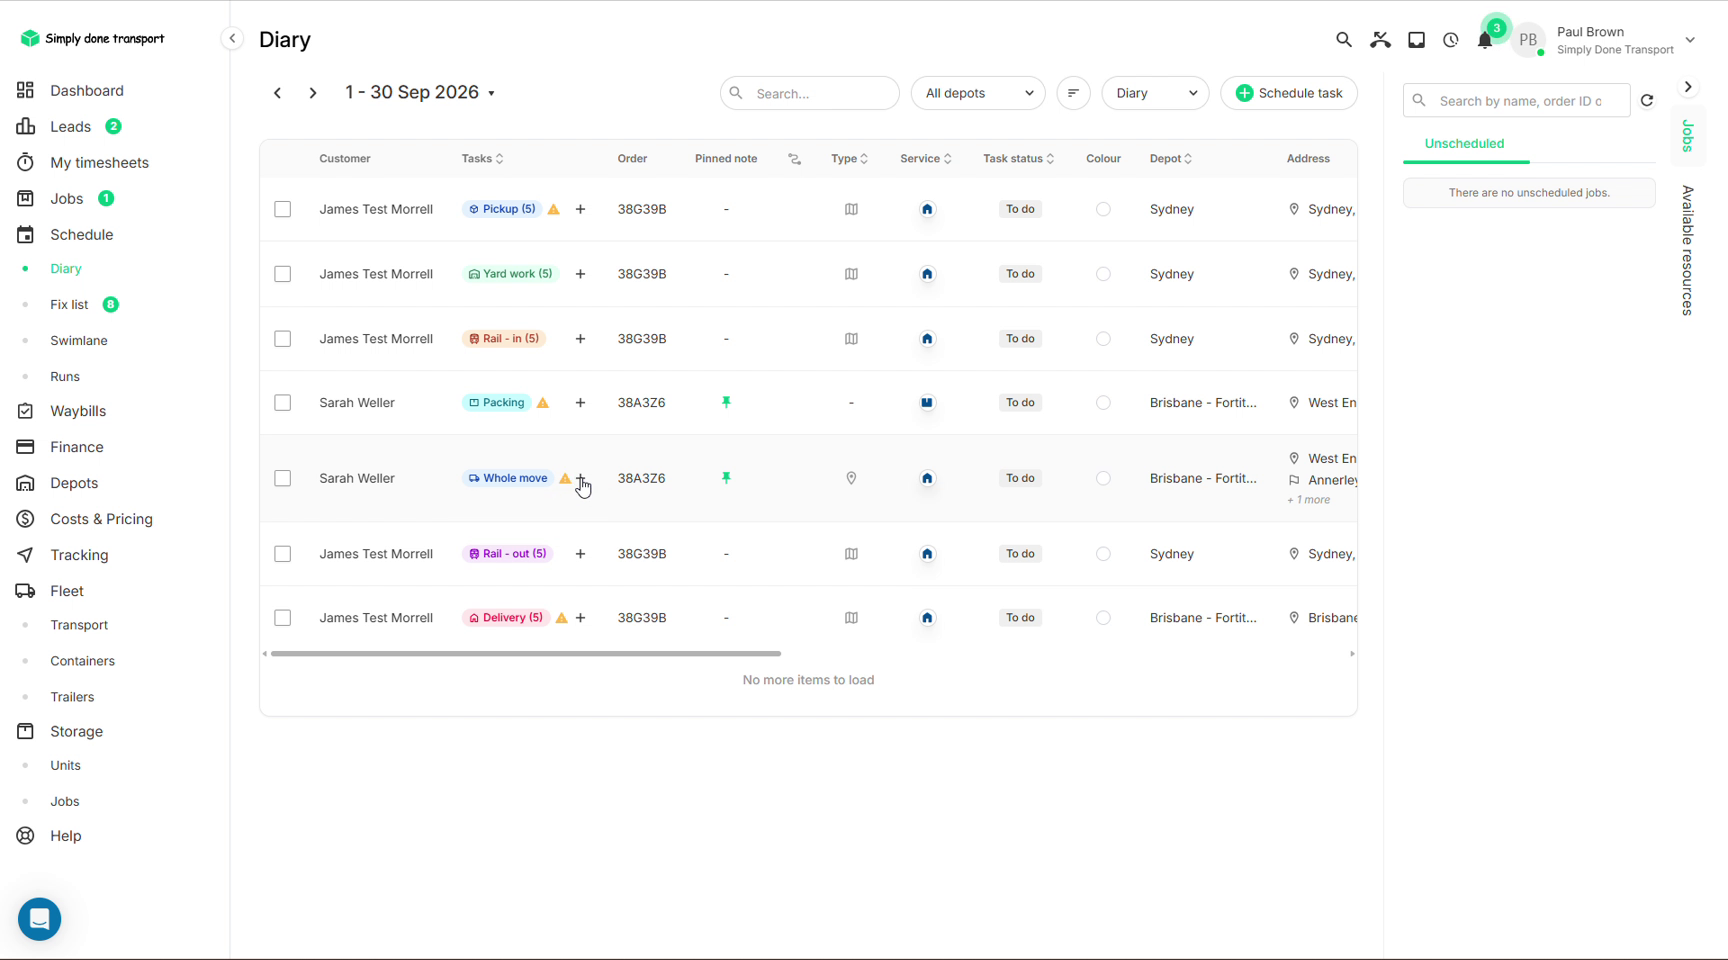
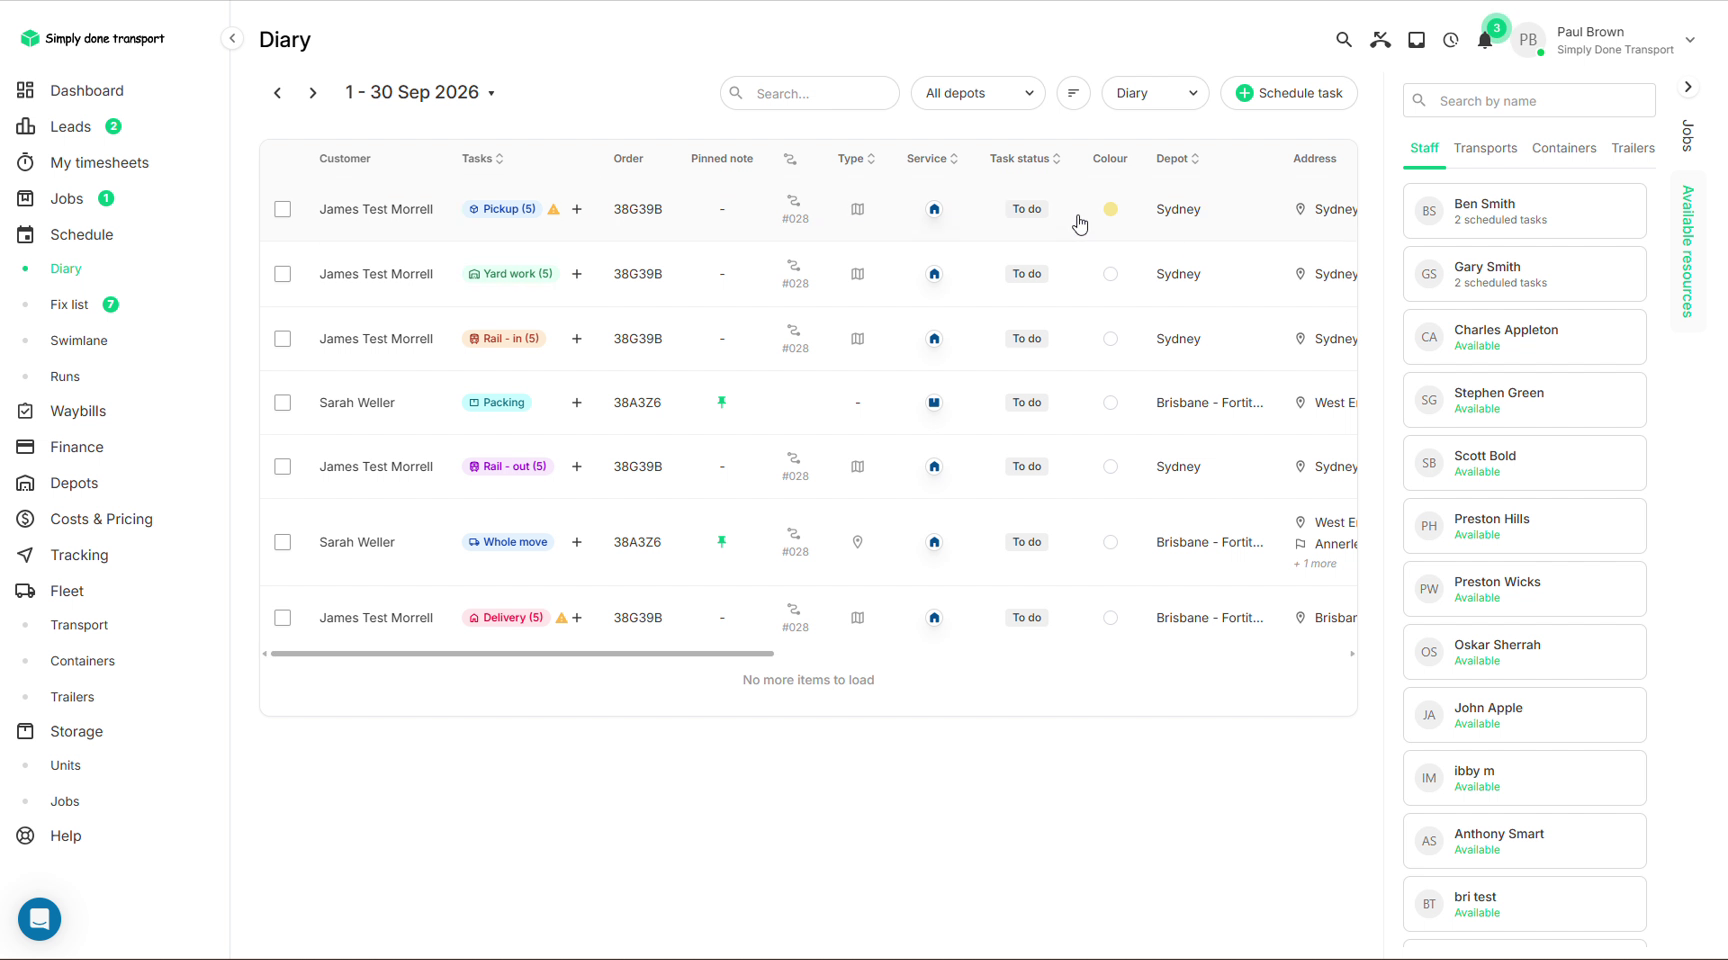
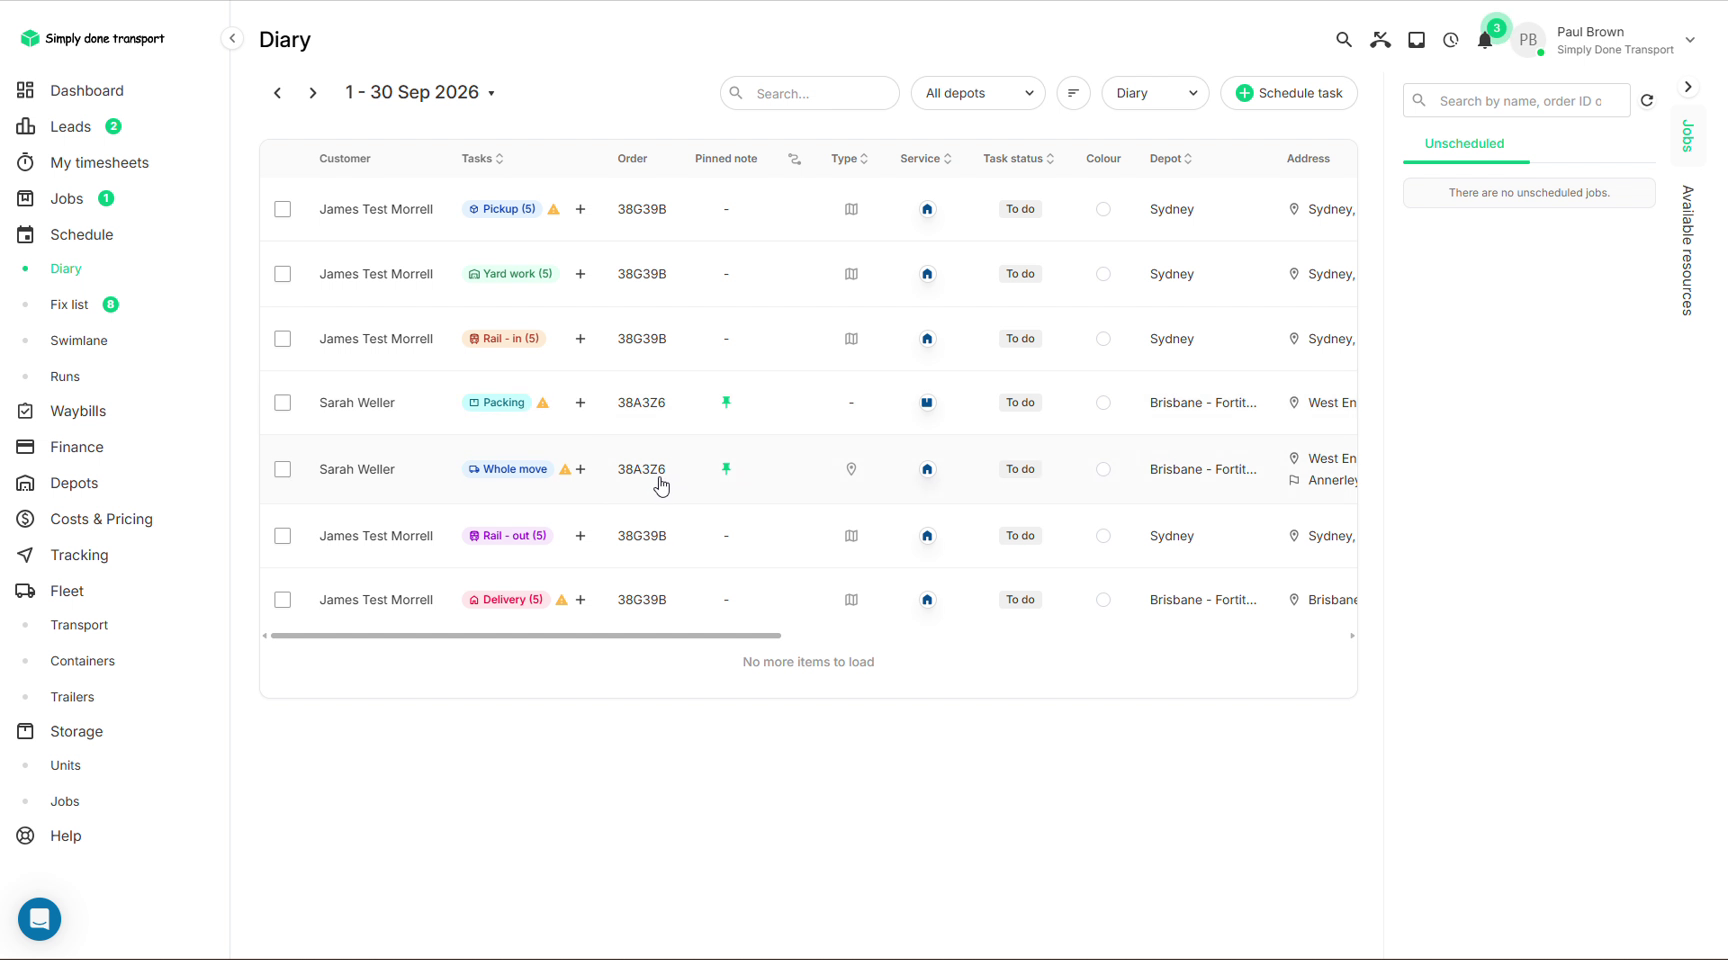
Go to Schedule → Job diary. Each row is a scheduled task for the selected date range: customer, task chip, order number, service icon, task status, depot and addresses, with more columns off to the right. Jobs that are booked but not yet scheduled wait in the Unscheduled rail on the right; click one to schedule it. Hover any icon in the list for a plain-English tooltip. Every office role except Finance can open the diary; crews see their assignments in the app instead. Everything in this diary hangs off an order; company work that isn't tied to a job lives in the internal diary.
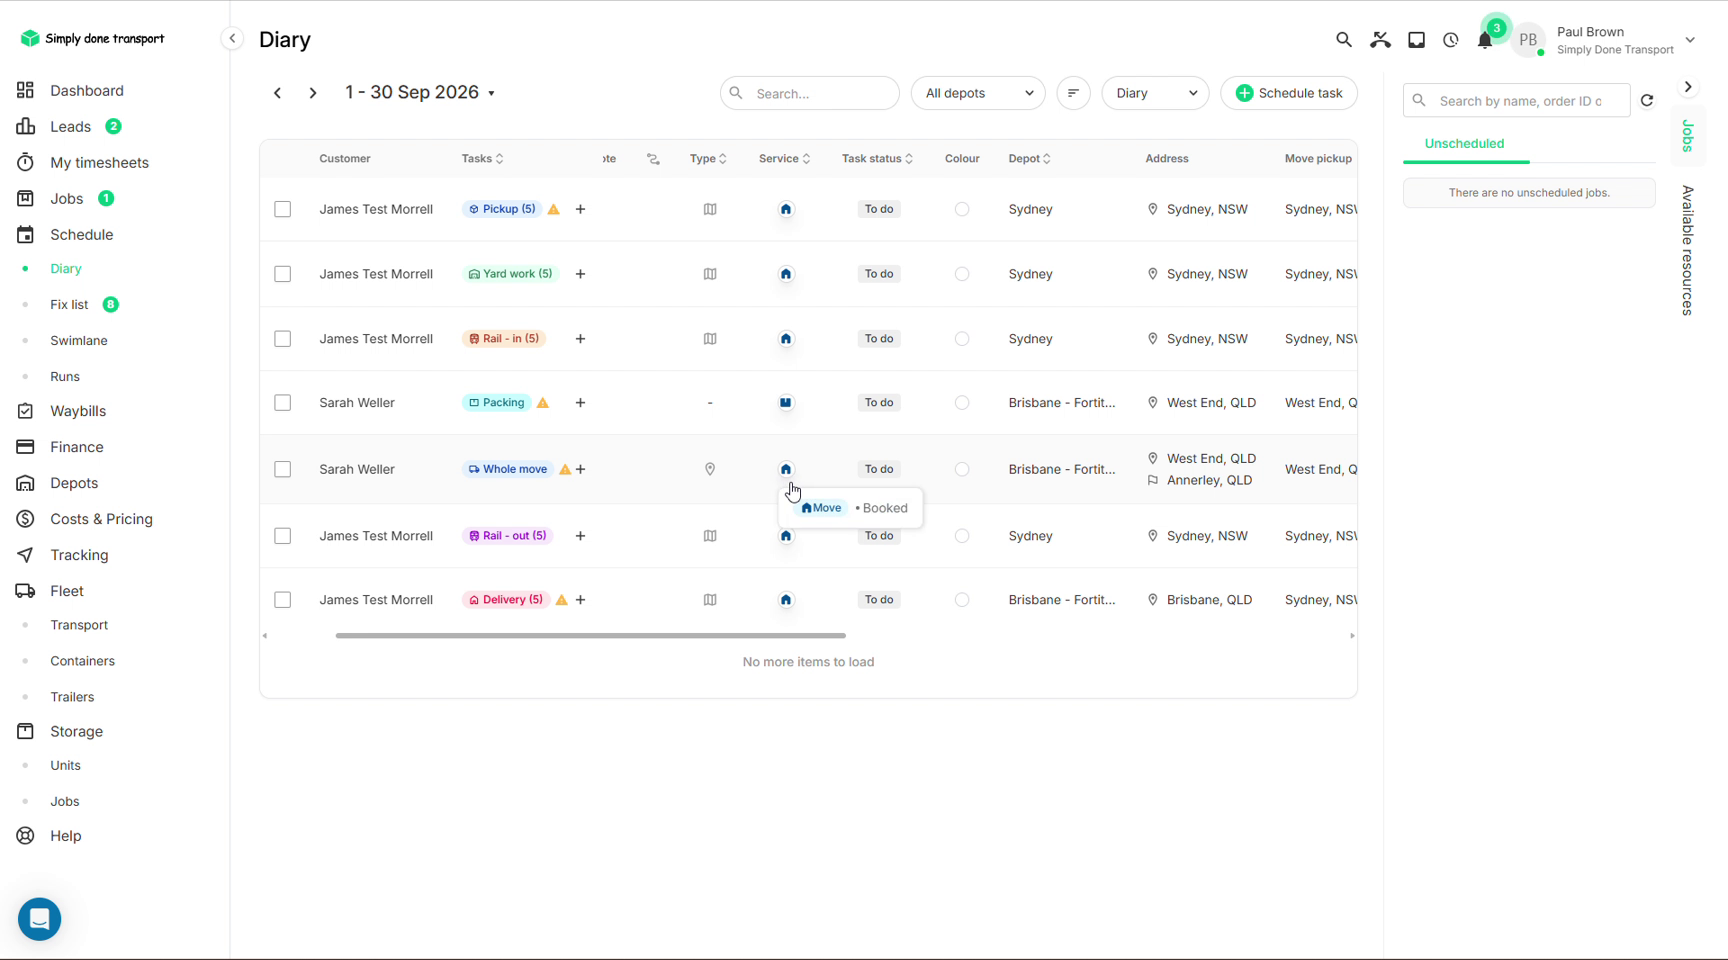
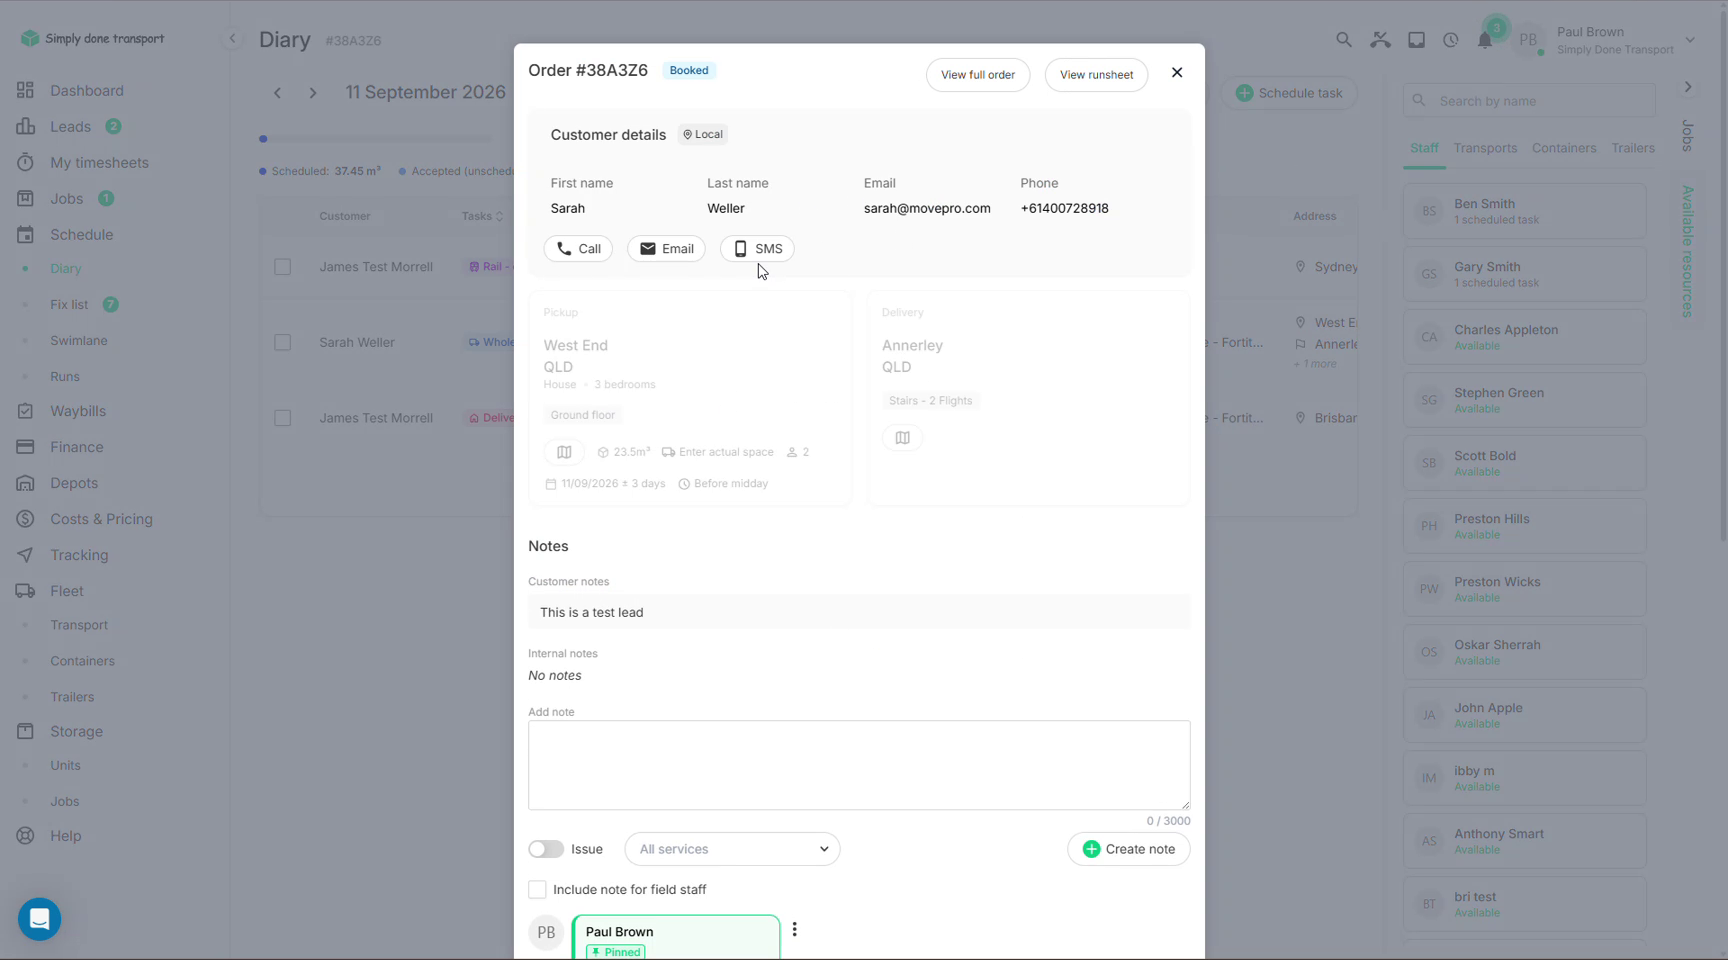
Click a task row to open its panel: customer details with call, email and SMS buttons, the pickup and delivery details, and the order's notes. Tick Include note for field staff when adding a note the crew should see on the day. View full order and View runsheet jump you out to the full pages.
Schedule a task
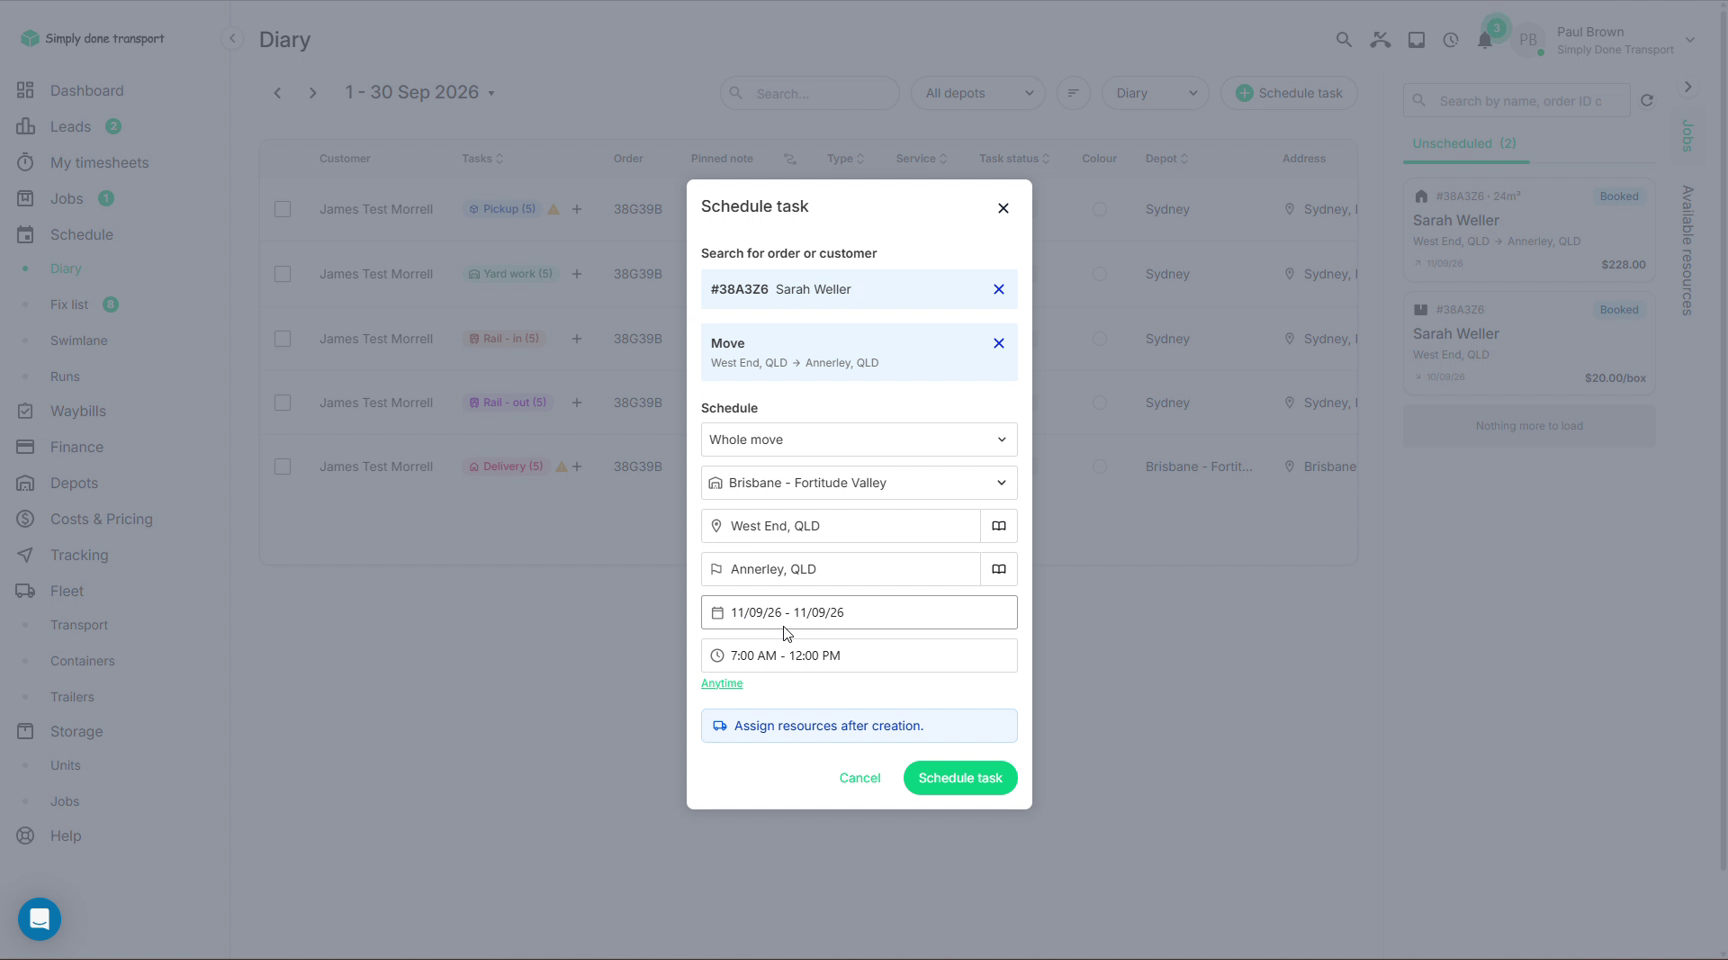
- Click Schedule task (top right of the diary), or click an order waiting in the Unscheduled rail.
- In the dialog, choose what to schedule. Whole move is the usual choice, but a job can have as many tasks as you like: separate pickup and delivery legs, a packing day before the move day, extra pickups. Each task gets its own line in the diary.
- Confirm the depot, addresses, date and time window, or click Anytime if the crew can slot it in whenever.
- Leave Assign resources after creation ticked and click Schedule task.
The task types on offer depend on the service being scheduled:
| Service | Task types it can schedule |
|---|---|
| Move | Whole move, Pickup, Delivery, Movement, Transfer, Transit, Handover in / out, Rail in / out, Quarantine, Fumigation, Bug spray, Clean, Hire, De-hire, Yard work, Miscellaneous |
| Storage | Storage, Client access, End storage, Miscellaneous |
| Packing | Packing, Collect materials, Packing materials delivery, Miscellaneous |
| Packing materials | Collect materials, Packing materials delivery |
| Unpacking | Unpacking, Collect materials, Miscellaneous |
| Pet transport | Pet pickup, Pet delivery, Miscellaneous |
| Car transport | Vehicle pickup, Vehicle delivery, Vehicle depot pickup / delivery, Miscellaneous |
To add another task to a job that's already in the diary, hover its task chip and click the + that appears, which is handy for adding a packing day or an extra delivery leg without leaving the list.
Multiple pickup and delivery addresses
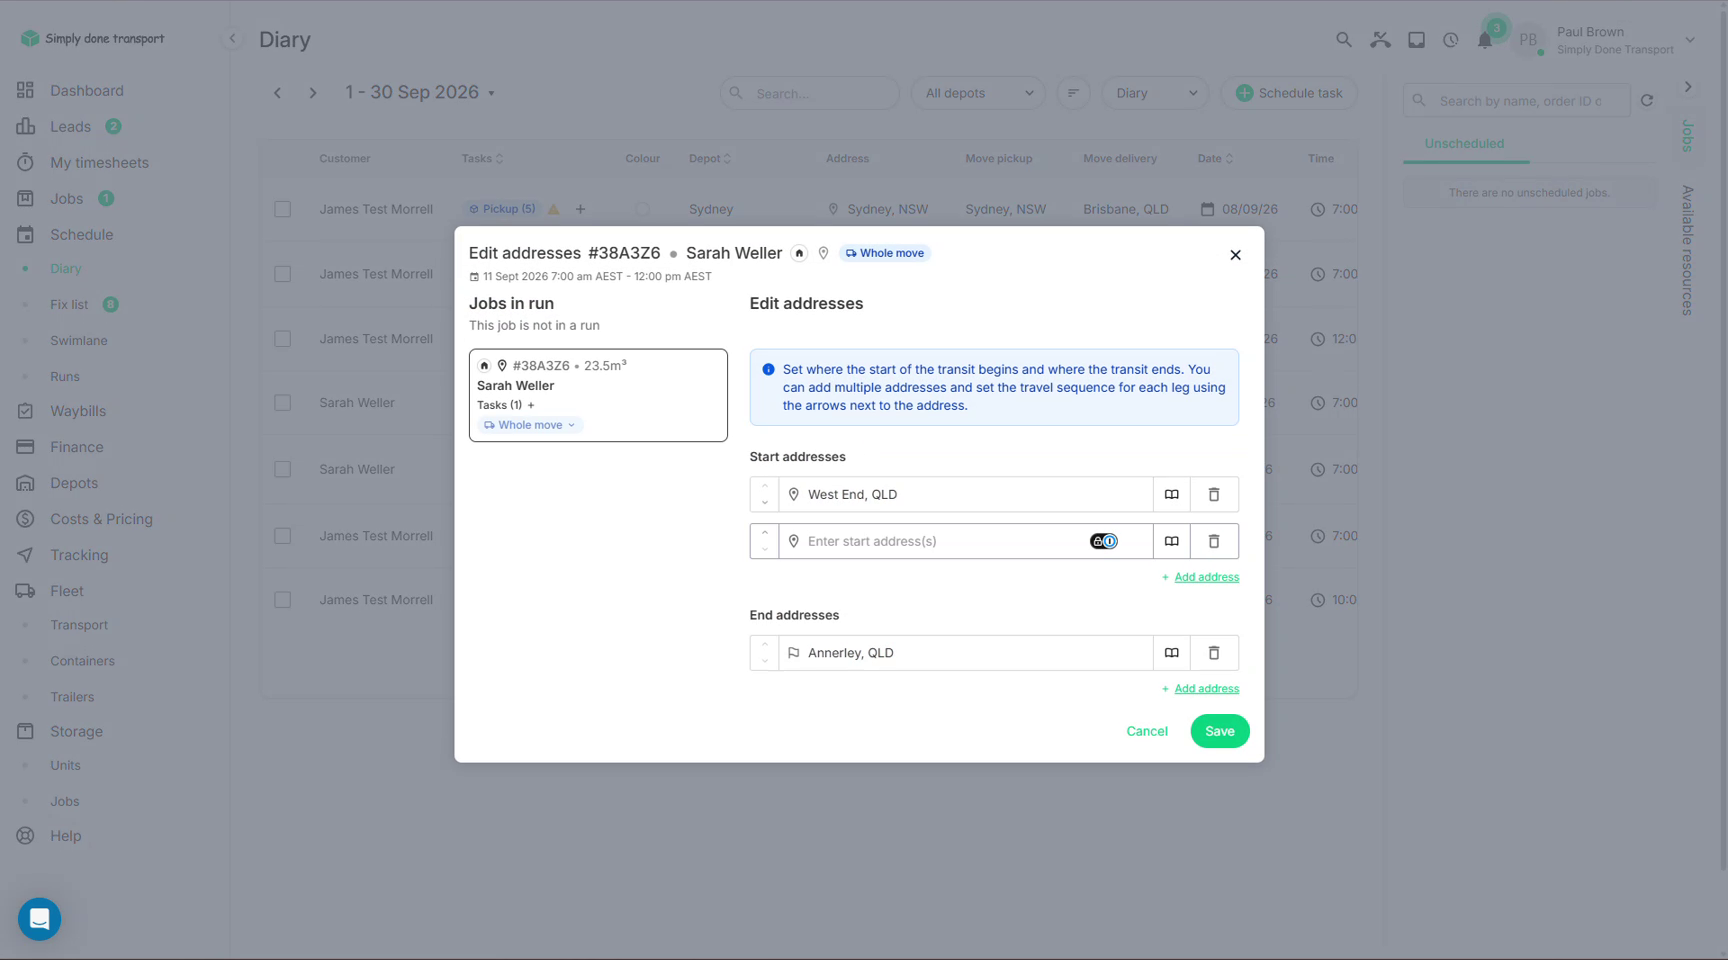
Jobs with two pickups, a storage stop or split deliveries are handled on the task's addresses. Open the task and choose Edit addresses:
- Start addresses are where the transit begins, End addresses where it finishes. Click Add address under either list to add a stop.
- Use the up/down arrows next to each address to set the travel sequence for the leg.
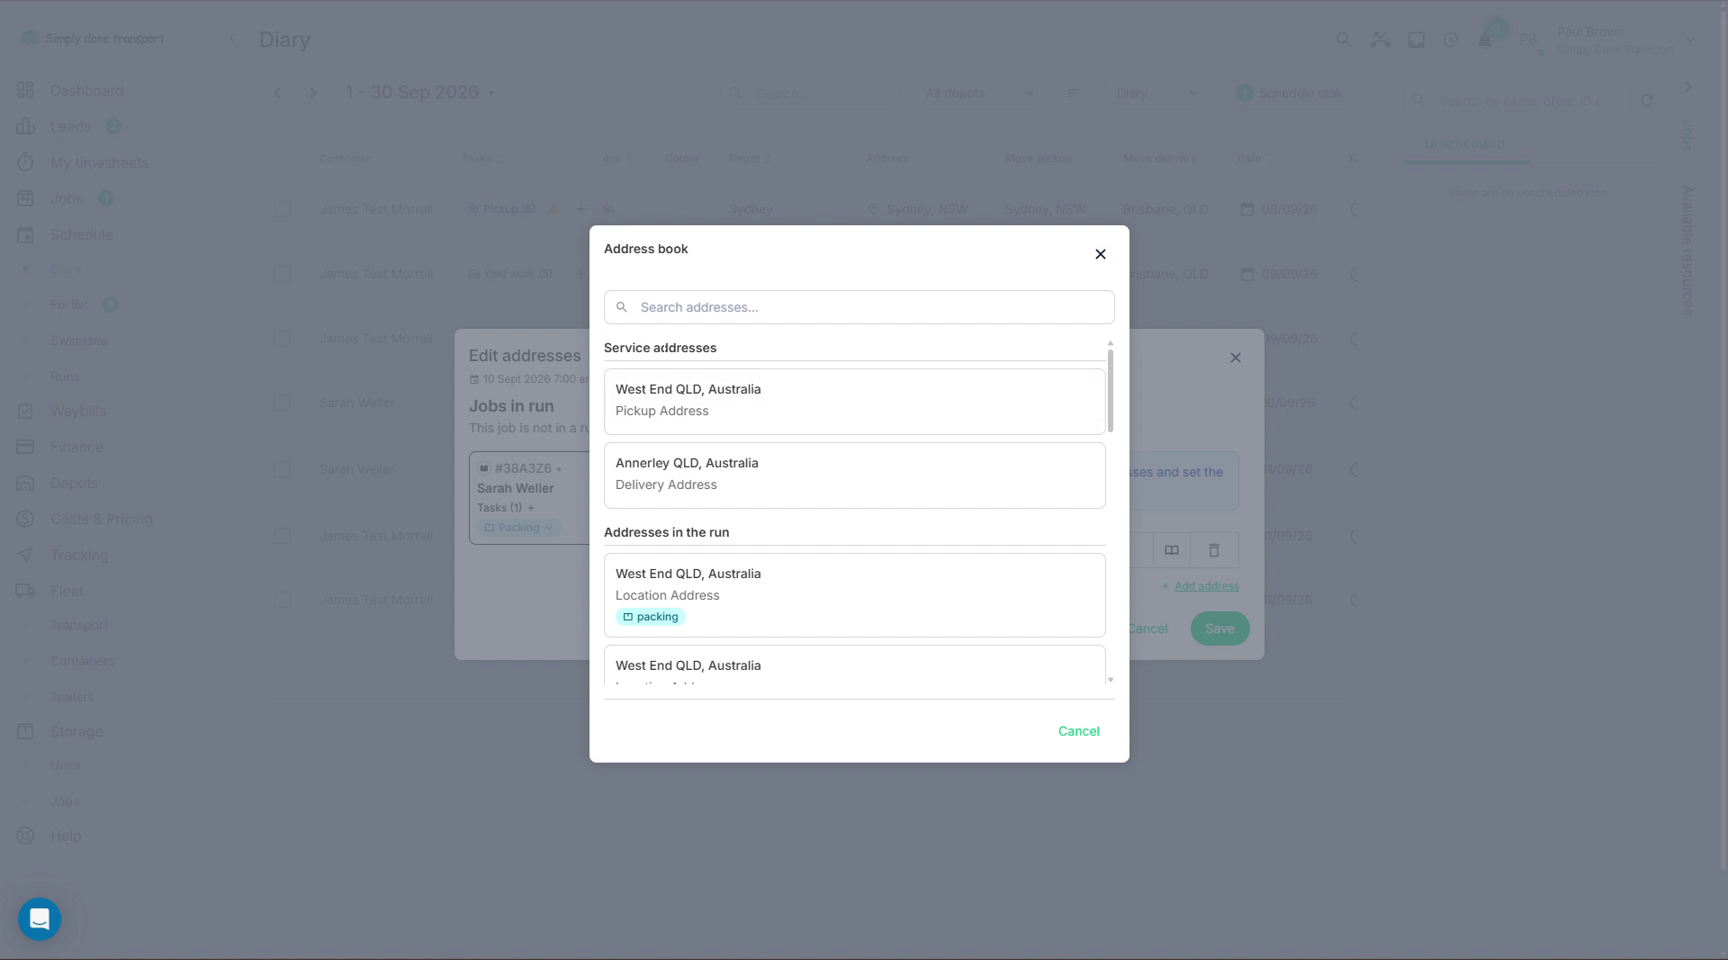
- The book icon opens the Address book: every address already on the order or in the run, ready to reuse.
Assign staff and trucks
Back in the diary, each task row has columns for staff, transports, containers and trailers. The Available resources rail on the right shows the same pools: who's free and how many tasks each person or truck already has that day.
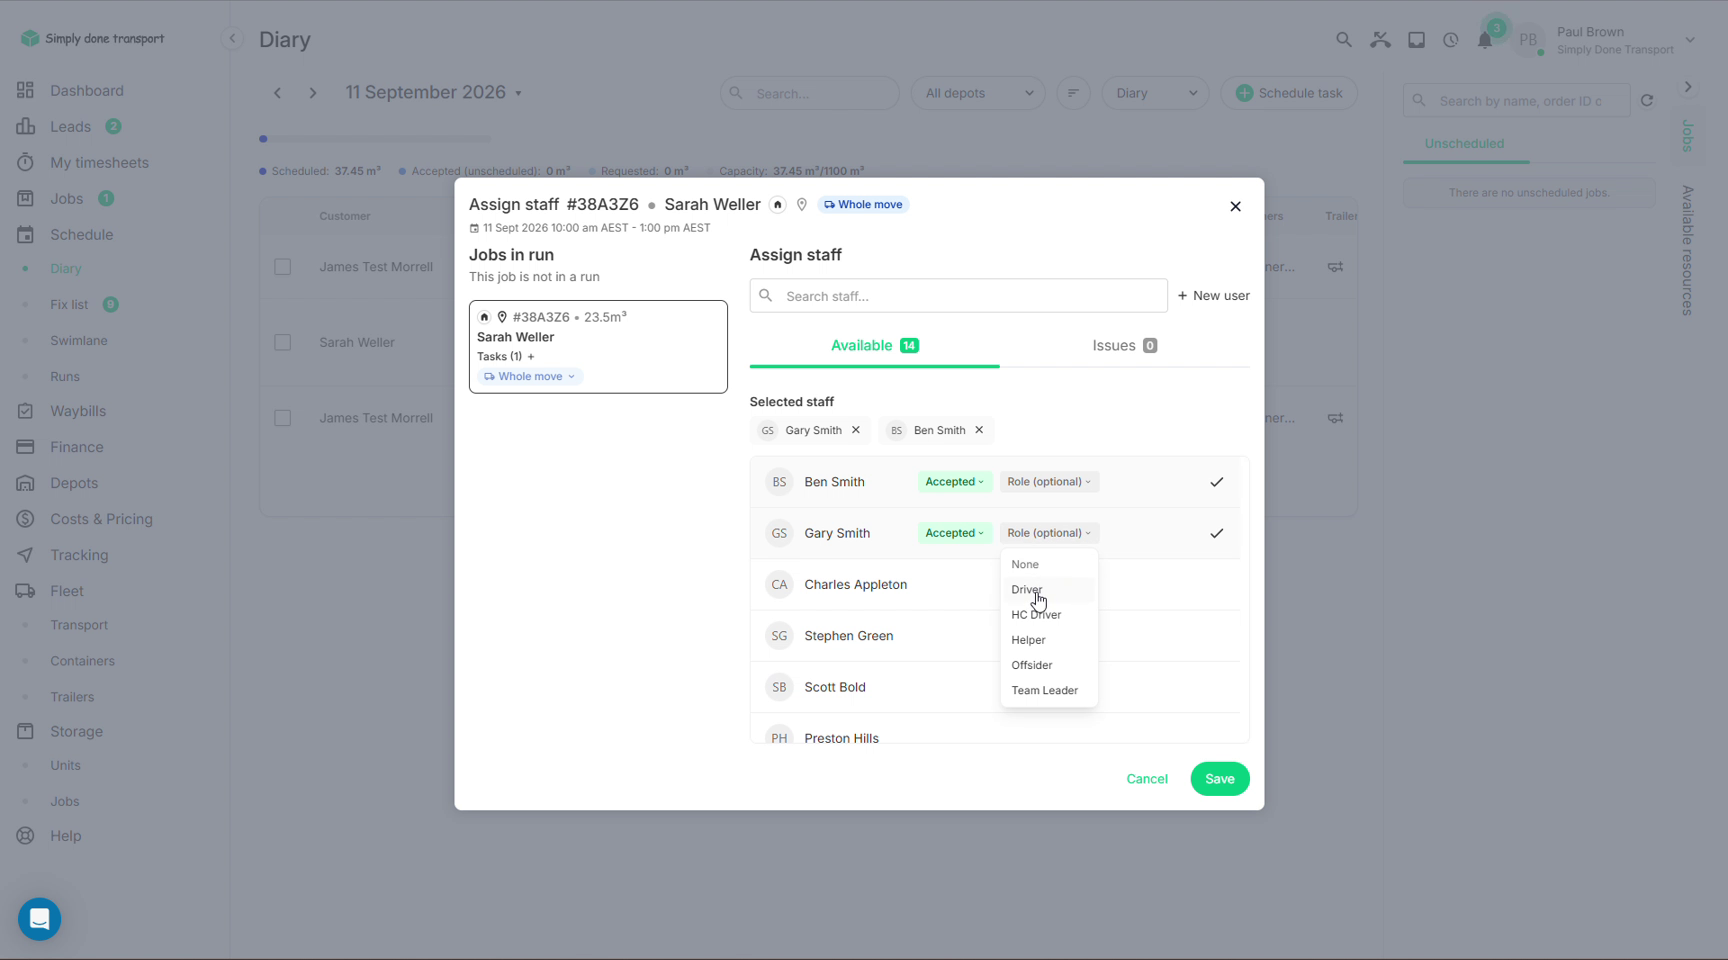
- Click the staff column on the task row. Tick the crew members for the job (you can assign several at once) and give each a Role (Driver, Offsider, Team Leader…). Assigned staff see the job in their mobile app within a couple of minutes, and the chip next to their name flips to Accepted once they confirm it.
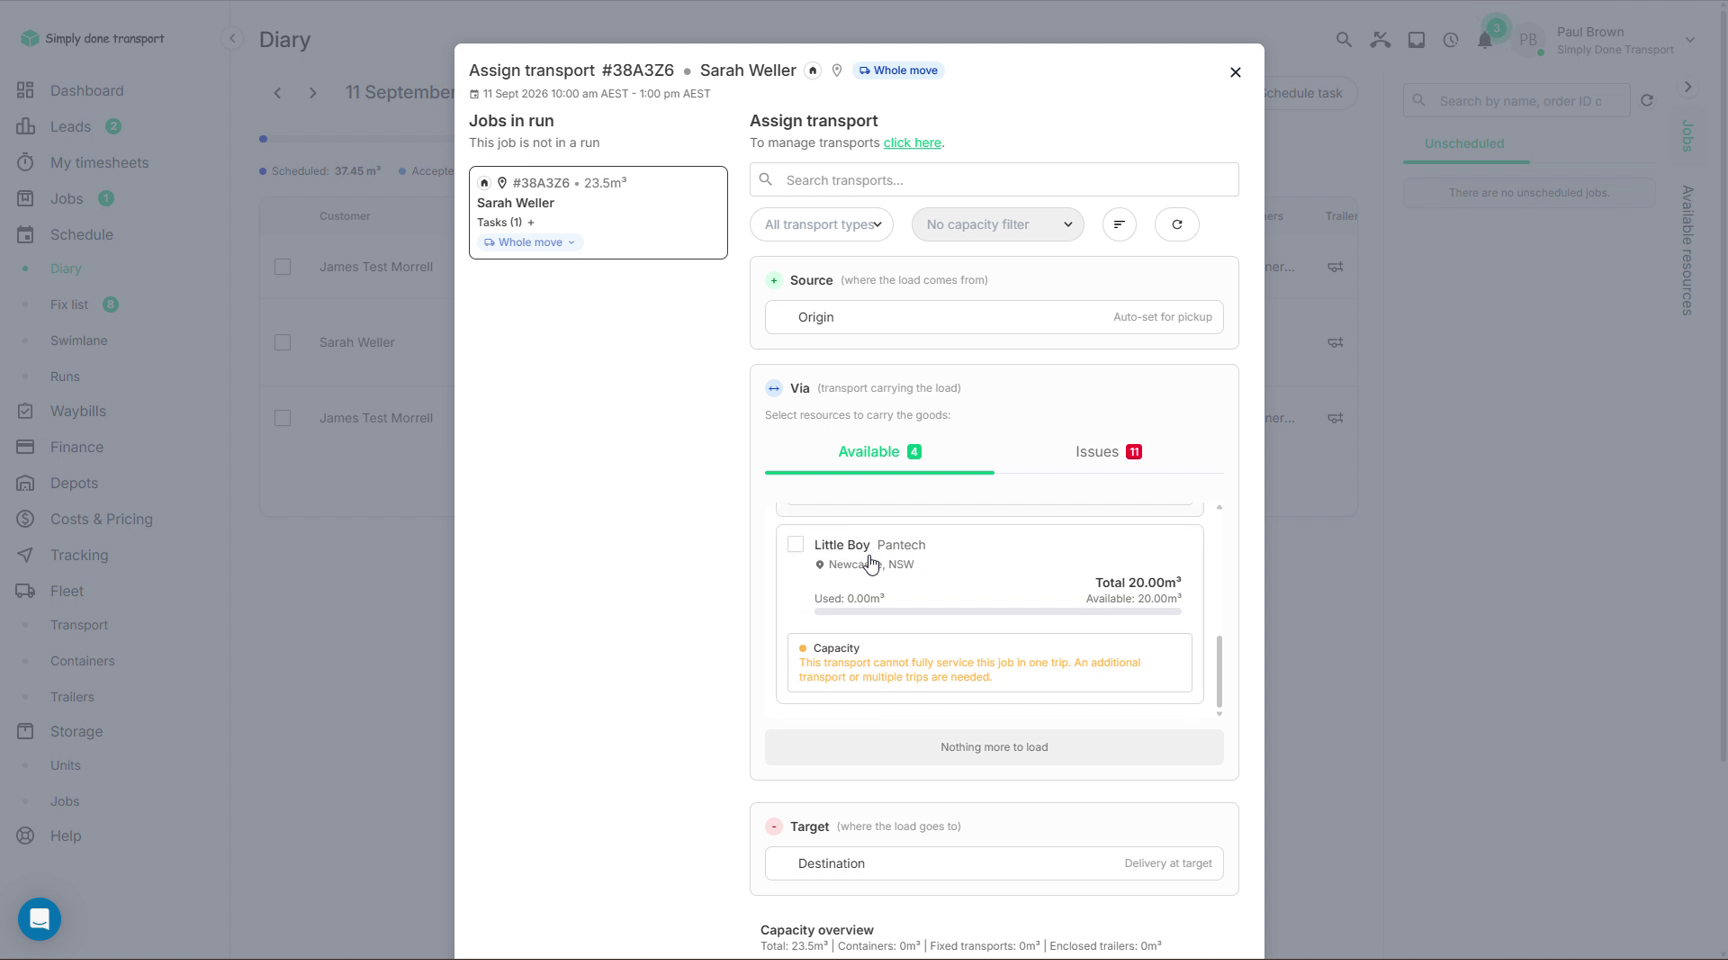
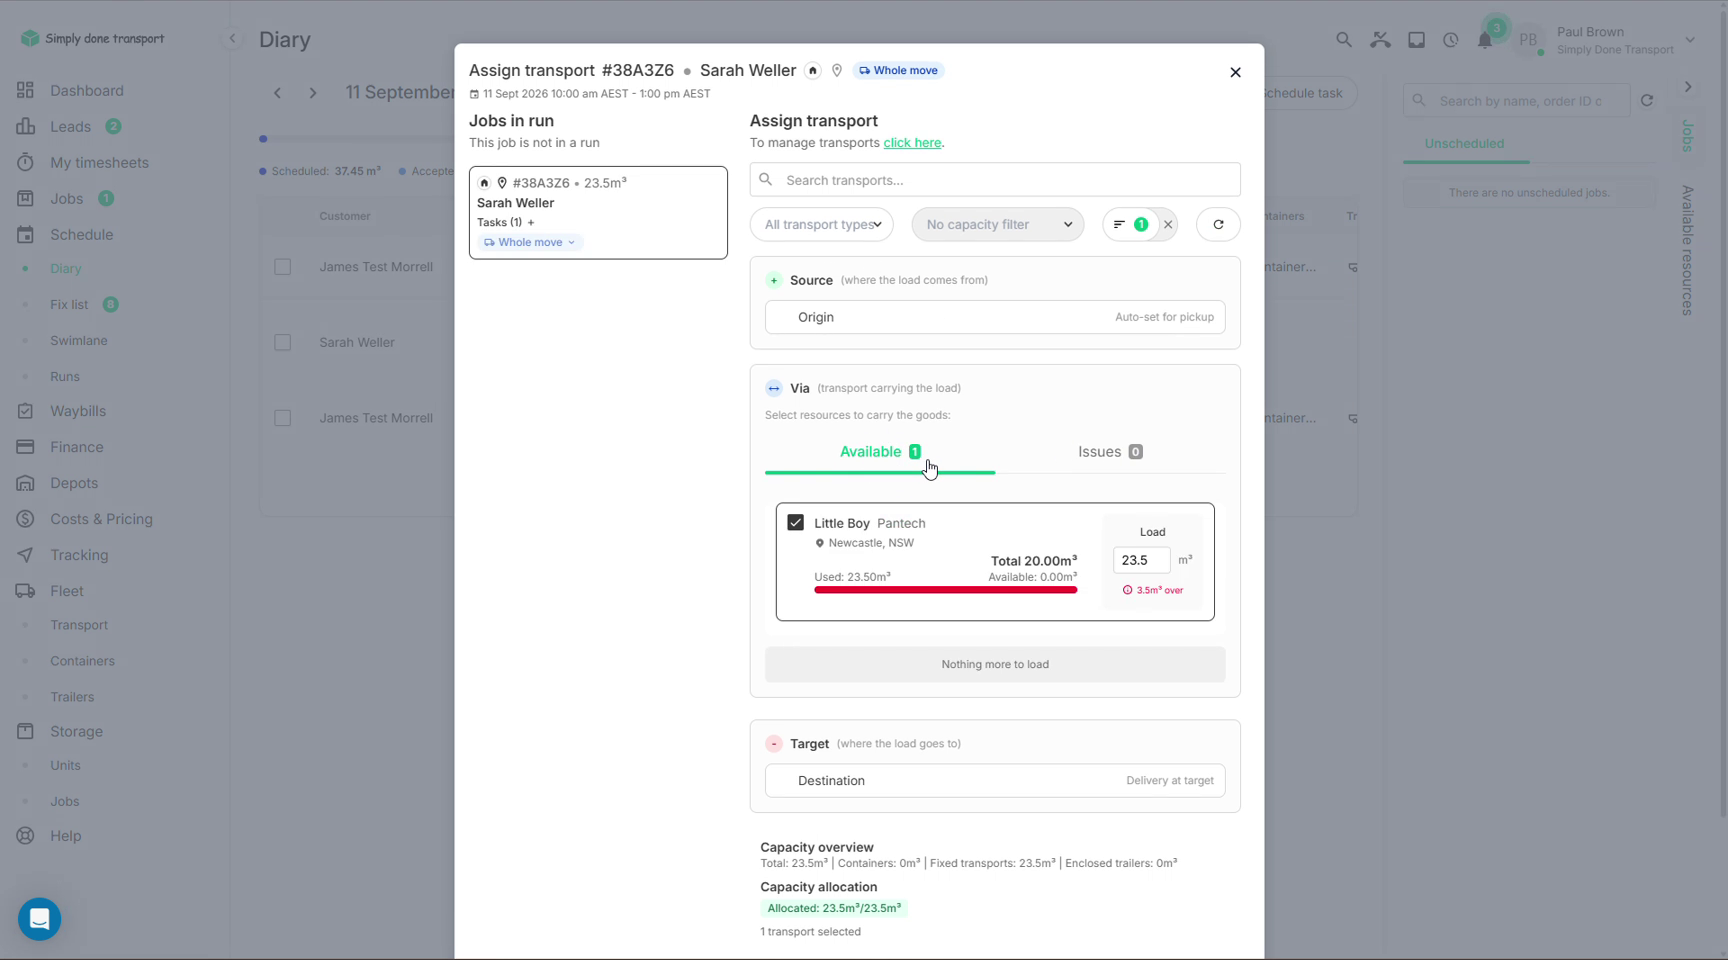
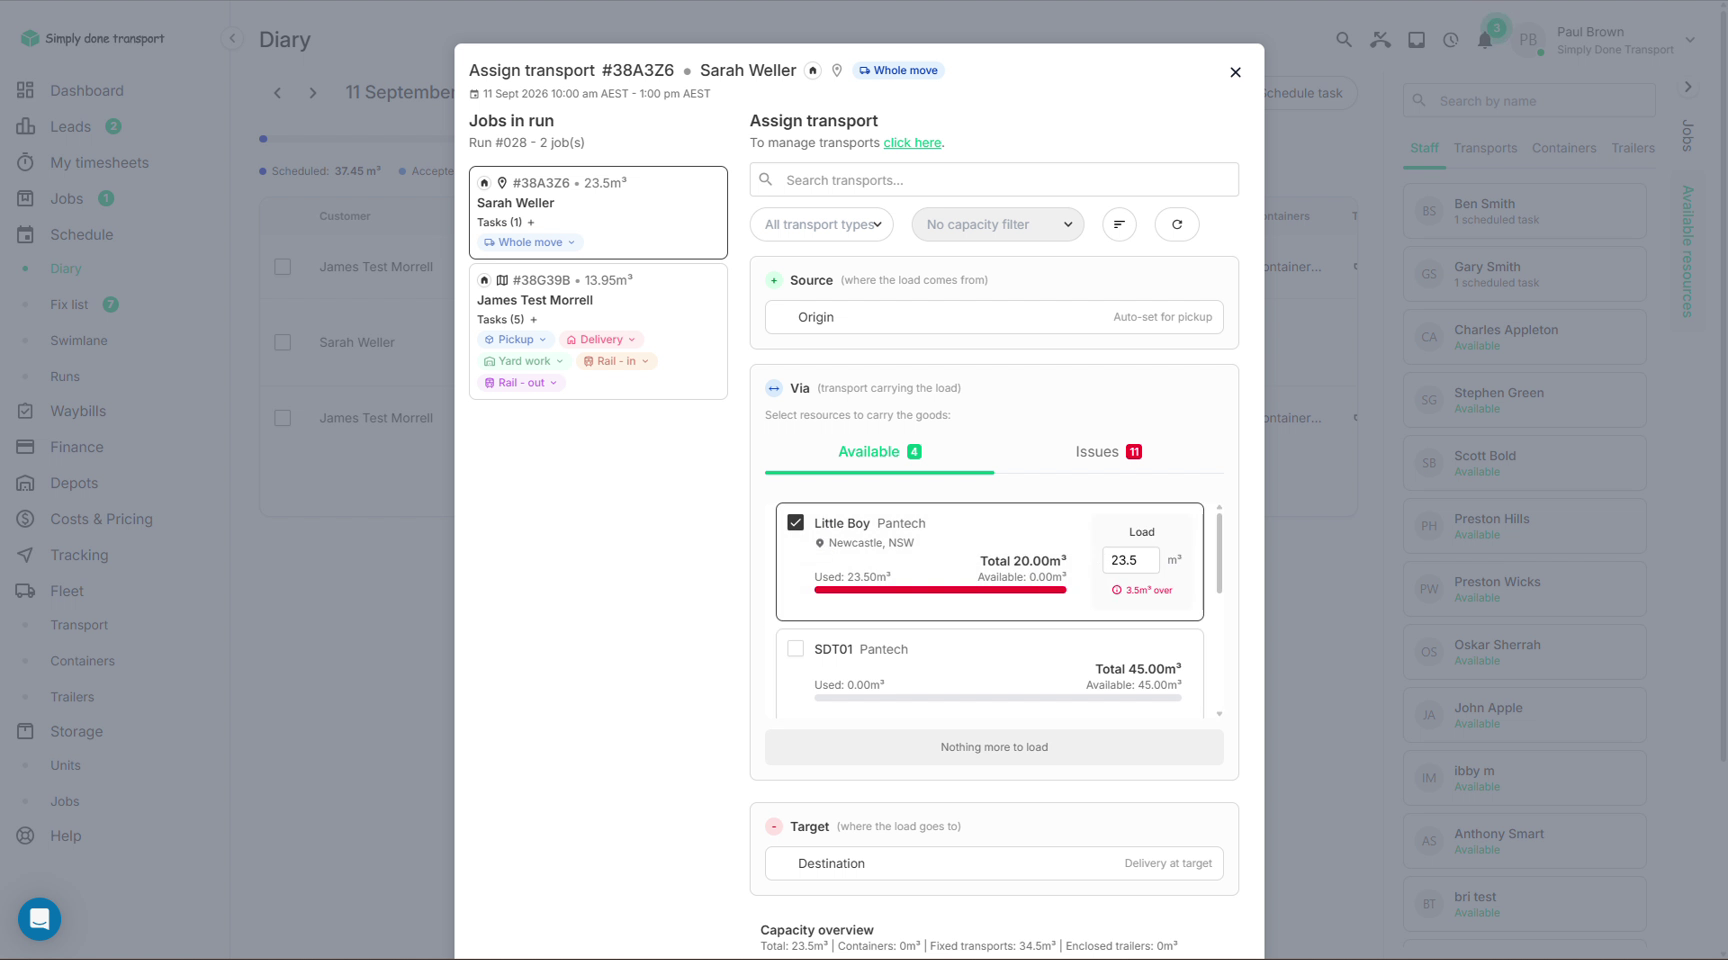
- Click the transport column and pick from your fleet. The dialog is built as Source → Via → Target: where the load comes from, what carries it, and where it goes. Containers and trailers work the same way from their own columns.
Capacity in cubic metres
The chips across the top of the diary keep a running total for the day: Scheduled m³, Accepted (unscheduled) m³ and Requested m³ against your fleet's total Capacity. Because every inventory carries a volume, you can tell whether tomorrow is overbooked before it becomes a problem; the same maths runs inside the transport dialog:
Warnings: the missing-resources check
Tasks that are missing something show warning icons in the diary. The filter control lets you narrow the view: turn everything off except missing resources and the diary becomes your control centre: it lists exactly which tasks still have no staff or no truck, so nothing slips to the morning of the move.
Group tasks into runs
For multi-drop days (deliveries, several small jobs on one truck, or a job that shares a truck with another), group tasks into a run:
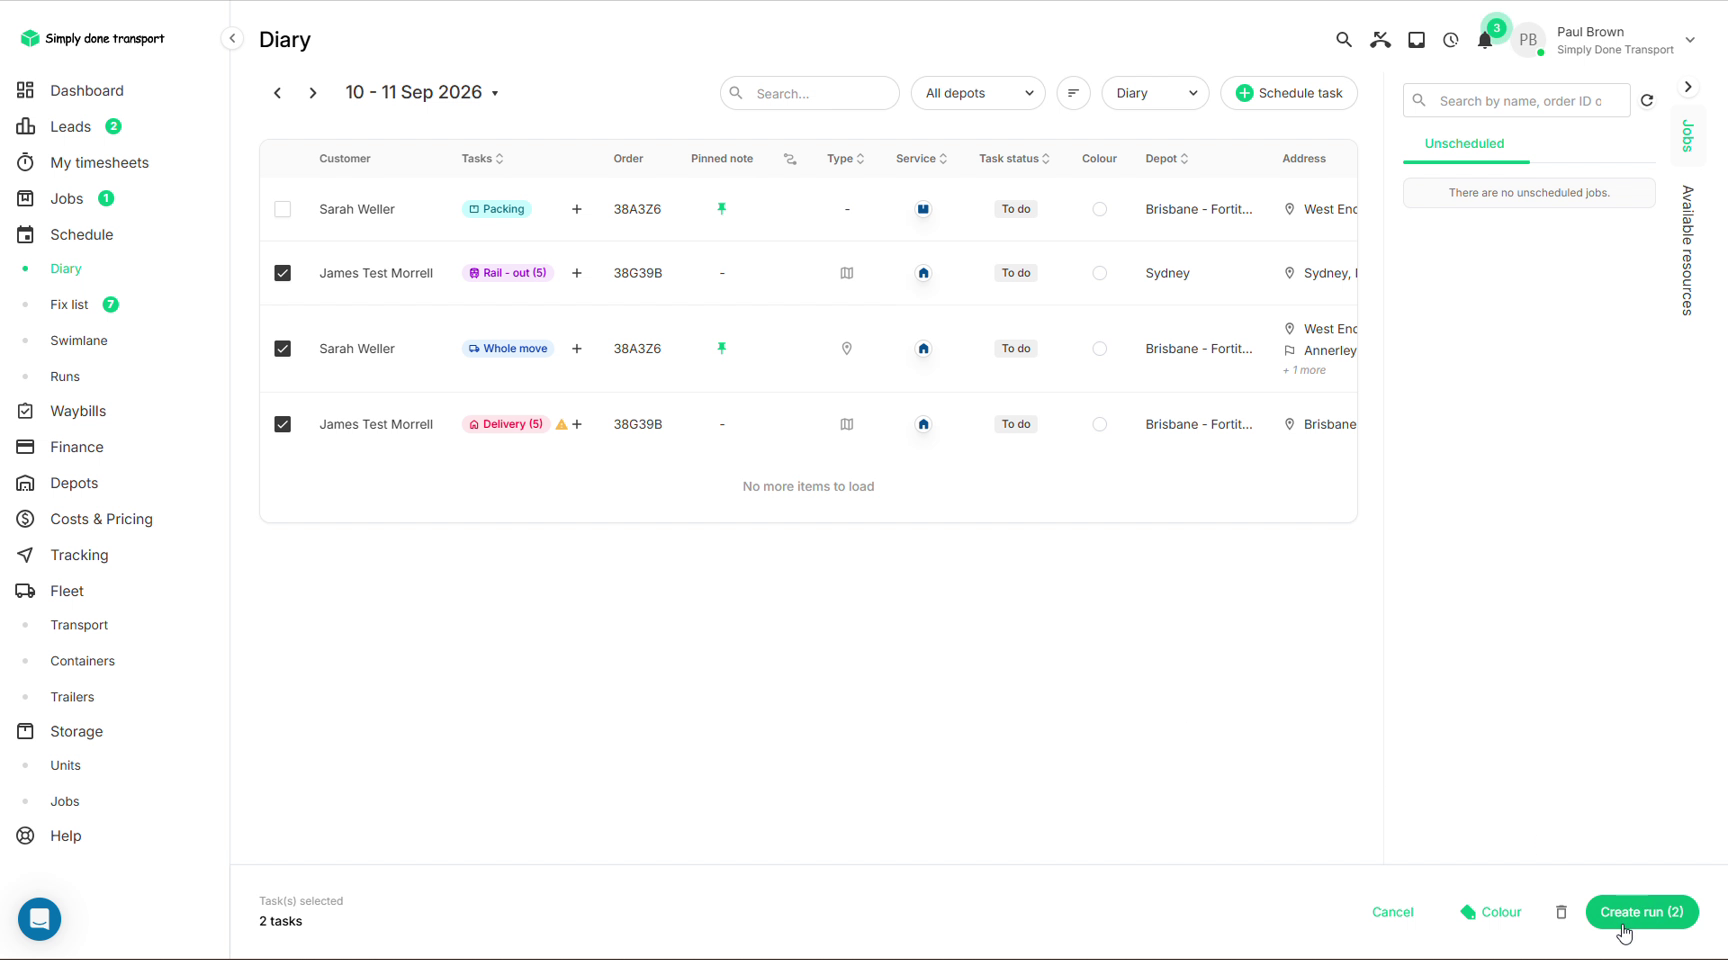
- Tick the checkboxes on the diary rows you want to combine. A bar appears at the bottom; click Create run.
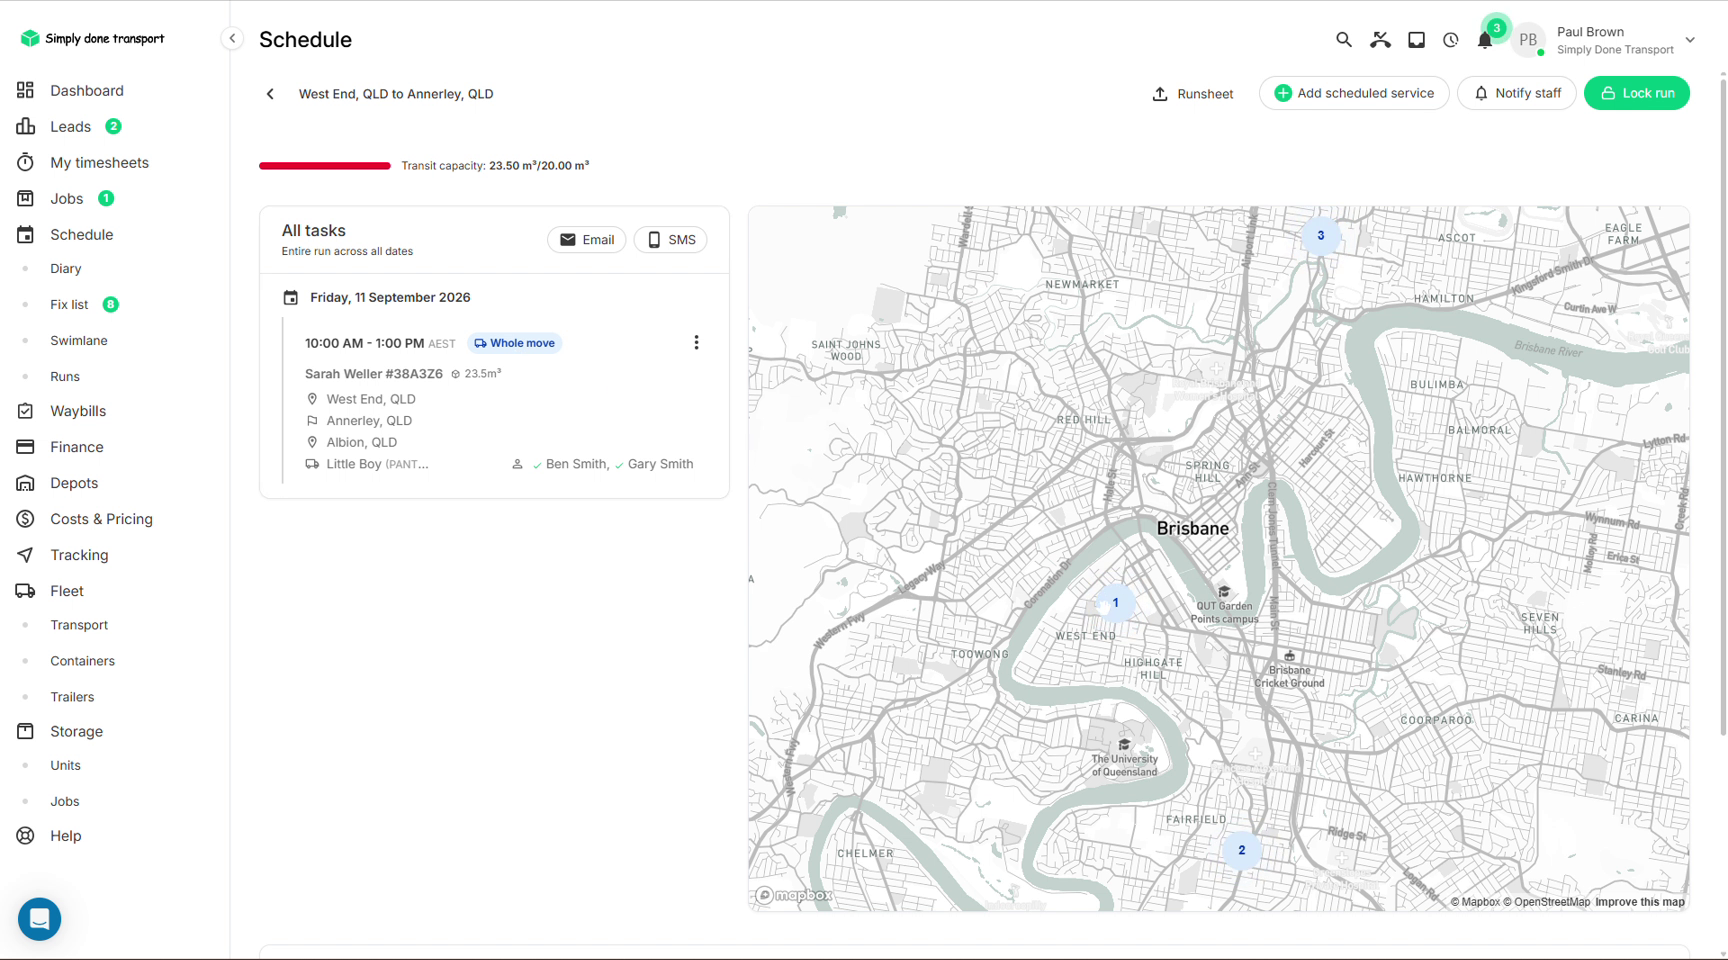
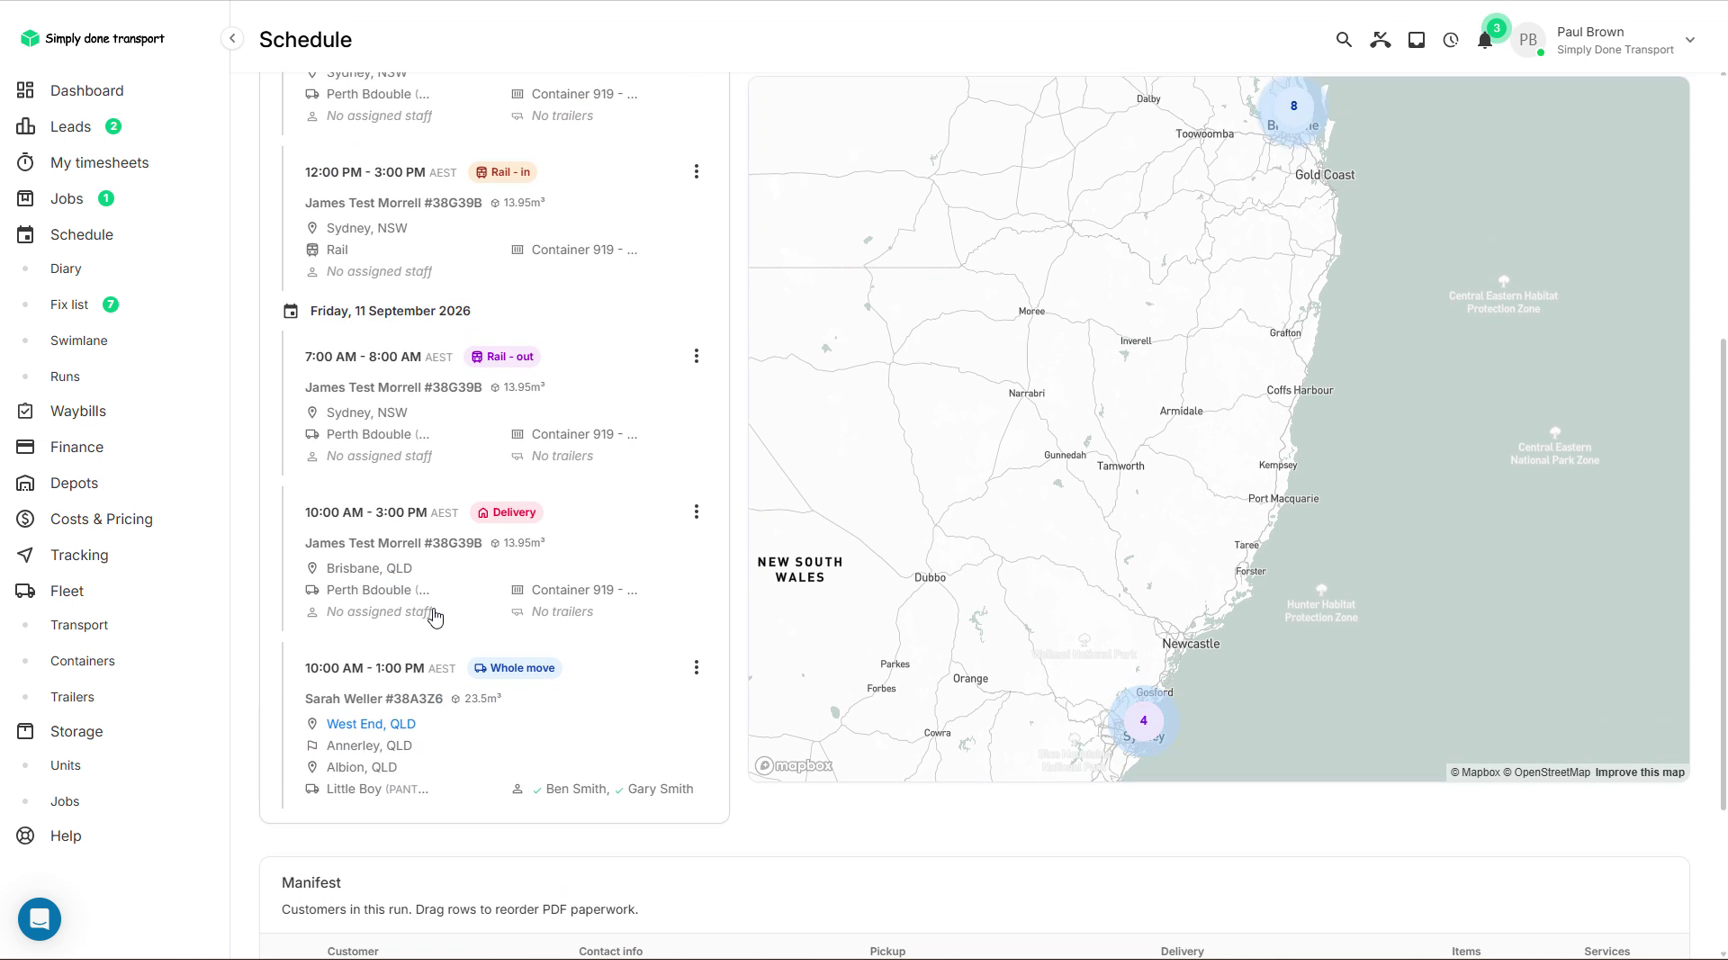
- In the run view, Add scheduled service pulls more booked tasks into the same run.
- Stops run in time order: set each task's time (7:00, 8:00, 9:00…) and that dictates the sequence. Movepro doesn't do route optimisation; the map view makes manual ordering easy.
- Notify staff pings the crew, and Lock run freezes it once you're happy. The header shows the run's transit capacity.
Other views: swimlane and calendar
Two more ways to see the same schedule:
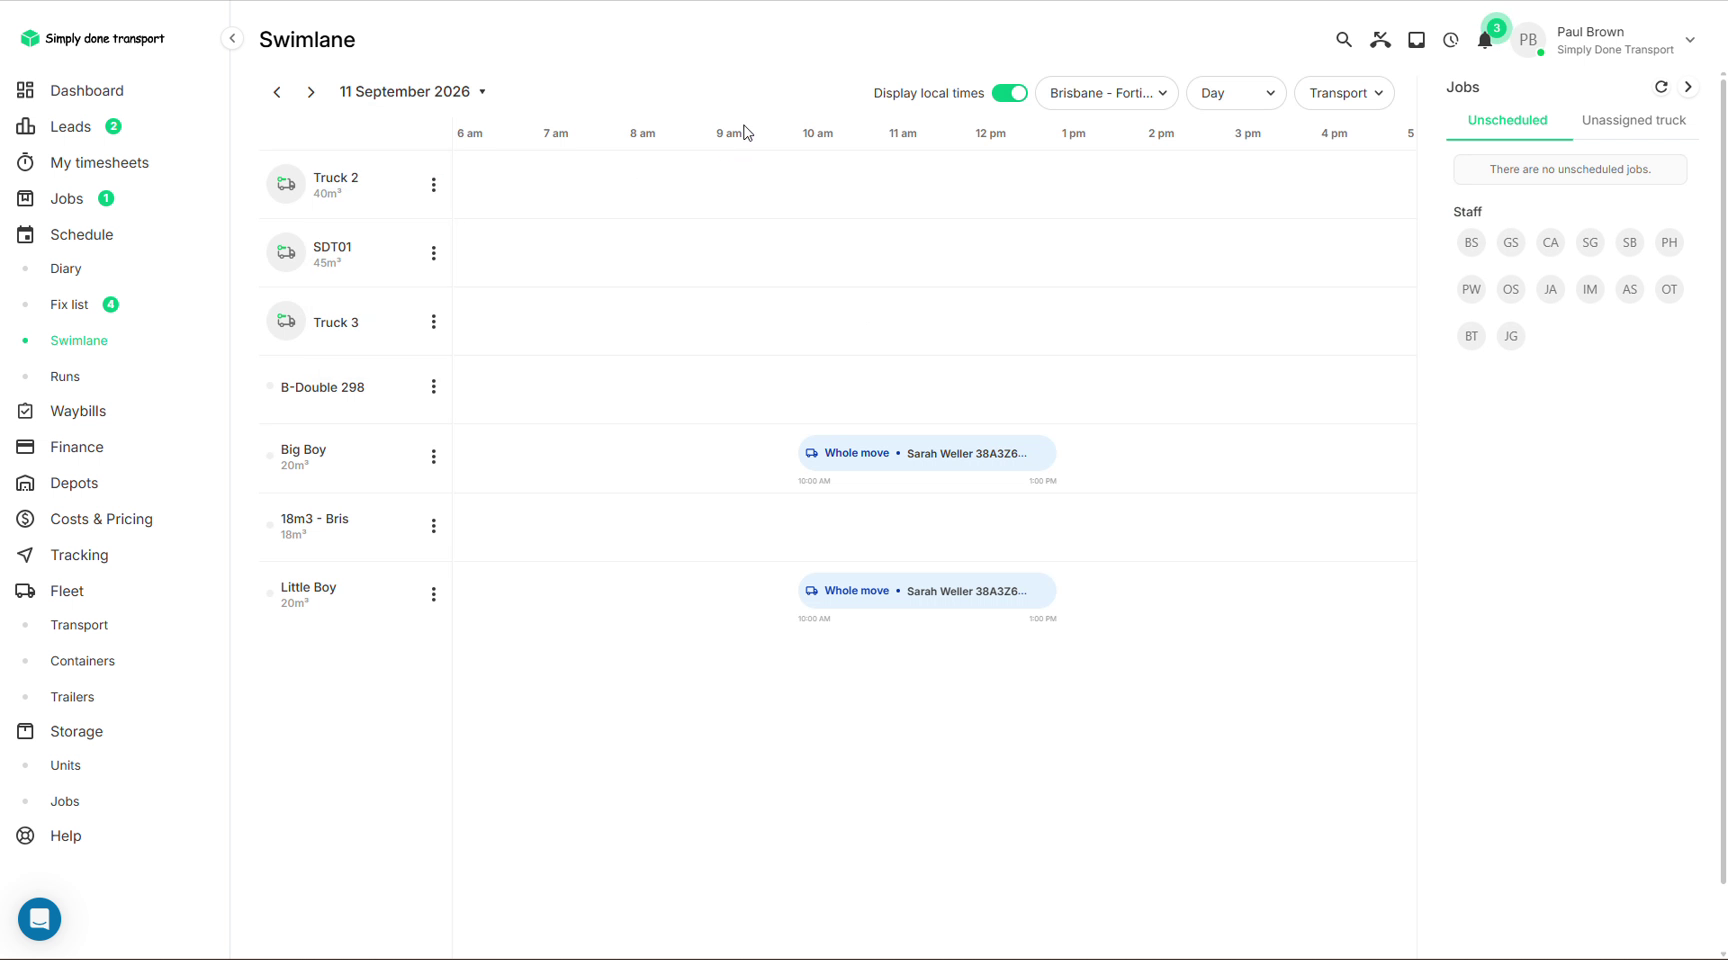
- Swimlane (under Schedule in the menu): one lane per resource across the day, so you can see at a glance what each truck or crew member is doing and where the gaps are.
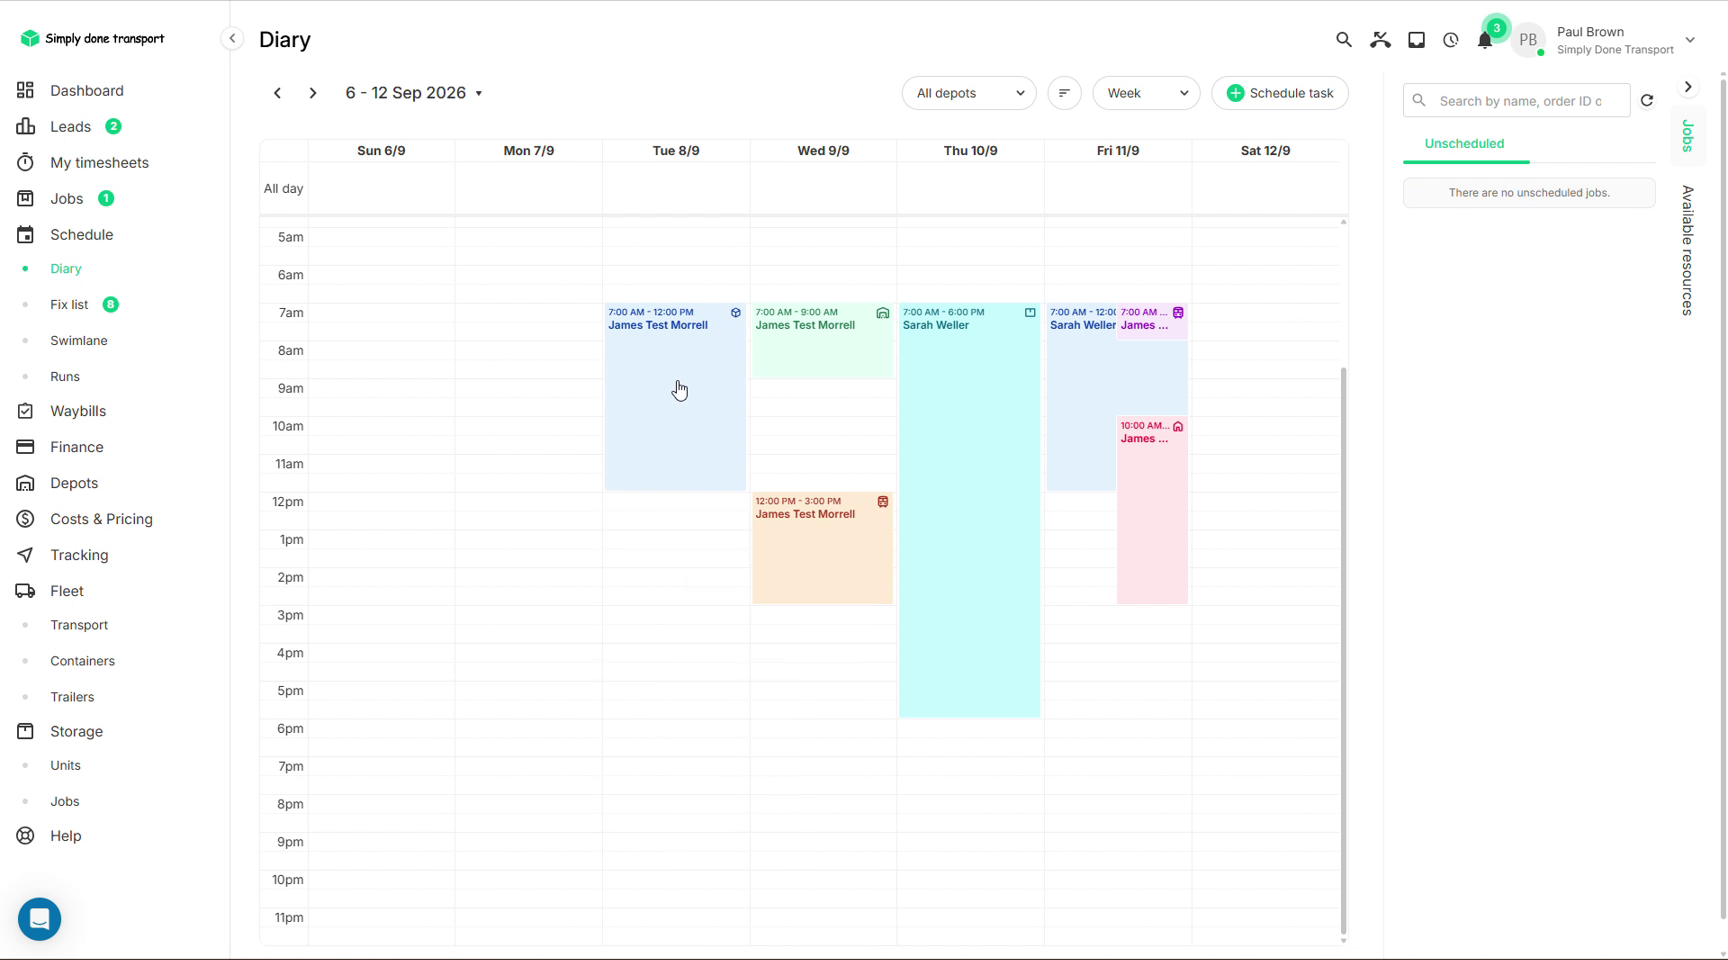
- Calendar: switch the diary's view dropdown from Diary to Week or month for a calendar layout. Tasks keep their colour tags, so a well-coloured diary reads like a wall planner.
The internal diary
Everything above is the job diary, where order tasks live. The internal diary (Schedule → Internal diary) is its sibling for the work a moving company does that never belongs to a customer order: taking a truck to its service, warehouse maintenance, compliance audits, supply runs, staff leave. Entries get the same treatment as tasks (a type, a title, a status, dates, addresses, staff and equipment) without inventing a fake order to hang them on.
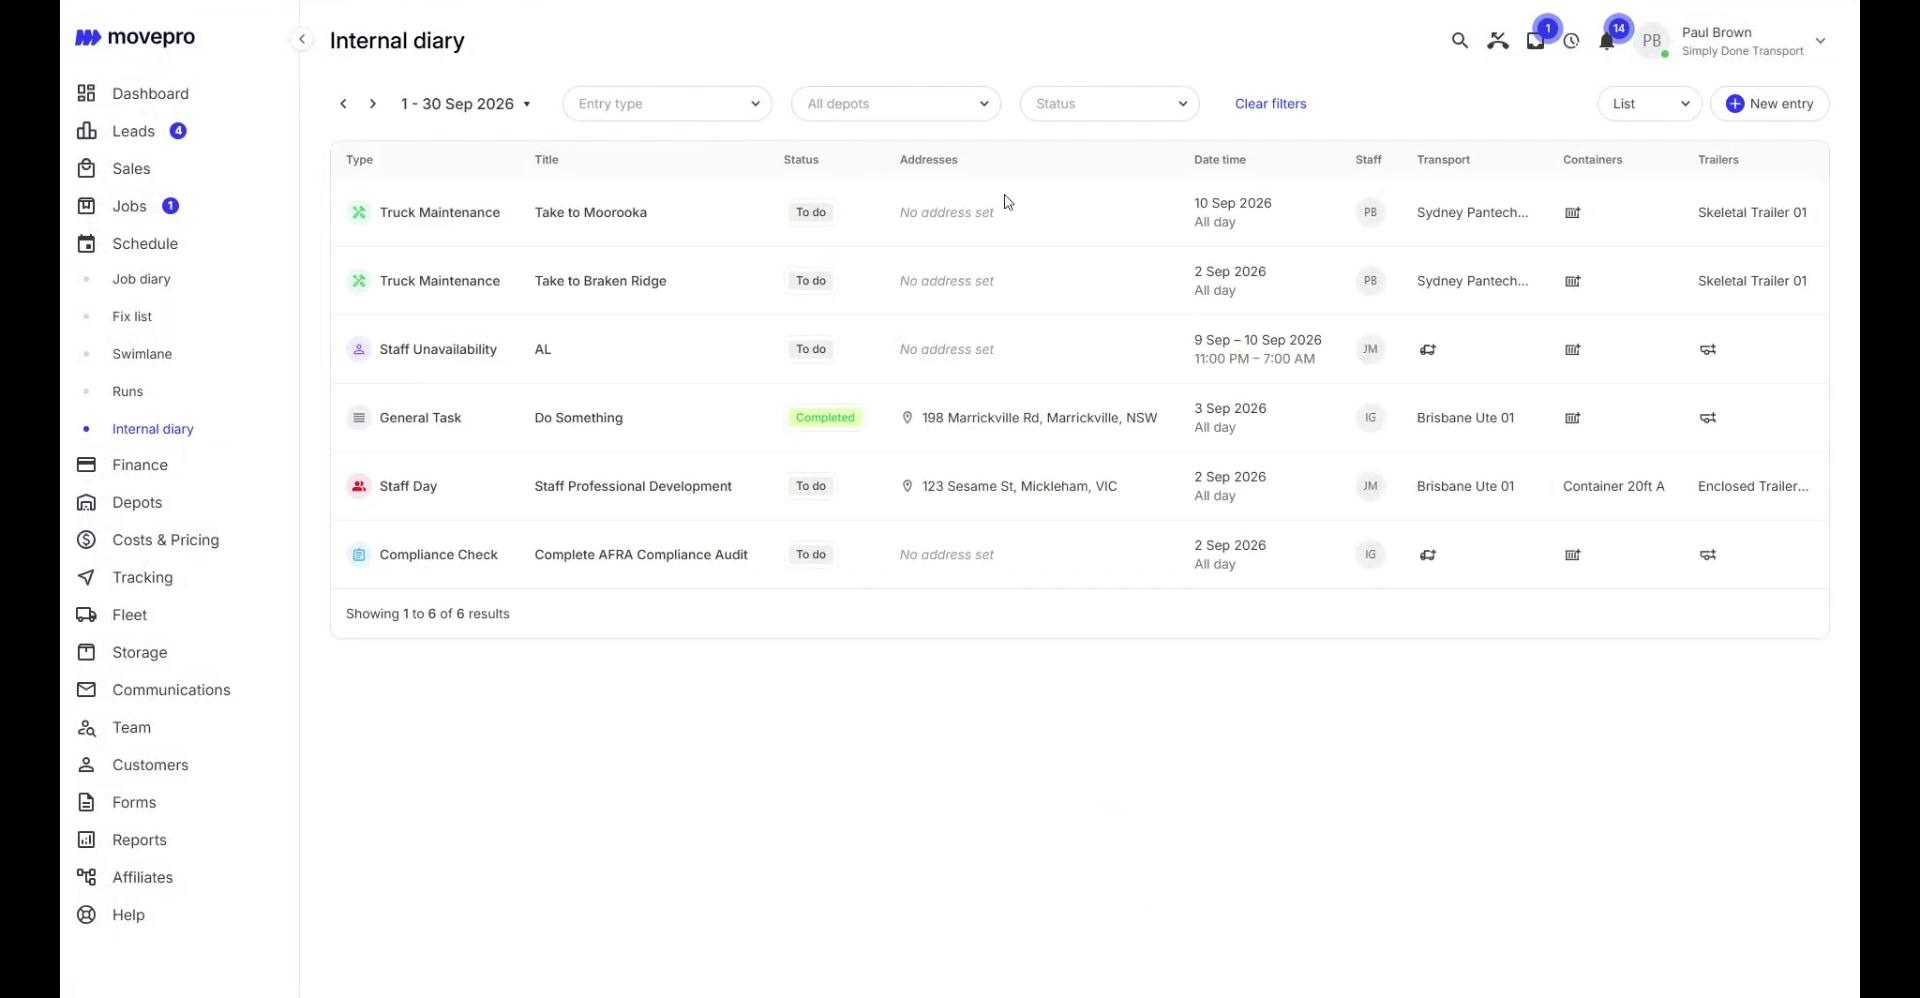
Every entry has a type, and the types are yours to define in Settings → Diary entry types: a name, a colour and icon, whether entries carry an address, and, most importantly, whether the type blocks availability. A blocking type holds everyone and everything assigned to the entry unavailable for its dates: assign a truck to a Truck maintenance entry and the job diary won't offer that truck while it's on the hoist. Non-blocking types (a staff development day you're happy to interrupt, say) leave the resources bookable. A couple of built-in staff types (leave and unavailability) are always present; the rest of the list is whatever your operation needs.
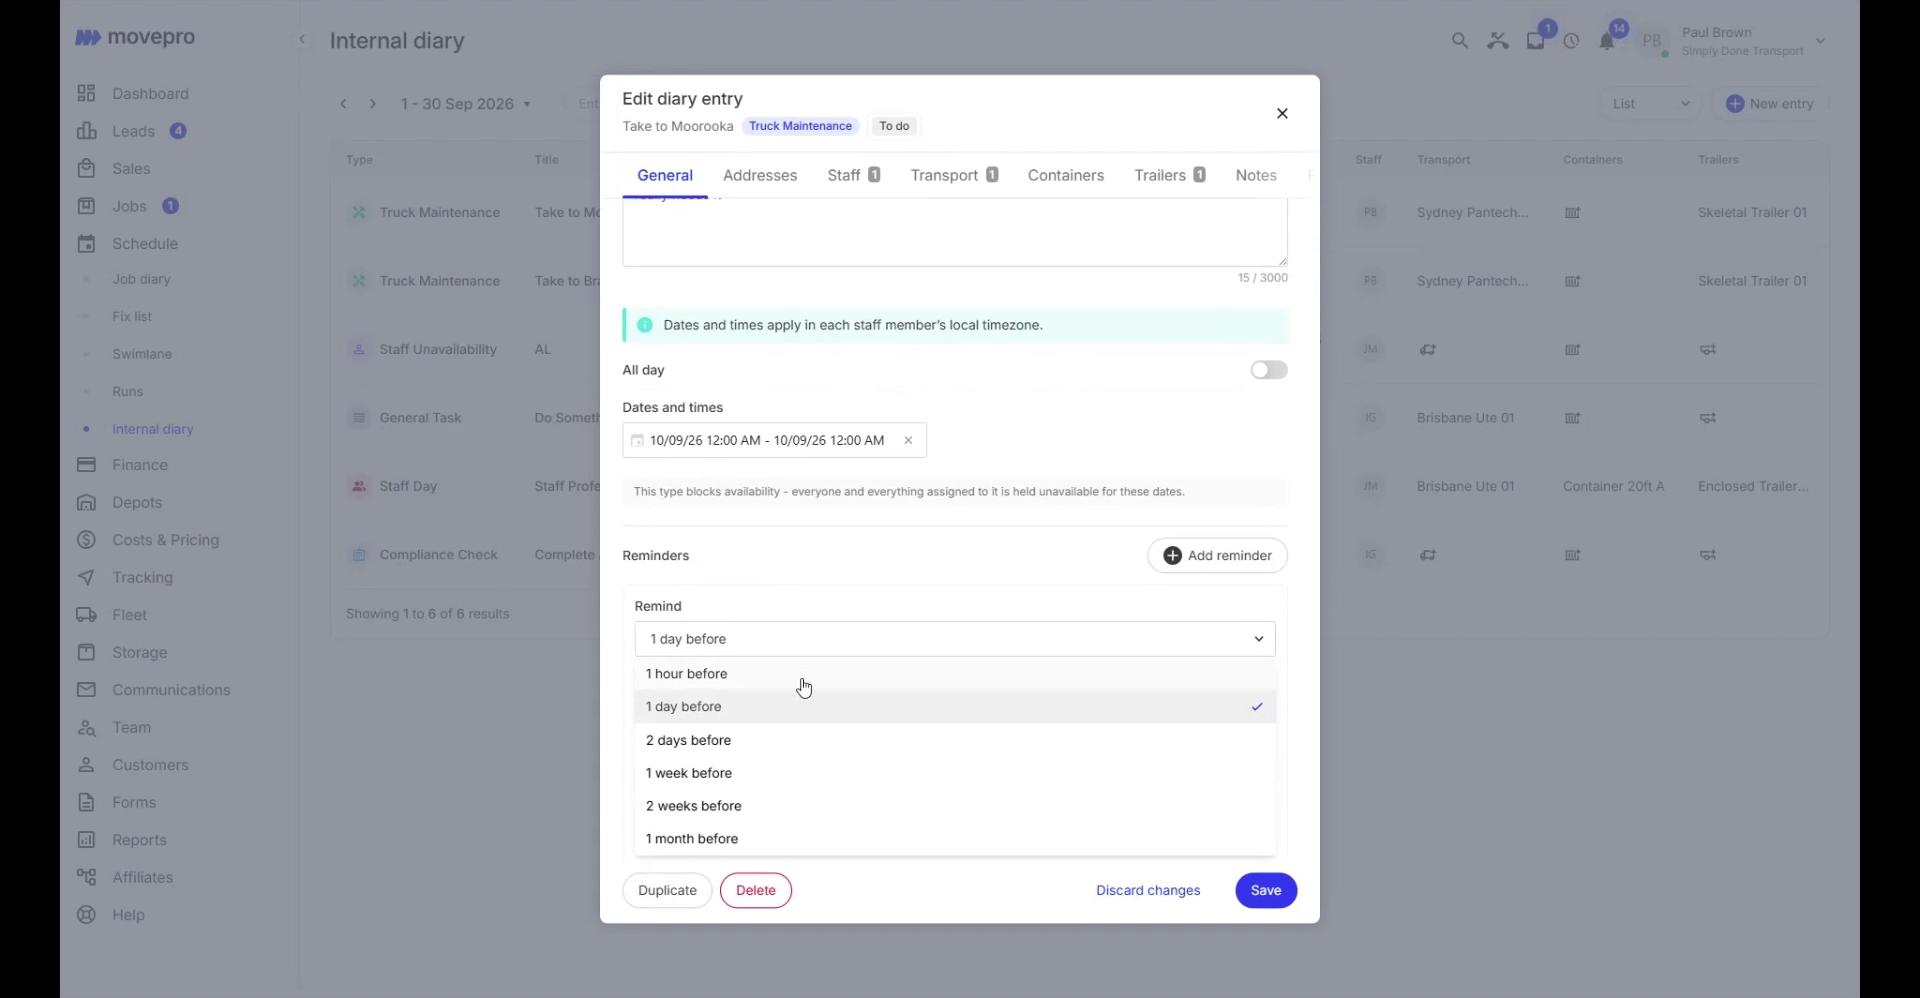
New entry creates one; clicking an entry opens the same window to edit it. Everything lives in one place, in tabs: General (type, depot, title, description, and all-day or timed dates), Addresses, Staff, Transport, Containers, Trailers, and Notes with file uploads. Dates and times apply in each staff member's local timezone. Duplicate, down the bottom, copies an entry for the work you schedule again and again.
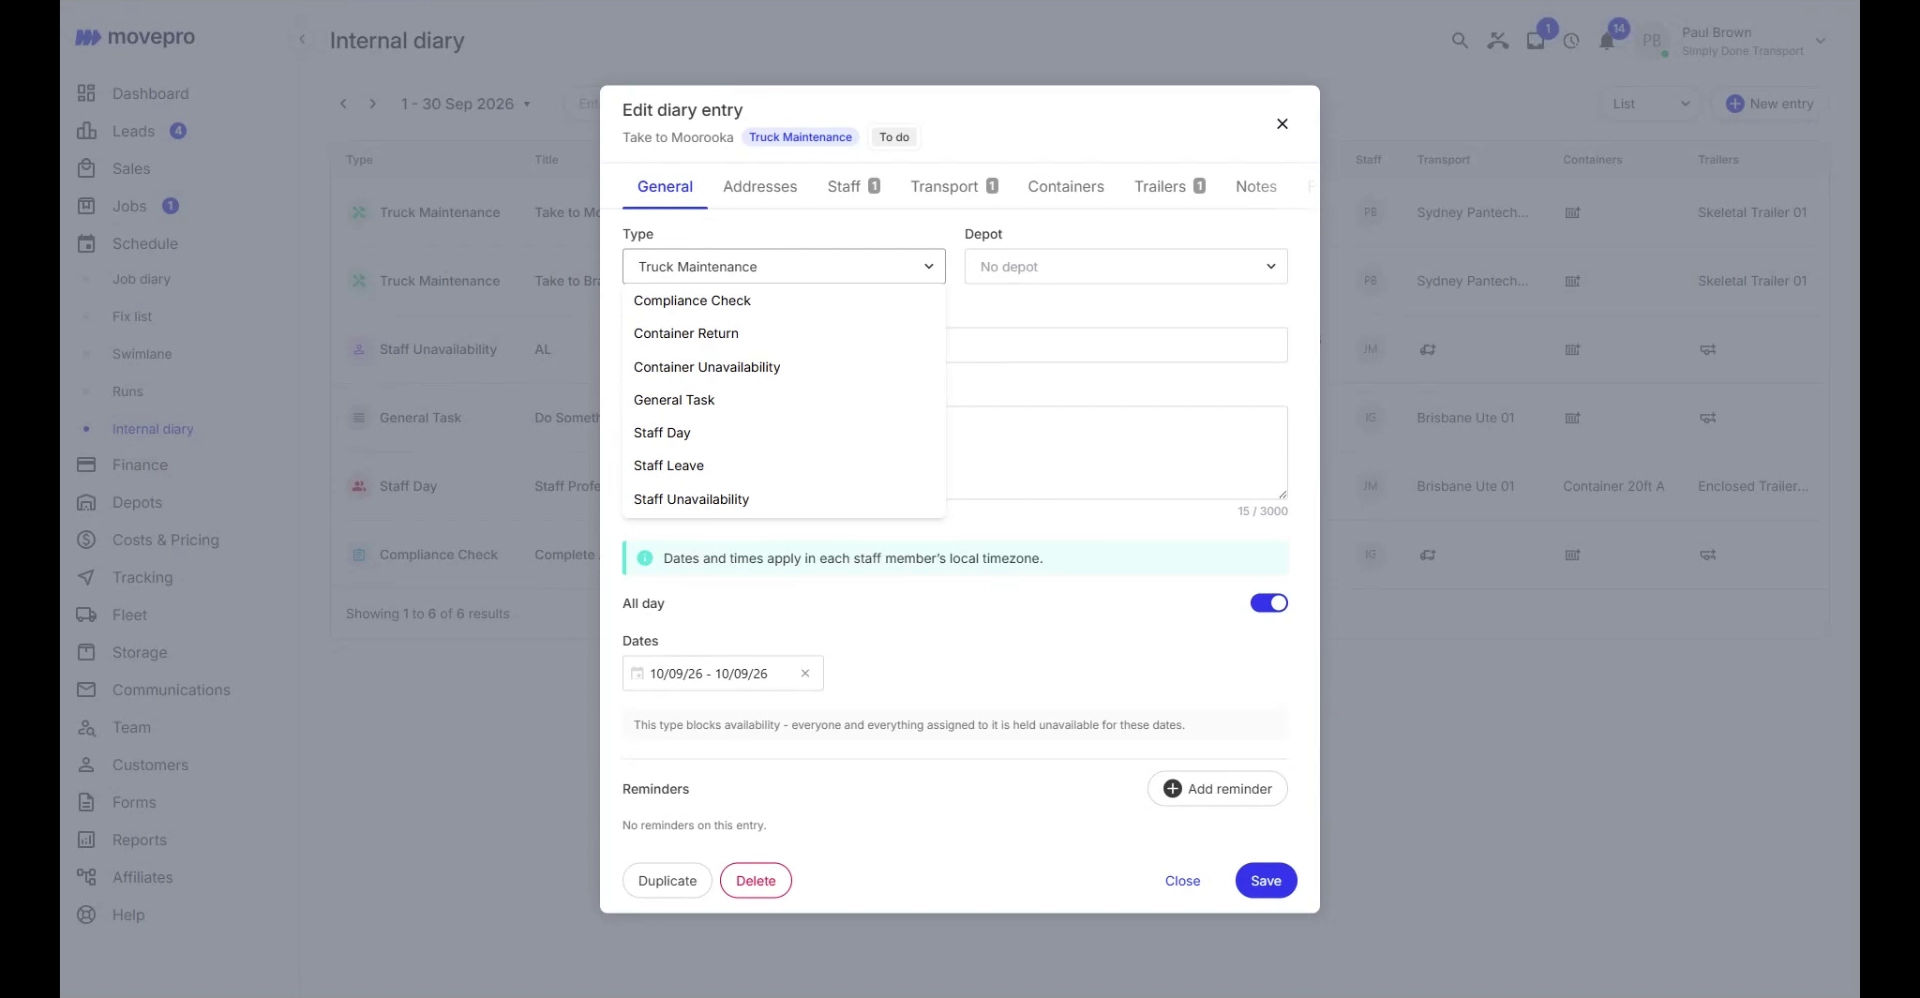
Reminders are the reason recurring maintenance stops being a memory game. Add reminder on any entry, choose when it should fire (from an hour to a month before the entry's date) and who should hear about it: named staff, or whole roles so everyone with that role is notified. Rego renewals, insurance expiries, the quarterly AFRA audit: put the entry on the due date and let the reminder find you a week early.
Entries carry a status: To do, In progress, Completed. When an entry is assigned to you, it also appears in your activity panel for that day (the clock icon in the top bar), where you can walk it between statuses without opening the diary.