On the day & completion
On move day the crew works from the Movepro mobile app while the office watches progress on the tracking map. Condition reports and sign-off forms are captured in the field, and when the work is done the service is completed, with actual hours, so the final payment can be taken.
The crew's day in the mobile app
Staff assigned to a task see it in the Movepro app on their phone. Through the day they:
- Start the job when they arrive (the office sees the task flip to In progress);
- capture inventory conditions and photos (the ICR), and collect the customer's signature on any sign-off forms;
- swipe to complete the task when they're done (the completion time is recorded against the job).
Live tracking
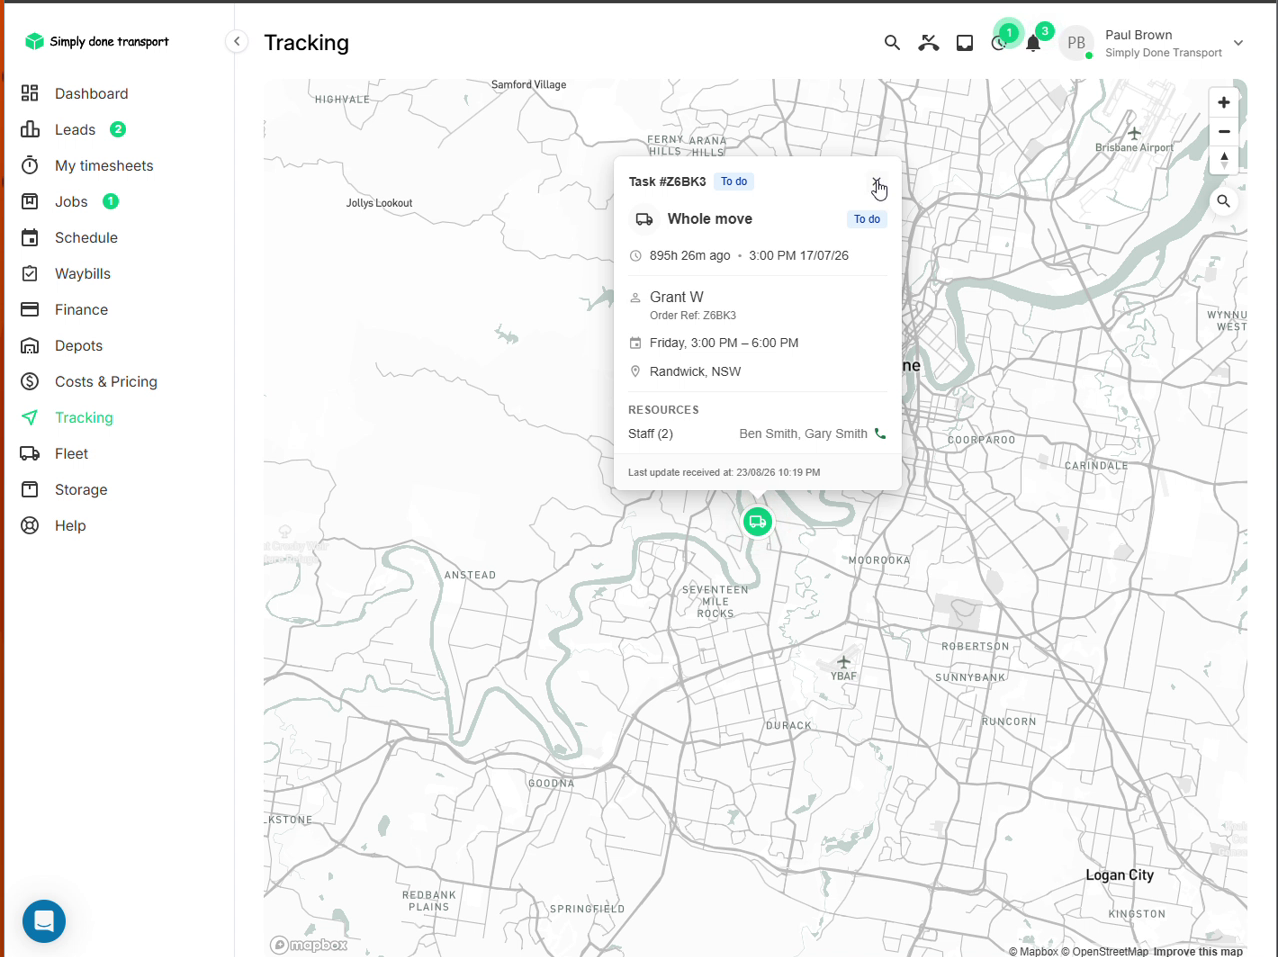
Tracking in the left menu shows every active task on a live map. Click a marker for the task card: status, customer and order reference, the scheduled window, the assigned staff, and when the last location update came in.
Inventory condition reports (ICR)
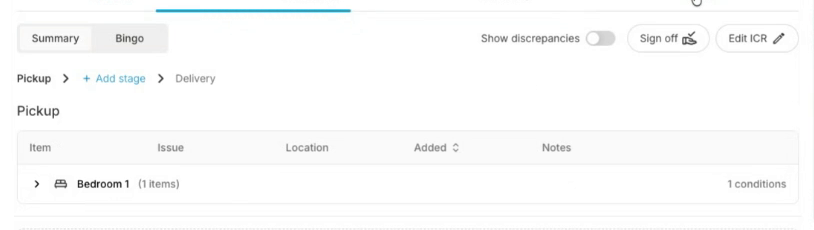
The ICR tab on the order records the condition of items at each stage of the move. Items are grouped by room with their issues, locations and notes; you can add stages (e.g. pickup and delivery), toggle Show discrepancies to see what changed between stages, and use Sign off to capture the customer's acknowledgement. Edit ICR adjusts the report from the office side. On site, crews build this report in the app, where AI mode turns a quick video of each item into itemised conditions with photo evidence, plus a delivery bingo sheet and the customer's signature.
Forms and customer sign-off
Forms are reusable documents that get structured data into Movepro and keep it on the record: terms-of-agreement sign-offs, pre-job checklists, condition acknowledgements, annual policy sign-offs, customer review forms. They're filled in by crew, office staff or customers, and they surface wherever you tell them to: in the crew app before or after a job, after payment, as QR codes on PDF run sheets, or as plain links you send to anyone. Building forms is an Owner, Admin or Manager job; field staff can open Forms to fill them in, but can't change the templates (role matrix).
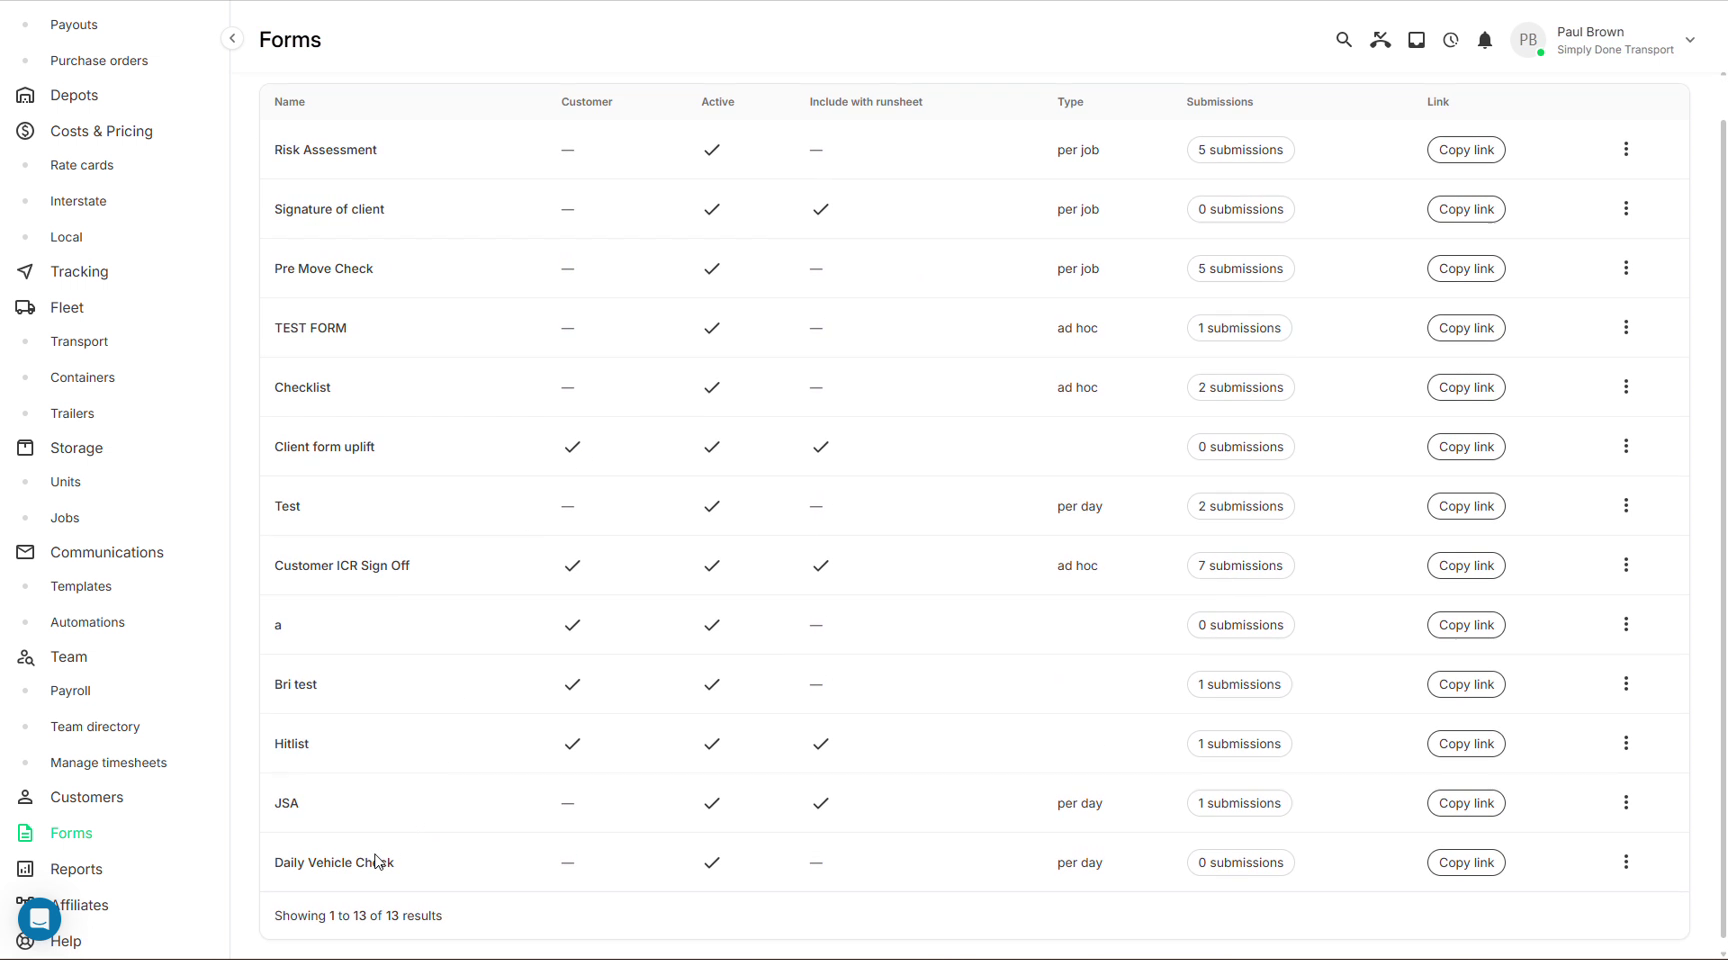
Open Forms in the left menu for the library. Two defaults ship ready to use, a Daily Vehicle Check and a Risk Assessment, and each row shows whether the form is customer-facing, active, included with the runsheet, its cadence, how many submissions it has, and a Copy link for sharing it directly.
Create a form (or edit one from its ⋮ menu) and two blocks matter:
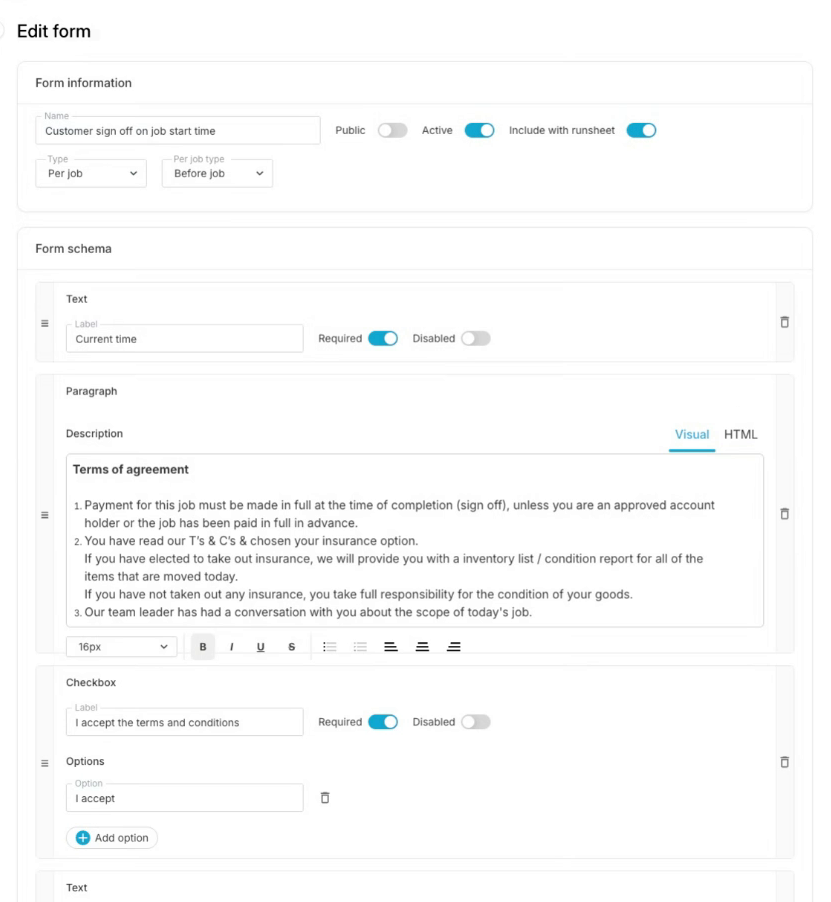
- Form information: the name, a Public toggle for customer-facing forms, Active on/off, Include with runsheet (adds the form as a QR code on the PDF run sheet), and the cadence. Per day prompts the crew once at the start of their shift (vehicle checks), Per job prompts in the app around every job and sets when it applies (before the job, after payment, after the job), Per year suits annual policy sign-offs, and ad hoc never prompts anyone; it's filled from its link only.
- Form schema: the fields. Click Add field for text fields, text areas, checkboxes, a PDF viewer (attach a policy the reader must view), signatures and more; drag fields to reorder them. Mark a field Required and the form won't submit without a value in it. Click Update and the change is live for every submission from that point on.
Forms attach to orders two ways. Prompted forms (per day, per job) land automatically; for anything else, open the order's Forms tab (bottom of the order view) and click New form submission: the link it gives you is unique to that order, so a review or feedback form a customer fills from it comes back attached to the right job. Completed forms, signatures included, all end up on that same tab.
In the crew app, per-day forms appear at shift start and per-job forms pop up when the crew hits Start task. The prompts are deliberate nudges rather than hard gates: a crew member can skip past to reach the task details, but the task then carries a Pre-job forms outstanding, tap to complete reminder until it's done, and the office can see what came back on the order's Forms tab. If a form is genuinely mandatory for you (a risk assessment for compliance, say), back the prompt with an internal policy and check the Forms tab.
Complete the service
When the crew finishes, complete the service in the CRM to lock in what actually happened (the hours worked and anything extra the customer took) and settle the money. (The status chip is also how you move a job through its life manually; click it to change status any time.)
- Open the order and click Complete services (top right), or click the Booked status chip and choose Completed.
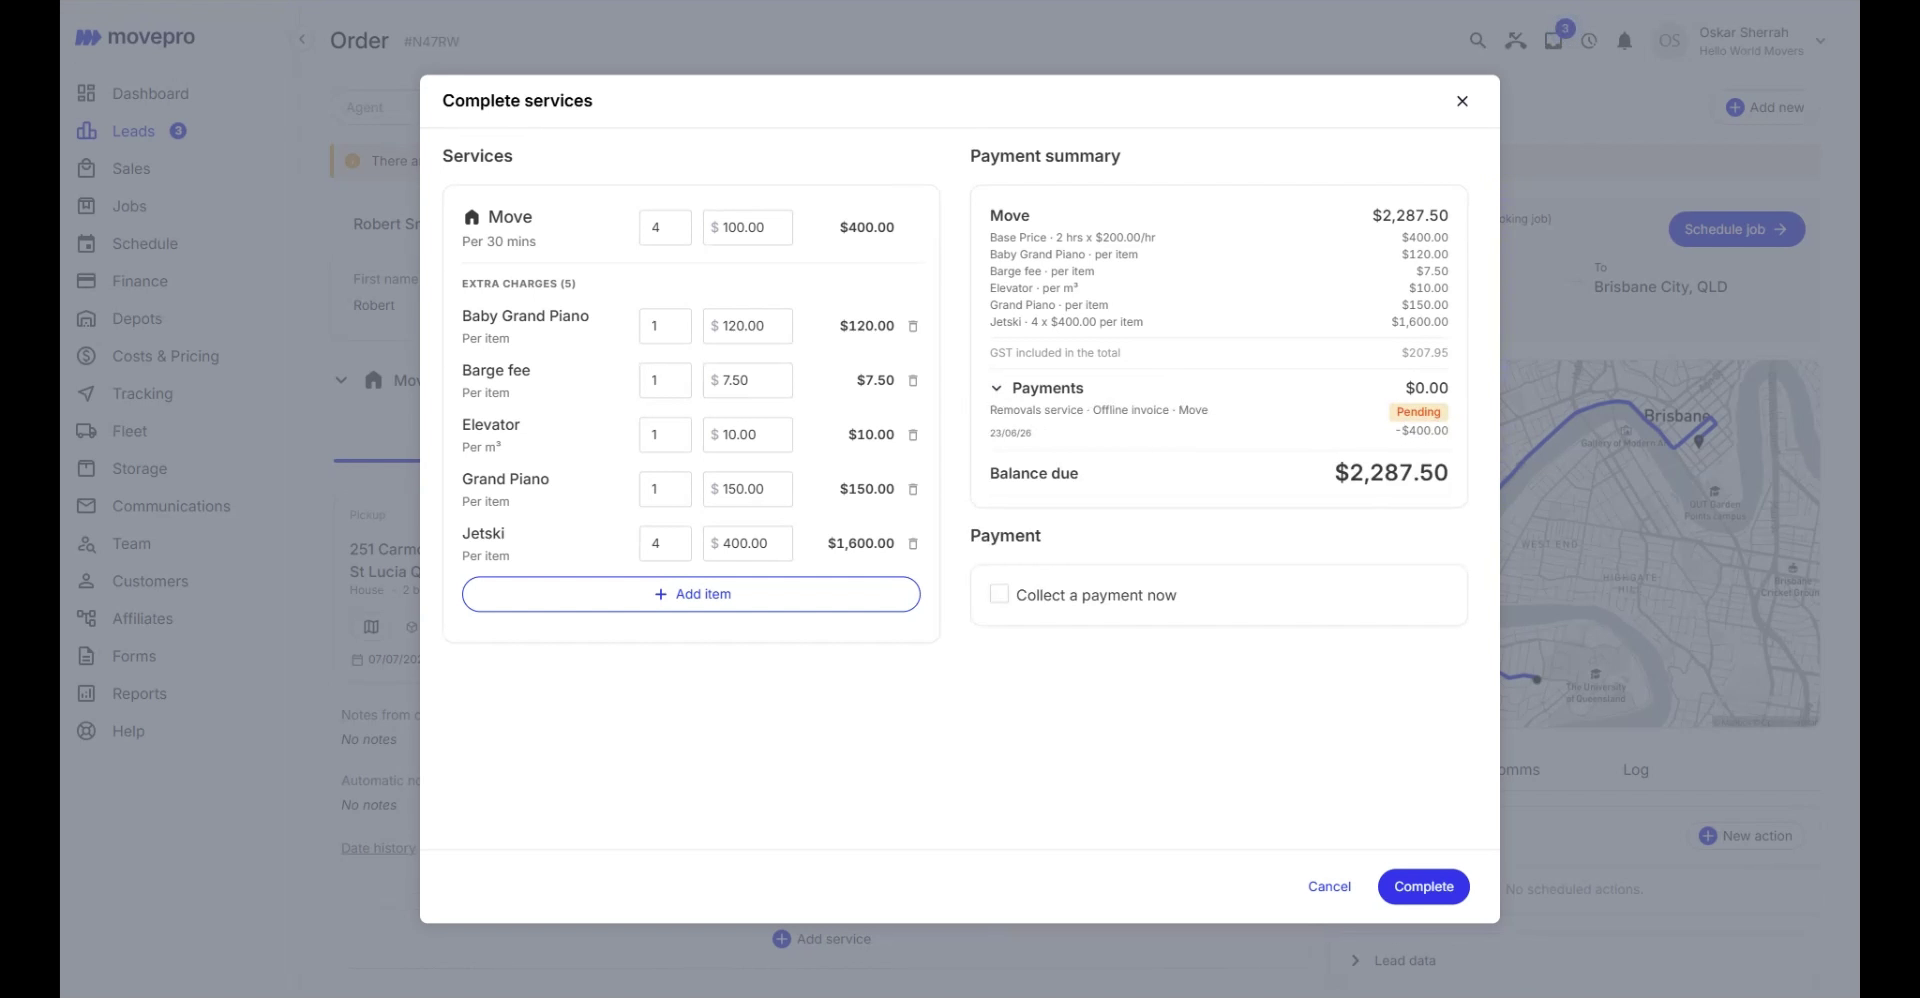
- Enter the actuals for each service. An hourly move is priced by the time actually worked (units of the quoted per-half-hour rate: work 2 hours and it's 4 × the rate); a packing service takes boxes packed. Rates carry over from the quote, so the price calculates itself.
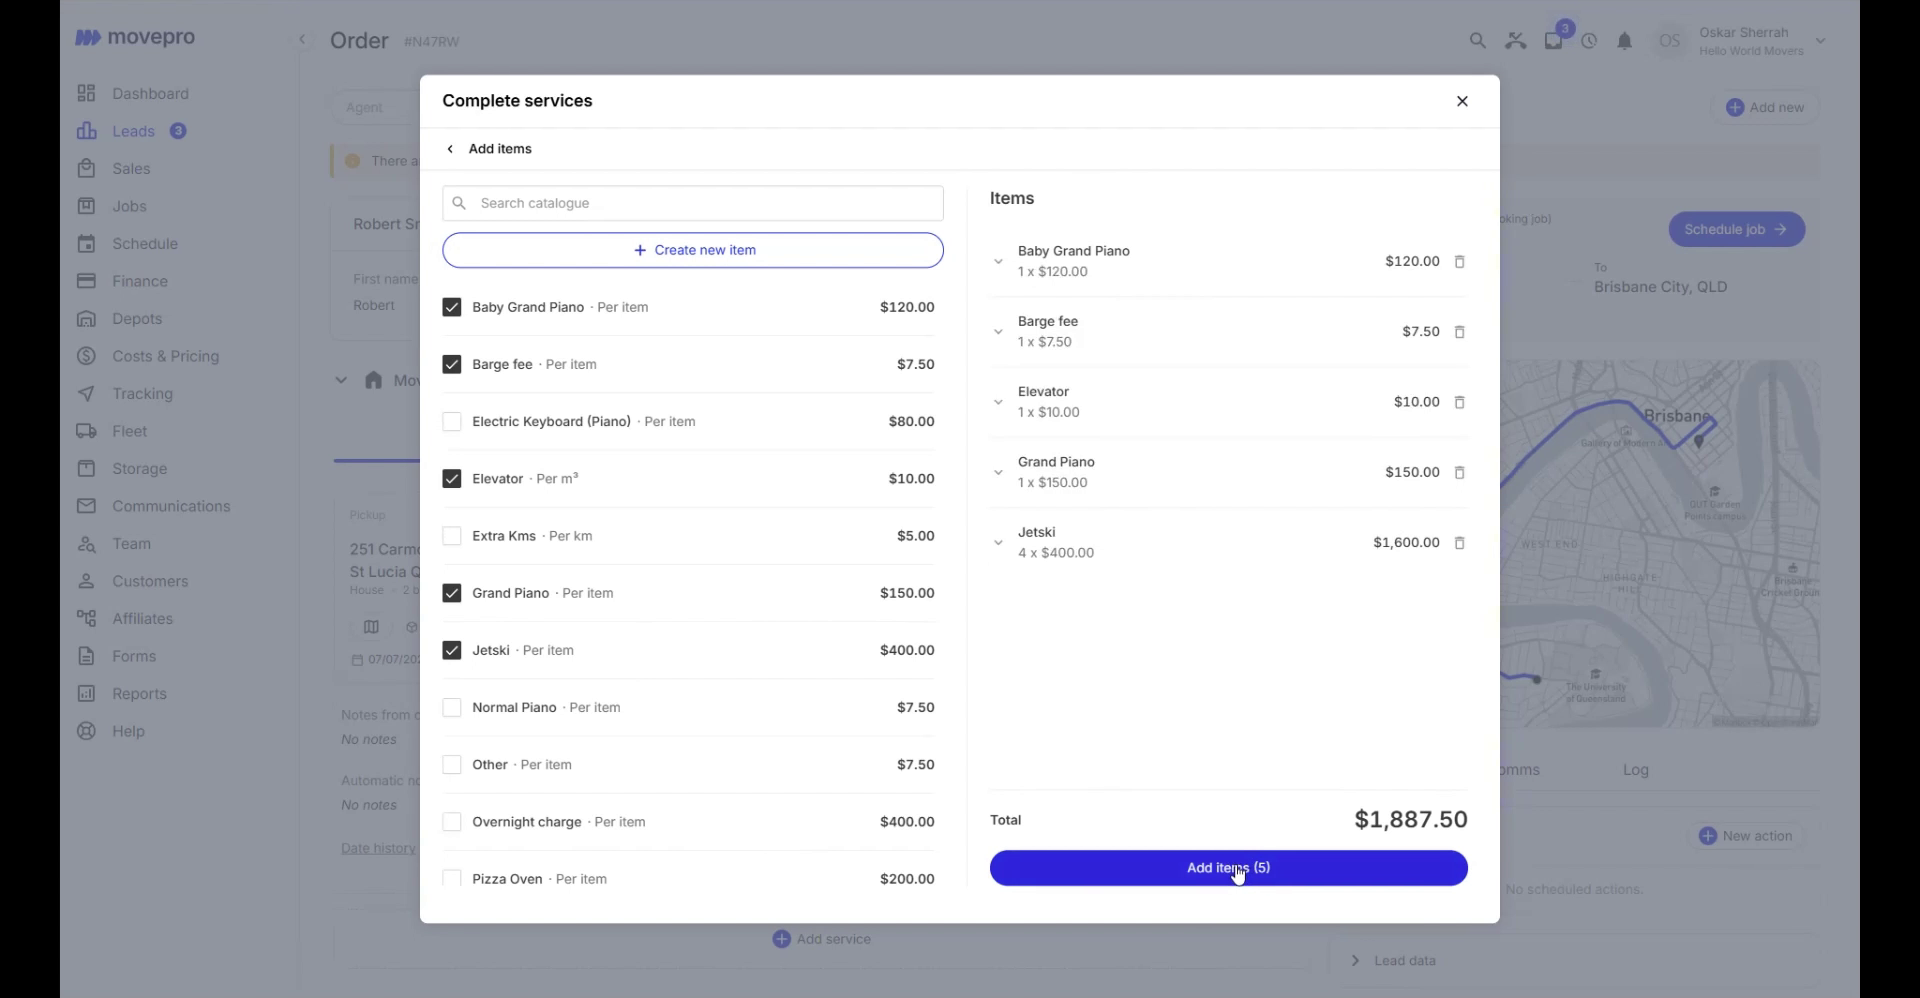
- Add anything the day added. Add item under Extra charges opens the catalogue: tick items, set quantities, or create a new item on the spot. Each lands as its own line at its catalogue price: the piano that appeared in the garage, extra kilometres, an overnight charge.
- Read the Payment summary: the itemised price (hours at the rate, each extra charge), what's been received, and the Balance due. Payments still pending, a bank transfer you haven't confirmed, say, are flagged and don't count toward what's been received.
- Tick Collect a payment now to take the balance on the spot (the amount is pre-filled), or leave it and collect from the Payments tab afterwards.
- Click Complete. The service shows Completed.
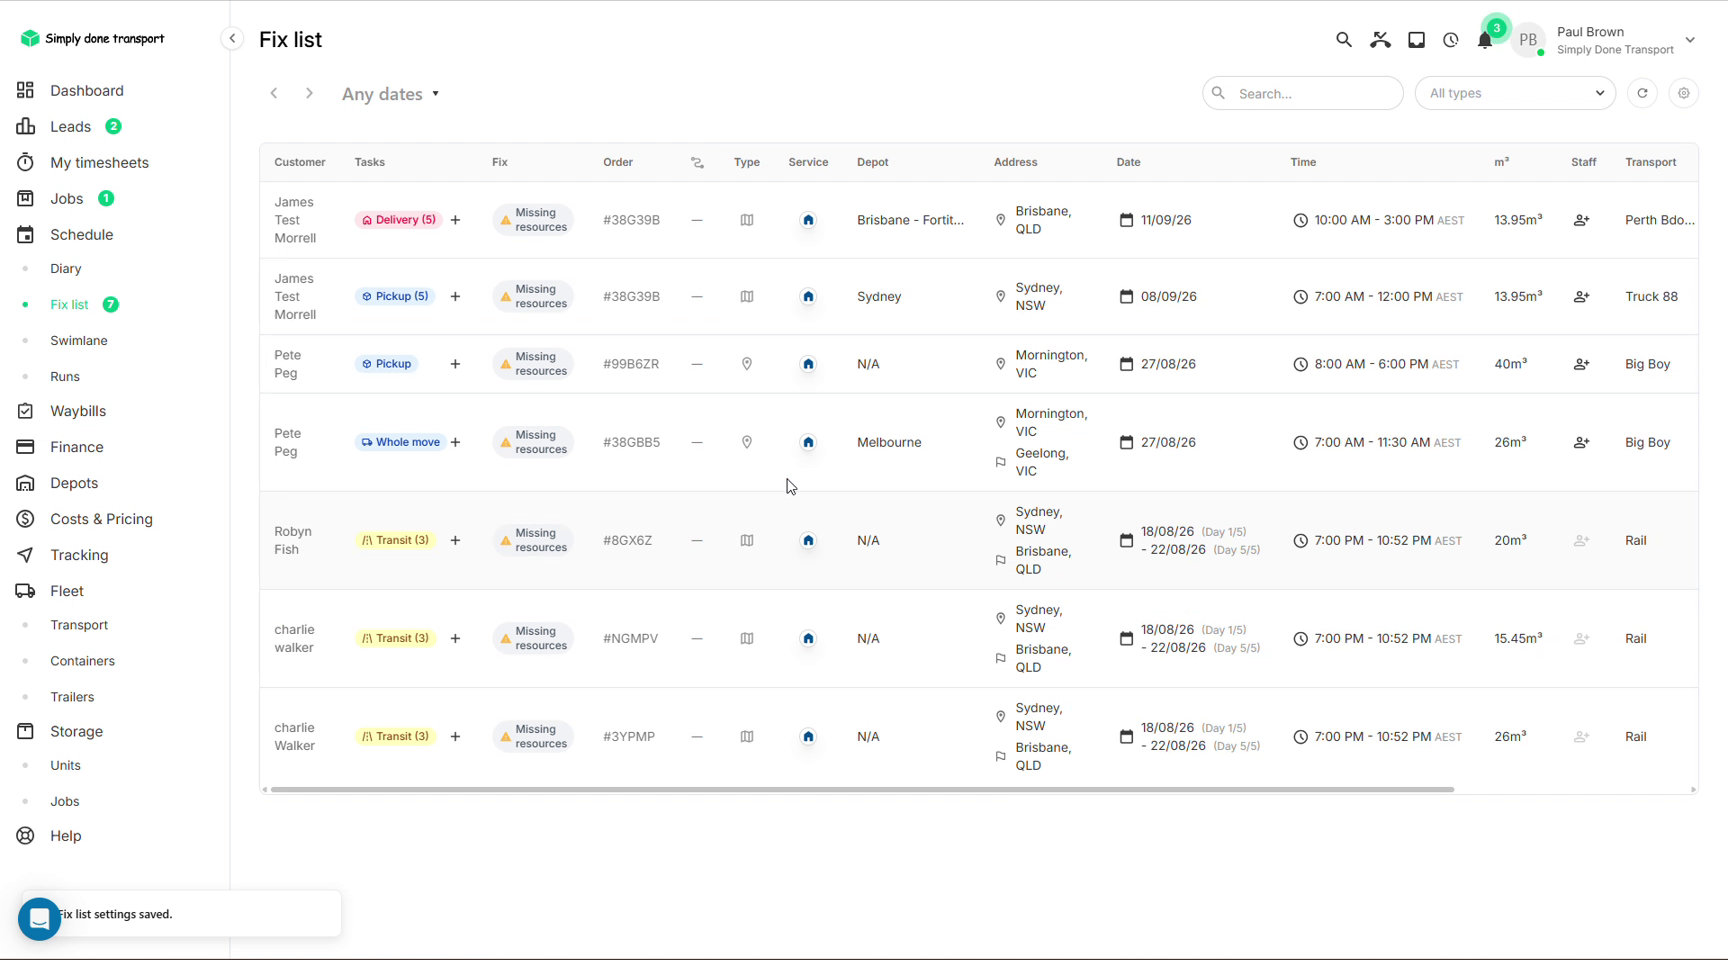
The fix list
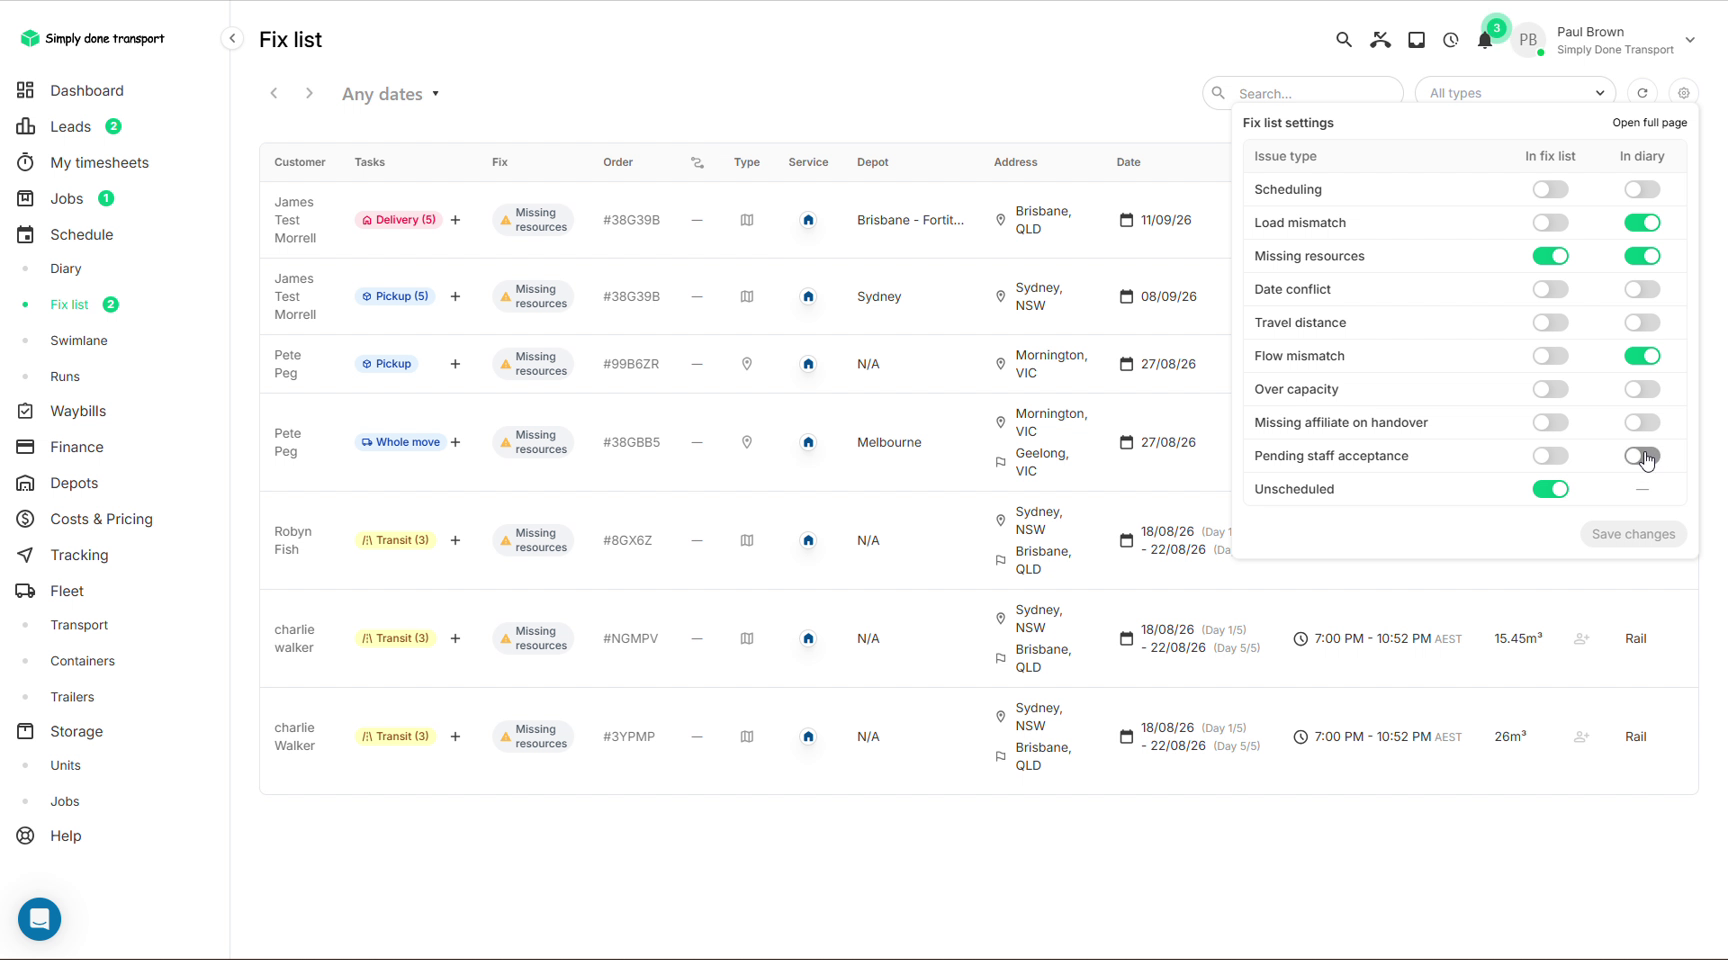
The Fix list (under Schedule in the menu) is the "what needs attention" queue: orders with flagged issues, tasks missing staff or trucks, unfinished admin. As the trainer put it, it's your control centre: use the cog to turn checks on or off and narrow the scope to the mode you're in right now, e.g. show only missing resources to see what still has no crew or truck for tomorrow.